Tag Bindings in Vision
Binding Properties to Tags
A Tag binding is a very straight-forward binding type. It simply binds a property directly to a Tag. This sets up a subscription for that Tag, and every time the chosen Tag changes, the binding is evaluated, pushing the new value into the bound property. If you choose a Tag in the tree, and not a specific property of that Tag, the Value property is assumed.
Drag and Drop
There are several ways to drag and drop Tags onto a component allowing you to create screens very quickly. You can quickly bind a Tag by dragging it from the Tag Browser into a component or into the component property.
Binding to a Component
Ignition automatically creates the Tag bindings to several of the component properties when you choose to bind a Tag to a component by dragging and dropping. This is true for both creating a component by dragging and dropping a Tag onto empty space on a window at the same time Ignition prompts you for what type of component you want to create, and by dragging and dropping a Tag directly onto a component that already exists on a window. In both cases, Ignition automatically creates the Tag bindings on the component.
In addition, some of the bindings will be bidirectional or they may be expression bindings. How Ignition handles the binding depends on the disparity between the data types of the Tag and the target component. For example, binding a numerical Tag to a label component will result in an expression binding that formats the number to a string.
Binding to a Component Property
Ignition automatically creates a Tag binding to the property that you dropped the Tag into in the Property Editor, resulting in the property binding to the value of the Tag. In addition, it is possible to bind the Tag attributes to the component's property. For example, the Tag's Engineering High Limit attribute could be bound to the capacity property of a cylindrical tank component.
Bidirectional
Tag bindings can be made bidirectional simply by checking the Bidirectional checkbox at the bottom of the Property Binding window. A Tag can be set as a bidirectional binding, if it has a read/write permission and if the user has the security permission to write to the Tag. The Fallback Delay is the amount of time that the value will remain at the written value, waiting for a Tag change to come in. If no Tag change comes in within the allotted time (specified in seconds), the property will fall-back to the value as it was before the write. This is needed, because sometimes even if a write succeeds, another write or ladder logic in a PLC might have written something different, even the old value, in which case no Tag change event will be generated. As a rule of thumb, the fallback delay should be twice the Tag's scan class rate.
Bindings and Tag Properties
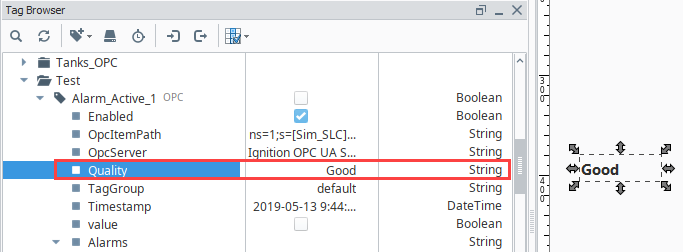
Aside from binding a property to a Tag's value, you can also bind to properties on a Tag, such as Tooltip, Quality, or AlarmActiveAckCount. This is useful when you don't need the value of the Tag, but rather the state, or some other configuration on the Tag. Here we see a boolean Memory Tag. It has a property indicating the Tag's quality. We can easily display that quality property on a component.
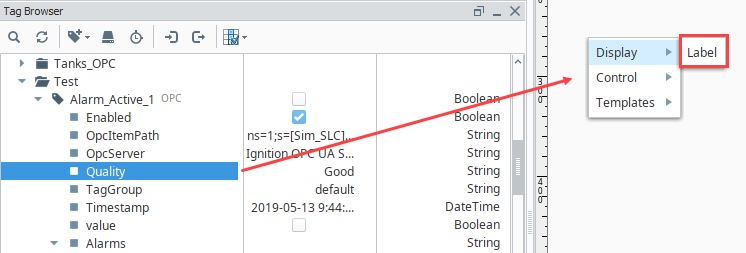
The simplest approach involves a Tag Binding. This can be achieved by dragging-and-dropping the Tag Property onto a Window, component, or component property. For example, you can drag a Tag's Quality property to a Label component.
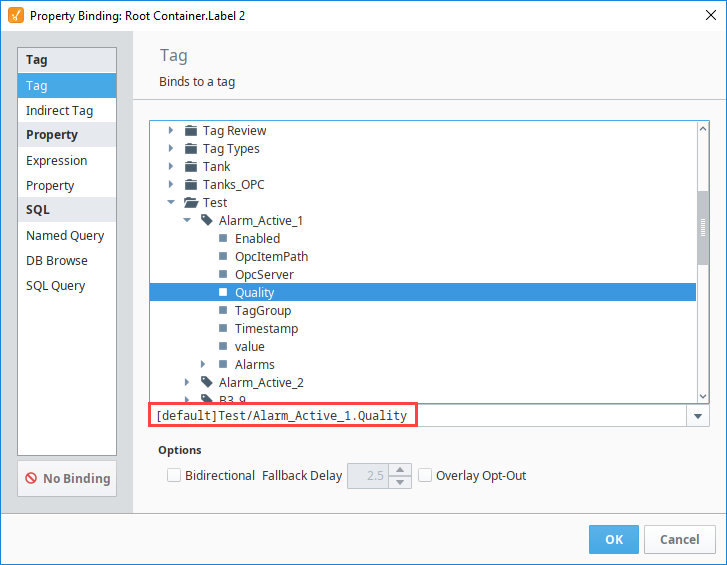
This is similar to creating a standard Tag Binding, except we're using a property on the Tag instead of the Tag's value. The resulting Tag Binding would be:
[default]Test/Alarm_Active_1.Quality
Note that the proerty name has been appended to the path.
The Label component now displays the current value of Good for the Tag's Quality property.