Parameterized Popup Windows
A parameterized popup window lets you pass parameters from one window into a popup window, where the receiving popup window could then use that parameter to display relevant information. This also allows you to maintain a single window that can be used to display similar information. For example, suppose you have two compressors: Compressor 1 and Compressor 2. Imagine clicking on one of the compressors on the main window and a popup displays the diagnostic information about that specific compressor. Instead of creating a popup window for each compressor, you can create a single popup and use indirection with the passed parameter to display a different compressor's information depending on which was selected.
Passing Parameters to a Popup Window
To pass parameters from one window to a popup window, the receiving popup window must have custom properties that receive the passed parameters. When the event on the parent window is called, the parameters are passed to the receiving Popup Window's custom properties on its root container. The component's properties on the receiving window can use the root container's custom properties to address their bindings.
The following examples explain how to set up a popup window and main window to pass compressor numbers to the popup window in order to display relevant information about each compressor.
Setting up the Popup Window
-
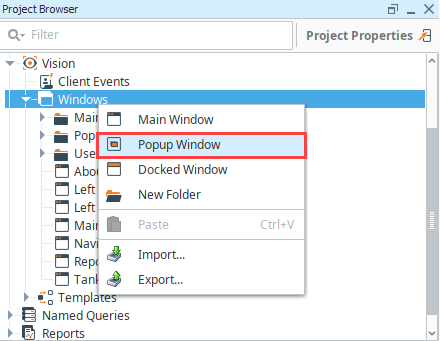
Right click on a folder in the Project Browser and select Popup Window to create a new popup.
-
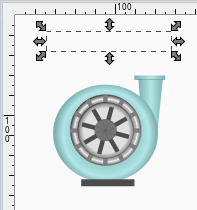
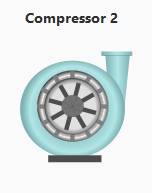
Drag a Compressor image from Symbol Factory.
-
Drag a Label component from the component palette to your window.
-
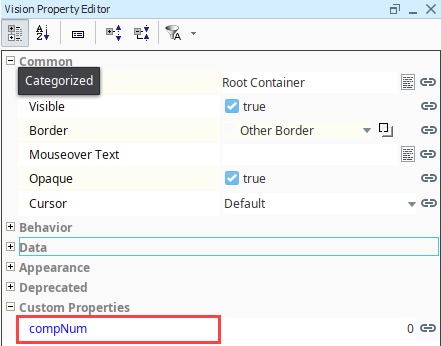
Create a custom property on your popup window's root container that will receive the passed parameters. Right click on your window and select Customizers > Custom Properties. The Custom Properties window is displayed.
-
Click the Add
 icon to add a property.
 -
Specify a Name for the Custom Property, such as compNum, and click OK.

The custom property is created and displayed in blue at the bottom of the Property Editor.
 caution
Do not bind these custom properties to anything, leave them unbound so you can pass values into them without any other values to override them.
-
Let's use an expression on the Label to show what compressor number we are on.
- Select the Label and click the binding
 icon for the Text property.
 - Select Expression for the binding type.
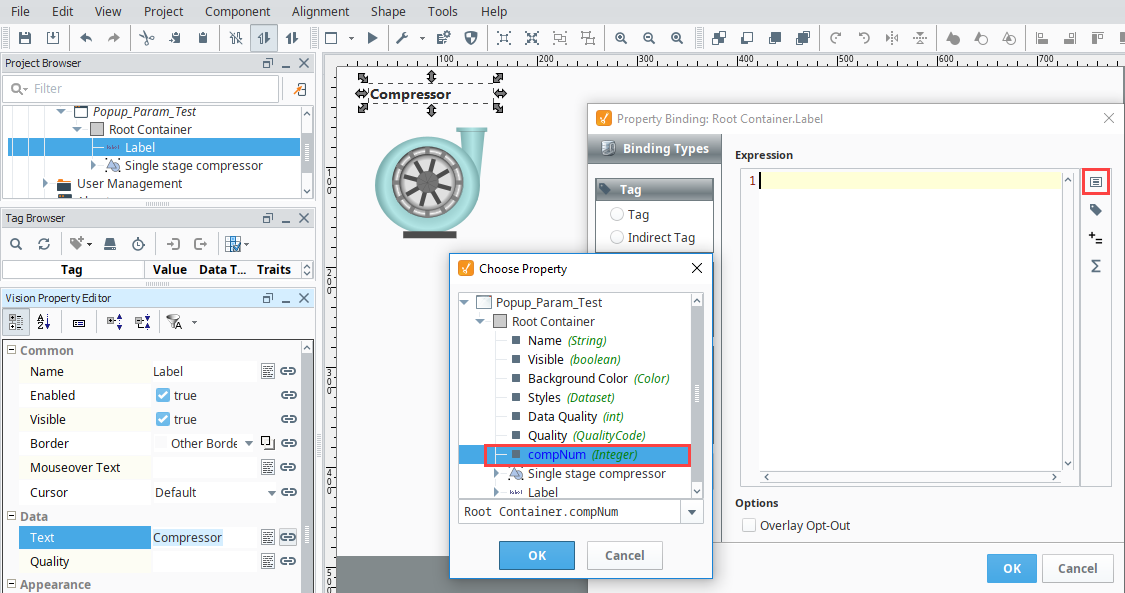
- Click the Insert Property Value
 icon in the Expression window and choose the compNum custom property on the root container for the compressor popup window as shown in the image below. Click OK.
- Select the Label and click the binding
-
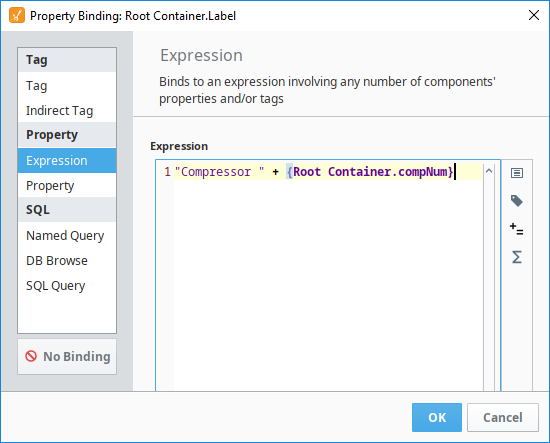
Now, let's update the Expression using the script below to show the word "Compressor" before the number in the label. Update the Expression in the Property Binding field as follows:
Script to change the compressor number"Compressor " + {Root Container.compNum} -
Click OK to save the property binding.
Setting up the Main Window
-
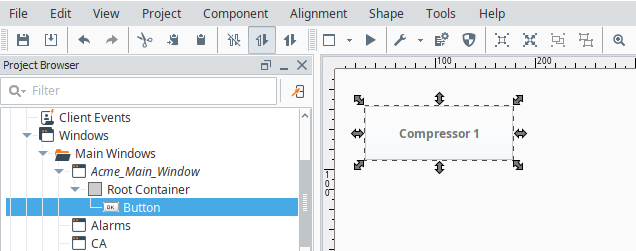
In a Main Window (parent window) drag a Button from the component palette to your window. Type "Compressor 1" into the text property.
-
Let's add a script to the button which opens the popup that we created earlier. We can then pass in a value to designate that this button should be opening Compressor 1.
- Right-click on the Compressor 1 button and select Scripting.
- Under Event Handlers, select actionPerformed.
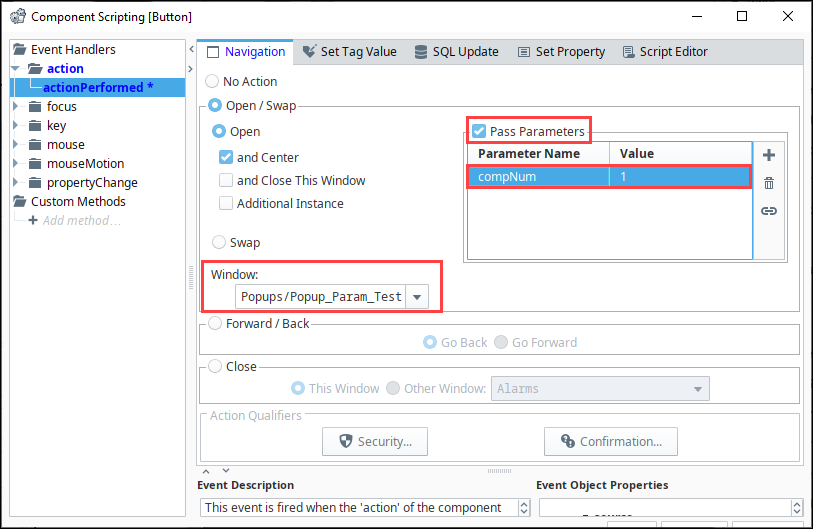
- Click the Open / Swap radio button.
- Under Window, use the dropdown list to select the path to your Popup Window (i.e.,Popup_Param_Test).
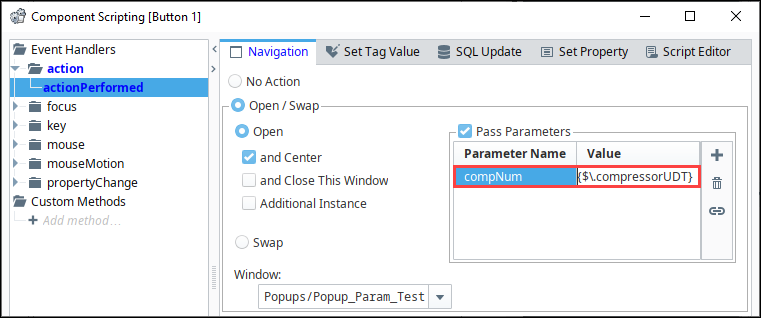
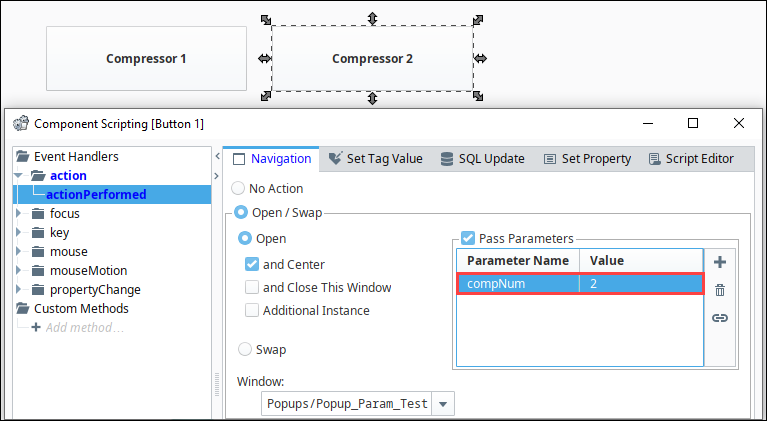
- Check the Pass Parameters check box, and click the Add icon to add a parameter.
- Click the new row under Parameter Name and a dropdown list will appear. Select the custom property compNum.
noteIgnition will automatically check the Root Container of the window selected in the Window dropdown. If you do not see the compNum parameter, it may have been created on wrong component, so check the Root Container of the Compressor Popup window.
- Enter "1" in the Value column because the button will be for Compressor 1.
- Click OK to save the script.
-
Now, create a second compressor button. A quick way to do this is duplicate (Ctrl D) the Compressor 1 button so it inherits the script. Update the Text property to Compressor 2.
-
Right-click on the new Button component and select Scripting. Update the parameter Value being passed in from a 1 to a 2.
-
Click OK to save the script.
-
Test it out by putting the Designer in Preview Mode. Click one of the Compressor buttons, then navigate back and click the other Compressor button. While these buttons are opening the same popup, they display different information because they are using the parameter that we passed in for indirection. In this example, we just used a label, but the parameters can be used in things like indirect Tag bindings or scripts to pull in various Tag bindings.
Passing a UDT to a Popup
In addition to the basic types, parameters can be a complex UDT type. This works much the same as passing in basic values, where the popup window has a custom property on the root container, and a parameter is passed in when opening the window.
The difference is that the custom property on the popup window needs to be a UDT that has been previously defined, and the value being passed in when opening the window needs to be an entire UDT instance. This gives the popup access to every Tag within the UDT, which can be useful when making popups that show all the details of a certain area which has a UDT.