User Defined Types - UDTs
UDTs (User Defined Types), also referred to as Complex Tags, offer the ability to leverage object-oriented data design principles in Ignition. UDTs are extremely important in Ignition. With UDTs, you can dramatically reduce the amount of work necessary to create robust systems by essentially creating parameterized "data templates".
By defining UDTs and using these “data templates”, you can generate Tag instances to rapidly build complex screens. A change to the type definition is then inherited by all instances, drastically saving time when making routine changes.
The UDT data types are fully supported by Vision Templates, which means you can configure templates for your custom data types and take advantage of drag-and-drop binding to rapidly build complex screens.
Primary UDT Features
- Object Oriented - Use small or large groups of Tags to create a single object. Create objects that match your real world devices or the existing structures in your PLCs.
- Central Definition - Once you define your data type, you can then create instances of it. If at a later time you want to change some aspect of the type, you can simply edit the type definition, and all instances of it are automatically updated.
- Parameterized Settings - Define custom parameters on your data type, and then reference them inside some or all of your member Tags. When it comes time to create instances, you can simply modify their parameter values in order to change where the underlying data comes from.
- Extendable - Data types can inherit from other data types in order to add additional members or override settings. Instances can also override settings, allowing for flexibility when dealing with irregularities and corner cases.
UDT Terminology
Many terms are frequently used when discussing UDTs:
Definition
A Definition represents the structure of a UDT. Definitions don't run, so Tags inside of a Definition won't poll or subscribe to anything. Rather they represent a Tag structure which Instances will inherit from. Changes made to a Definition are automatically applied to any Instances of that Definition.
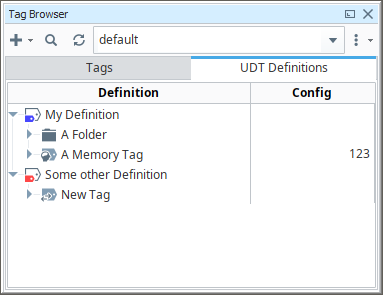
In the Tag Browser, UDT Definitions are always located under the UDT Definitions tab.
Instances
Instances are running copies of a Definition. All Instances have a "Parent Type", which is the definition that the Instance is inheriting from. The structure of an Instance is defined by its parent Definition, so you can not add new Members to an Instance. However, you can override the values on properties in any Member.
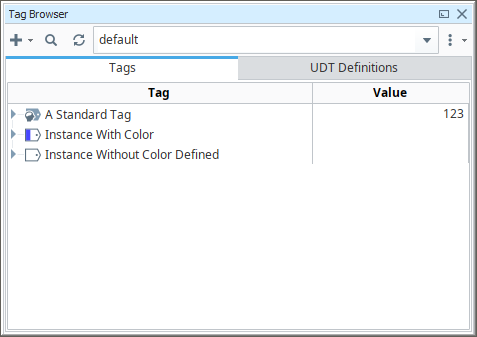
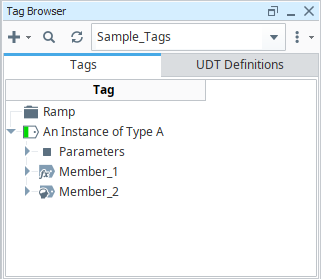
In the Tag Browser, UDT Instances can be found under the Tags tab, and are signified by either a plain white Tag ![]() icon, or a Tag icon
icon, or a Tag icon ![]() with a vertical stripe. Furthermore, you can expand the UDT Instance and find the members (other Tags) in the UDT.
with a vertical stripe. Furthermore, you can expand the UDT Instance and find the members (other Tags) in the UDT.
Parameters
Parameters are user created properties that can be used to create parameterized data templates. Parameters are configured on Definitions, and their values can be overridden on individual Instances. You can replace values on a member in a UDT with a reference to a parameter, allowing for For example, if a data type consists of three OPC Tags that only differ by a number in the path, you can use a parameter for the "base address", allowing instances to be created with only one setting.
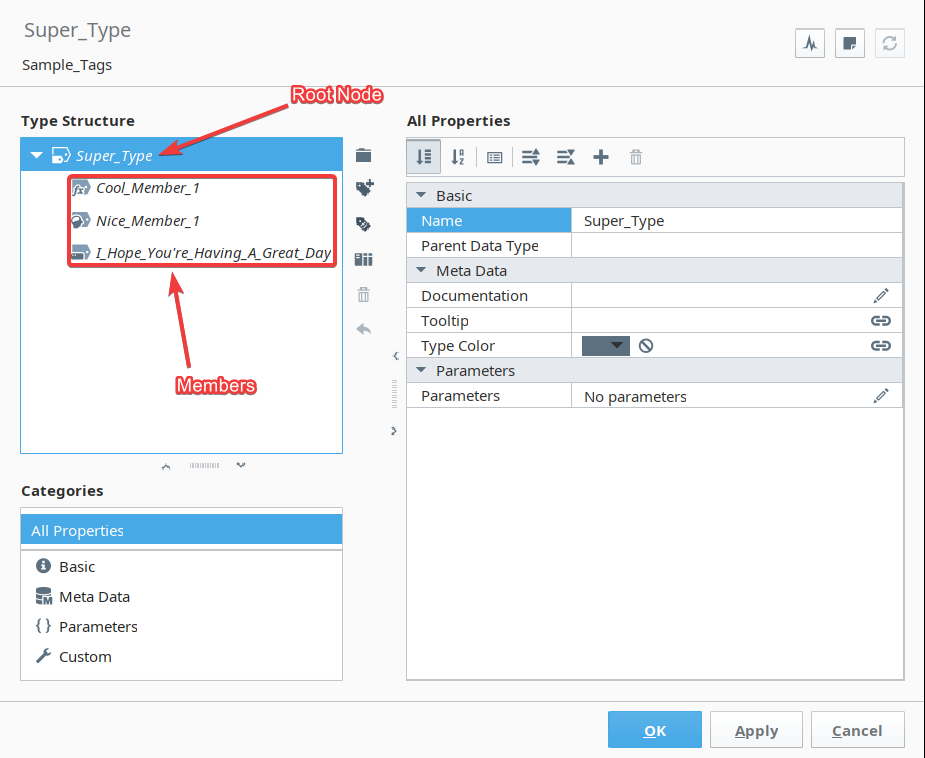
Root Node
The top level item in a UDT.
Members
Members are the Tags inside of a data type or instance. Members are always under a Root Node. Members can be standard Tag types or an instance of another UDT.
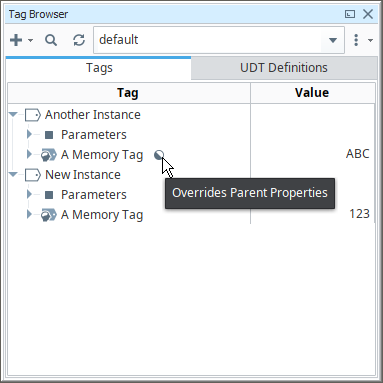
Override
Instances are copies of a Definition, but in some cases you may wish to change the value of a property on a particular member (Tag) in a UDT instance. This is called Overriding the property, allowing the property to have a value that deviates from the Definition.
Creating a UDT Definition and Instance
In these series of examples, we will create a very simple UDT Definition, make an instance of it, and make some additional configuration changes.
Creating a Definition
In this example, we'll demonstrate how to create a UDT Definition.
-
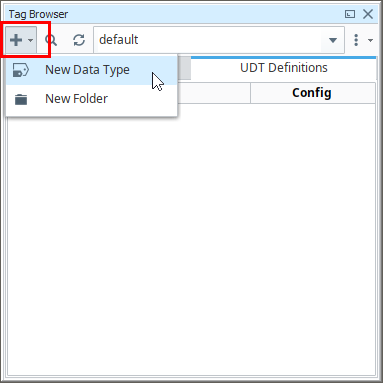
To create a UDT Definition, first switch click on the UDT Definitions tab in the Tag Browser. This is the only section where you can make UDT Definitions.

-
Next click the Add
 icon, and select New Data Type from the dropdown.
-
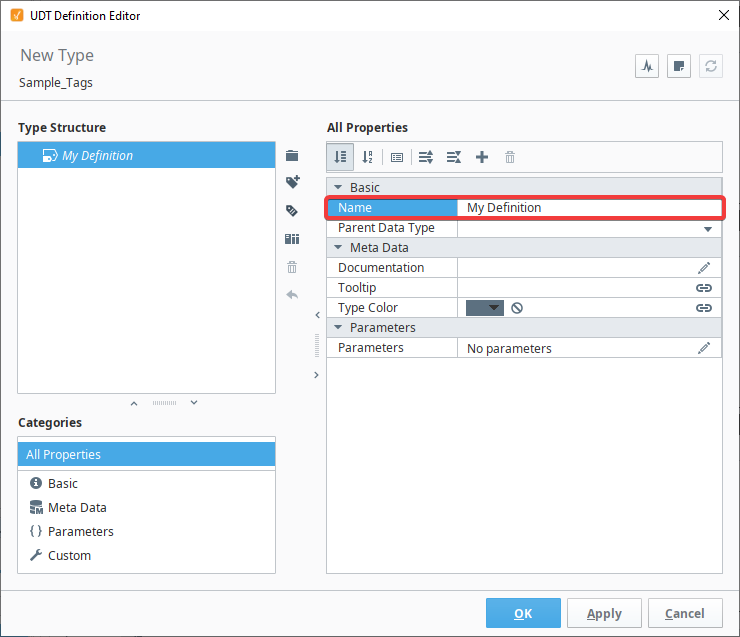
The Tag Editor will open, allowing you to create a new UDT Definition. To start, enter a name into the Name property. (For this example we used "My Definition".) This name is how the UDT will be identified by the rest of the system.:
noteNames can be changed later, but doing so after you've already made instances will create what's called an "orphaned UDT instance:" an instance that is no longer associated with a definition. It's generally advised to avoid changing the name of a definition unless you're also willing to update any of the instances.
-
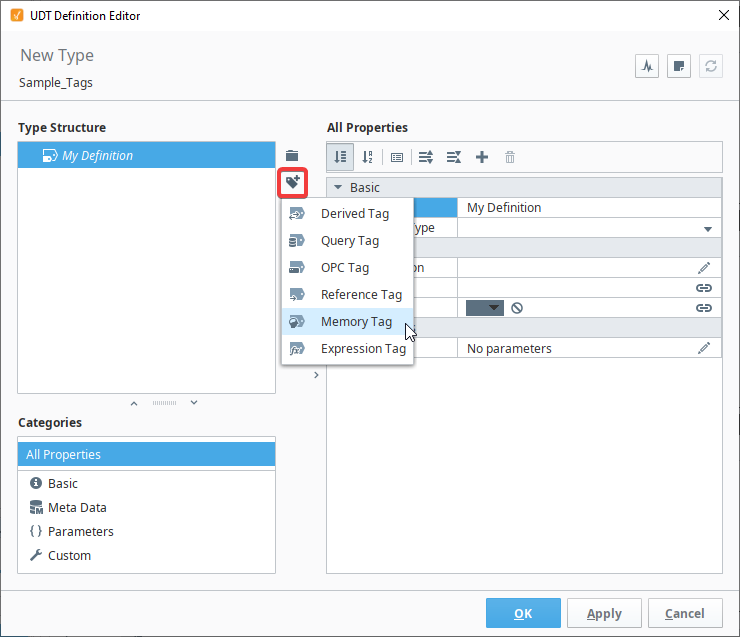
We'll keep this demonstration simple, and only add two members. We'll create a Memory Tag and add a Tag from a connected device. Let's create the Memory Tag first. Click the New Tag
 icon, and select Memory Tag.
-
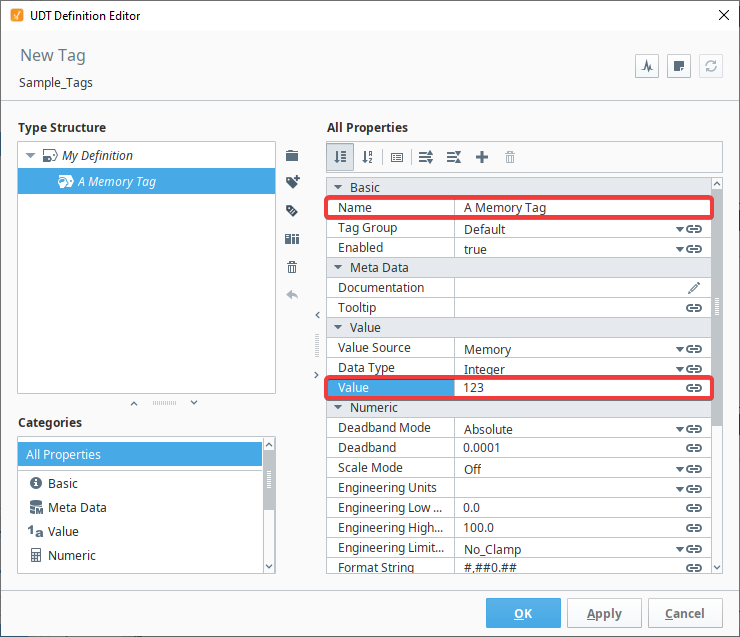
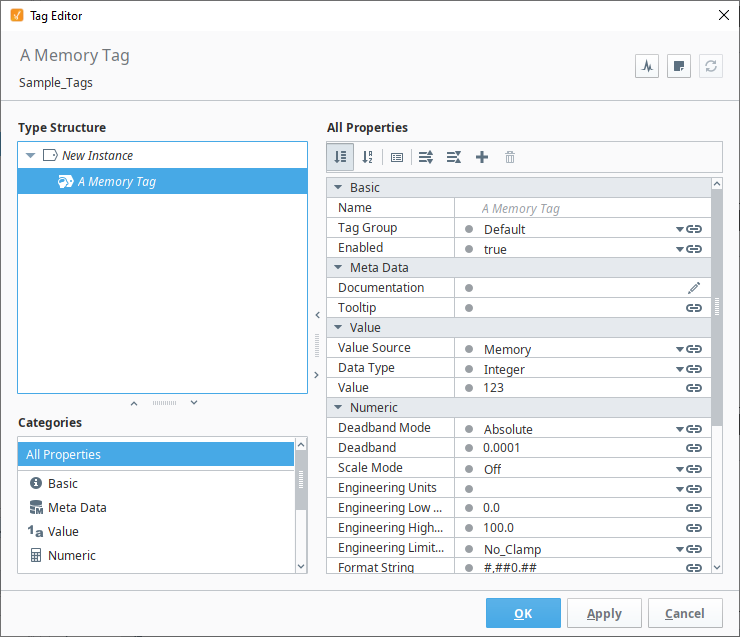
The Tag Editor will now add a memory Tag to the Type Structure tree and select it, allowing the Properties table to show settings for the selected Tag.
-
Change the Name to "A Memory Tag", and set a Value of 123.
-
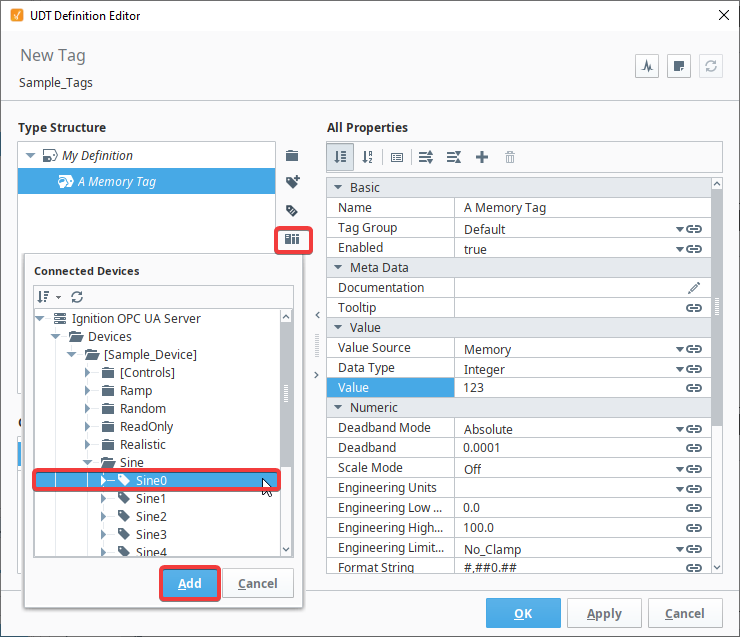
Now, let's add a Tag from the OPC UA server. Click the Connected Devices
 icon, and a window will open showing you your Connected Devices. Expand Ignition OPC UA Server>Devices>Generic>Sine, and select Sine0. Click Add. New in 8.1.1
As of 8.1.1, you can browse OPC devices from within the Tag Editor in order to add OPC nodes to UDT definitions.
noteWhen adding Tag(s) from a device, it requires that you have some connected devices such as the Ignition OPC UA Server as in this example.
-
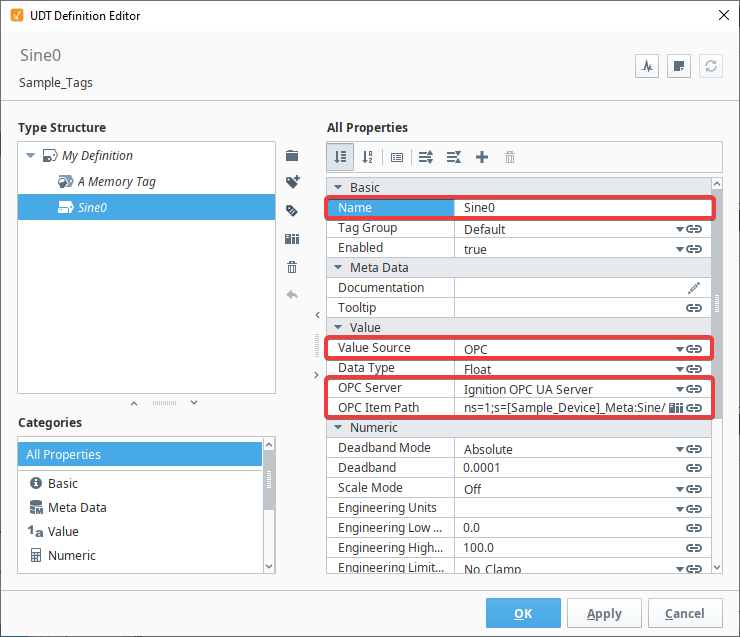
You'll see that the Sine0 Tag was added to the Type Structure. Select the Sine0 Tag and you'll see all the property settings for that Tag.
-
Click OK. This will close the Tag Editor, and apply your changes. The Tag Browser will now show your UDT Definition. You can expand the "My Definition" item to make the Memory and Sine0 Tags visible.

Creating a Data Type from Existing Tags
Version 8.1.5 added a feature that allowed data types to be created from existing tags.
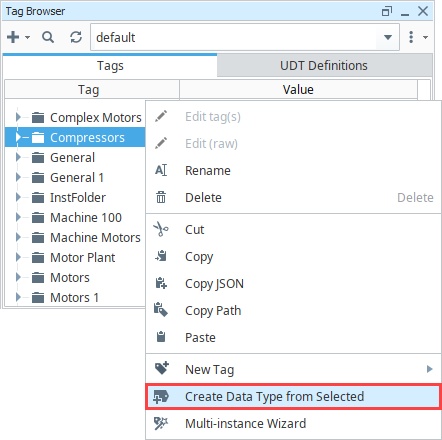
To create a data type from existing Tags, simply select the Tags or folders you wish to include, right-click and select Create Data Type from Selected. The Tag Editor window is displayed with the selected tags pre-populated as members. From here you can modify the Tags, add parameters, and so on. The original Tags will not be affected.
If you select a single folder as the root to create the type from, its sub-members will be added, and its name will be the basis for the type (that is, the folder itself won't be included in the structure).
Creating an Instance
Now that we have a UDT Definition, we can create a UDT Instance. You can use the Multi-Instance Wizard to make many instances quickly, but you can also create a single instance.
- In the Tag Browser, switch back to the Tags tab. This section of the Tag Browser is where you create UDT instances. Definitions can not be placed in this section.

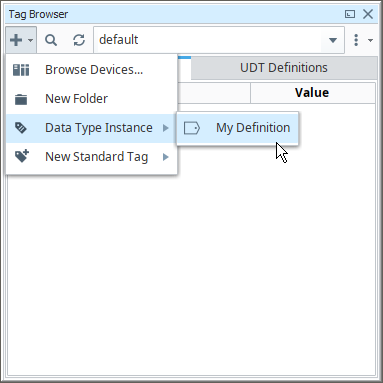
- Click the Add icon and hover the mouse cursor over Data Type Instance. This will expand and show all of the UDT Definitions that exist within the active Tag Provider. Select the Definition we created in the previous example.
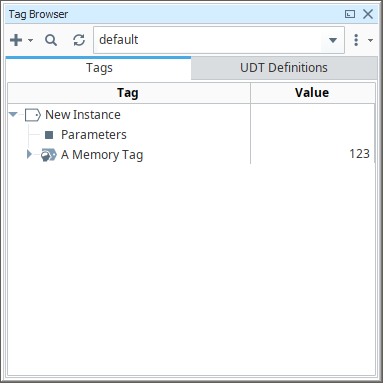
- Again, the Tag Editor will open. This time allowing you to edit an instance of the UDT. From here you can name the Instance. In this case we'll use the name "New Instance".
- If you select the member ("A Memory Tag"), you'll notice that many of the properties have a grey dot. This signifies that the properties are inheriting their values from the definition.
- We won't make any changes here. Just click OK, which closes the Tag Editor and creates a UDT instance.
Override Instance Properties
Instances inherit their structure and properties from the Definition, but property values can be overridden on an instance.
- Now that we have an instance, let's create another. You can use the same steps in the last example, or just copy and paste New Instance from the Tag Browser's right-click menu.
- Name the new instance "Another Instance".
- If you need to make changes to a UDT Instance, you can open the Tag Editor by double clicking on the Instance, or any of its members.
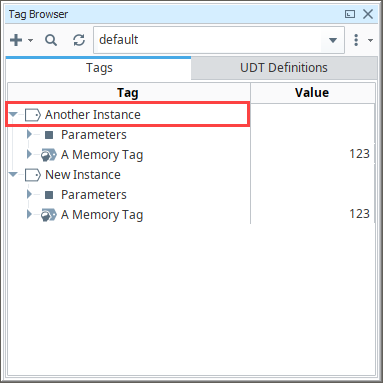
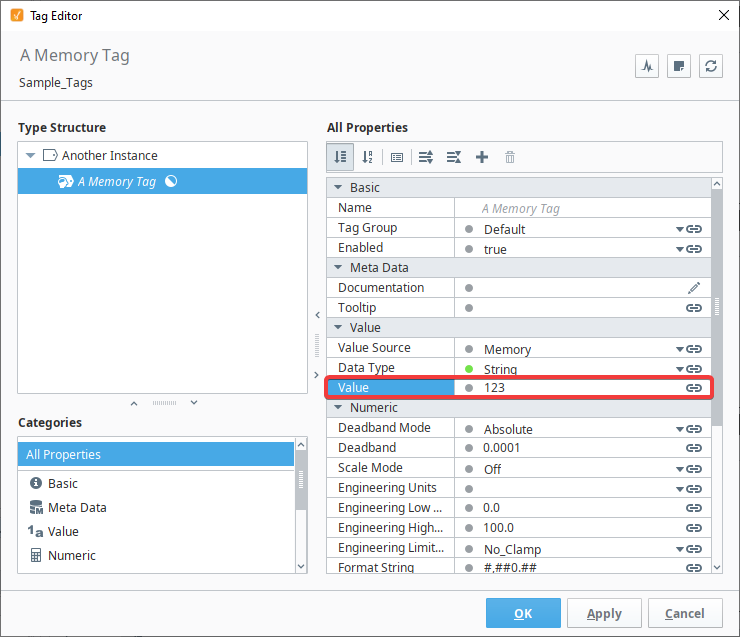
- With both instances expanded, we can see that aside from the names, they're identical. Let's change that. Double click on Another Instance or any of its members to open the Tag Editor.
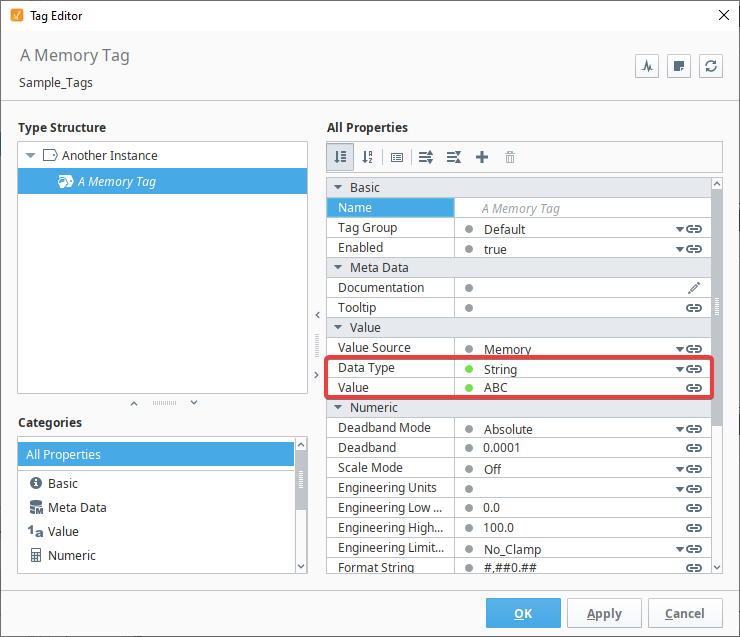
- With the Tag Editor open and focused on Another Instance, select the memory Tag. Change the Data Type to a String, and the Value to "ABC".
You'll notice that as you make changes to the properties, the grey dots become green signifying that the property values now differs from the Definition. This concept is known as "Overriding" a UDT member property.
- Click OK to close the Tag Editor and apply your changes. You'll notice that the memory Tag in the instance we edited now has an attribute icon, signifying that one or more properties on the member are overridden.
- If you wish to remove the overrides, simply edit the Tag again, and click on the green dot. This will remove the override and cause the property to revert to the value on the Definition.
Make Changes to the Definition
Now that we have some instances, we can make a modification to the Definition, which will propagate the change down to the Instances.
- Switch back to the UDT Definition tab in the Tag Browser.
- Edit the My Definition UDT.
- Use the Add Folder and Add Standard Tag icons to add a new folder, and a member inside of that folder.
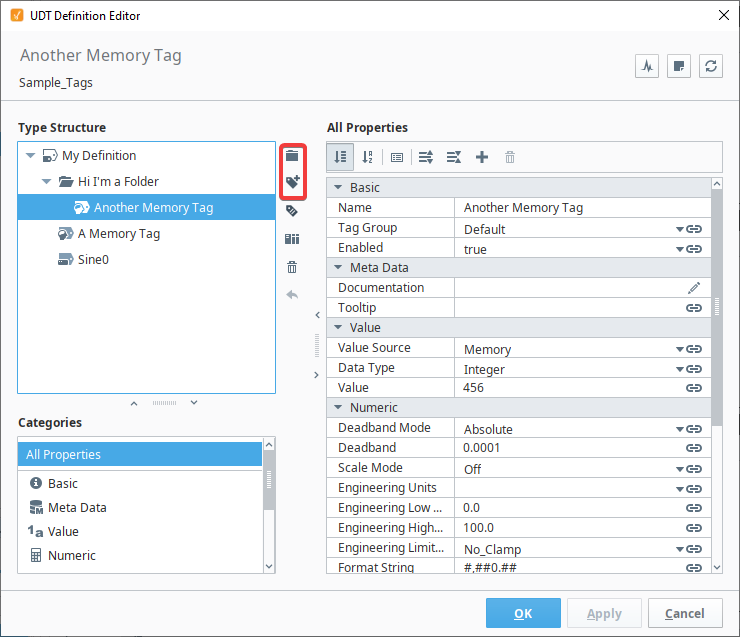
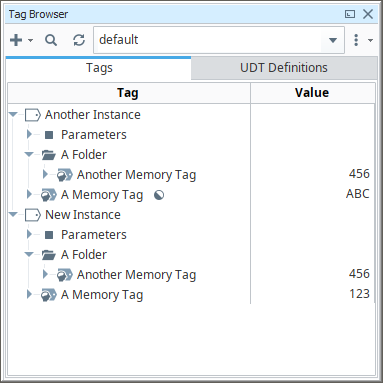
- Click OK to switch back to our instances,. You'll see they now both have new members.
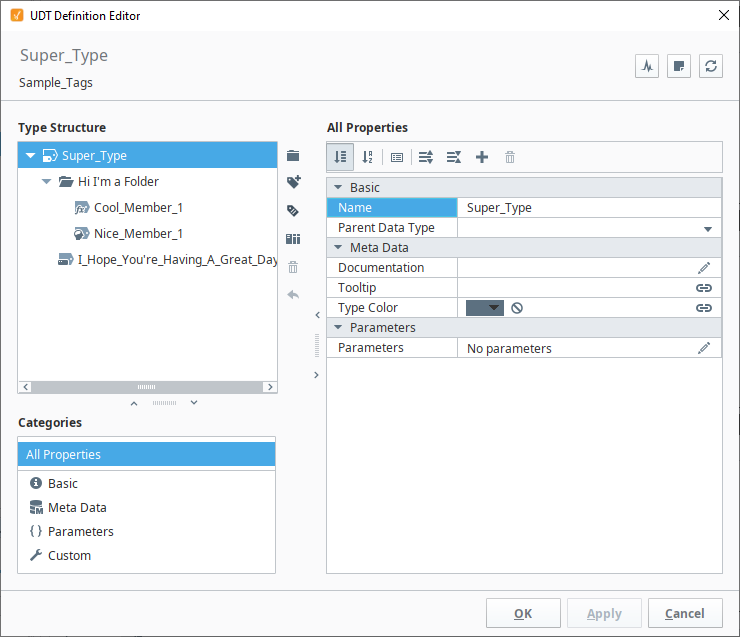
UDT Root Node Properties
While editing a UDT Definition or Instance, the Tag Editor will show some unique properties on the Root Node.
| Property | JSON Name | Description |
|---|---|---|
| Name | name | The name of the UDT Definition. |
| Parent Data Type | typeId | Both Instances and Definitions have this property, but the implications of the property are different. On a Definition - The name of the UDT Definition that this Definition is inheriting from. If blank, then the UDT being edited does not inherit from another UDT. On an Instance - The name of the UDT Definition this UDT is an instance of. Changing the Parent Data Type of an instance is not supported. |
| Documentation | documentation | New in 8.1.17 A freeform text property for information about the Tag or UDT. |
| Tooltip | tooltip | New in 8.1.17 The tooltip provides a hint to visual components as to what should be displayed when the user hovers their mouse cursor over the component that is being driven by the value of this Tag or UDT. |
| Parameters | parameters | A collection of parameters configured on the Definition. Note that you can only add or remove parameters on Definitions. |
| Type Color | typeColor | New in 8.1.0 A color that will be applied to the Definition and any Instances. This property is only cosmetic, but can be useful to have certain UDTs stand out from others in the Tag Browser. |
Assigning Colors to UDTs
UDTs can be color coded, which applies a color to the Root Node. This is purely a cosmetic change, but can be helpful in systems with a large number of instances, as the colors can make certain UDTs stand out from one another.
Color is applied to the Definition, via the Type Color property.
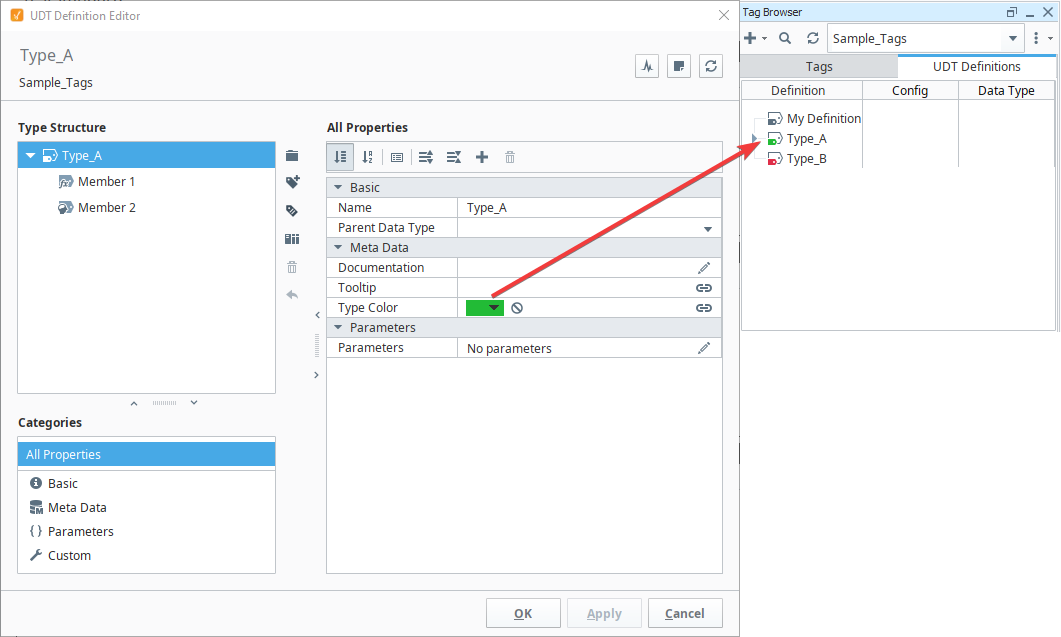
Any instances of that type will apply the color to the Root Node.
Binding to UDTs
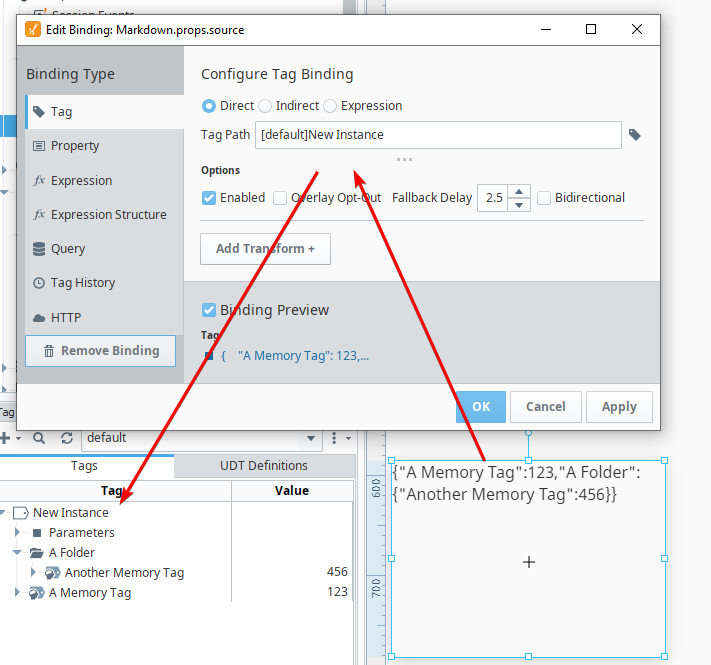
Both Perspective and Vision feature a "binding" system, that allows components in those modules to display live values on Tags. In regards to UDT instances, component bindings can bind to members just like any standard Tag, but they can also bind directly to the UDT instance, which results in the binding receiving live live values from all members of the UDT.
In the image below, a Perspective Markdown component has a Tag binding on its source property. The binding is leading to the root of a UDT instance. As a result, the member values are shown on the component. They're also live values, so any value changes on any member will appear on the Markdown component.