Creating Tags
Tags are created in the Designer in one of two ways; either using the Connected Devices window or creating Tags manually in the Tag Browser.
The Connected Devices window allows you to browse your connected devices and drag OPC Tags into your Tag Provider, as well as create folders and other Tags manually. You can also make immediate changes to the Tag properties in the Connected Devices window.
Or you can manually create Tags in the Tag Browser. The Tag Browser allows you to choose from a list of these standard Tag types and change the Tag properties directly in the Tag Editor.
This page describes both methods for creating Tags.
Connected Devices Window
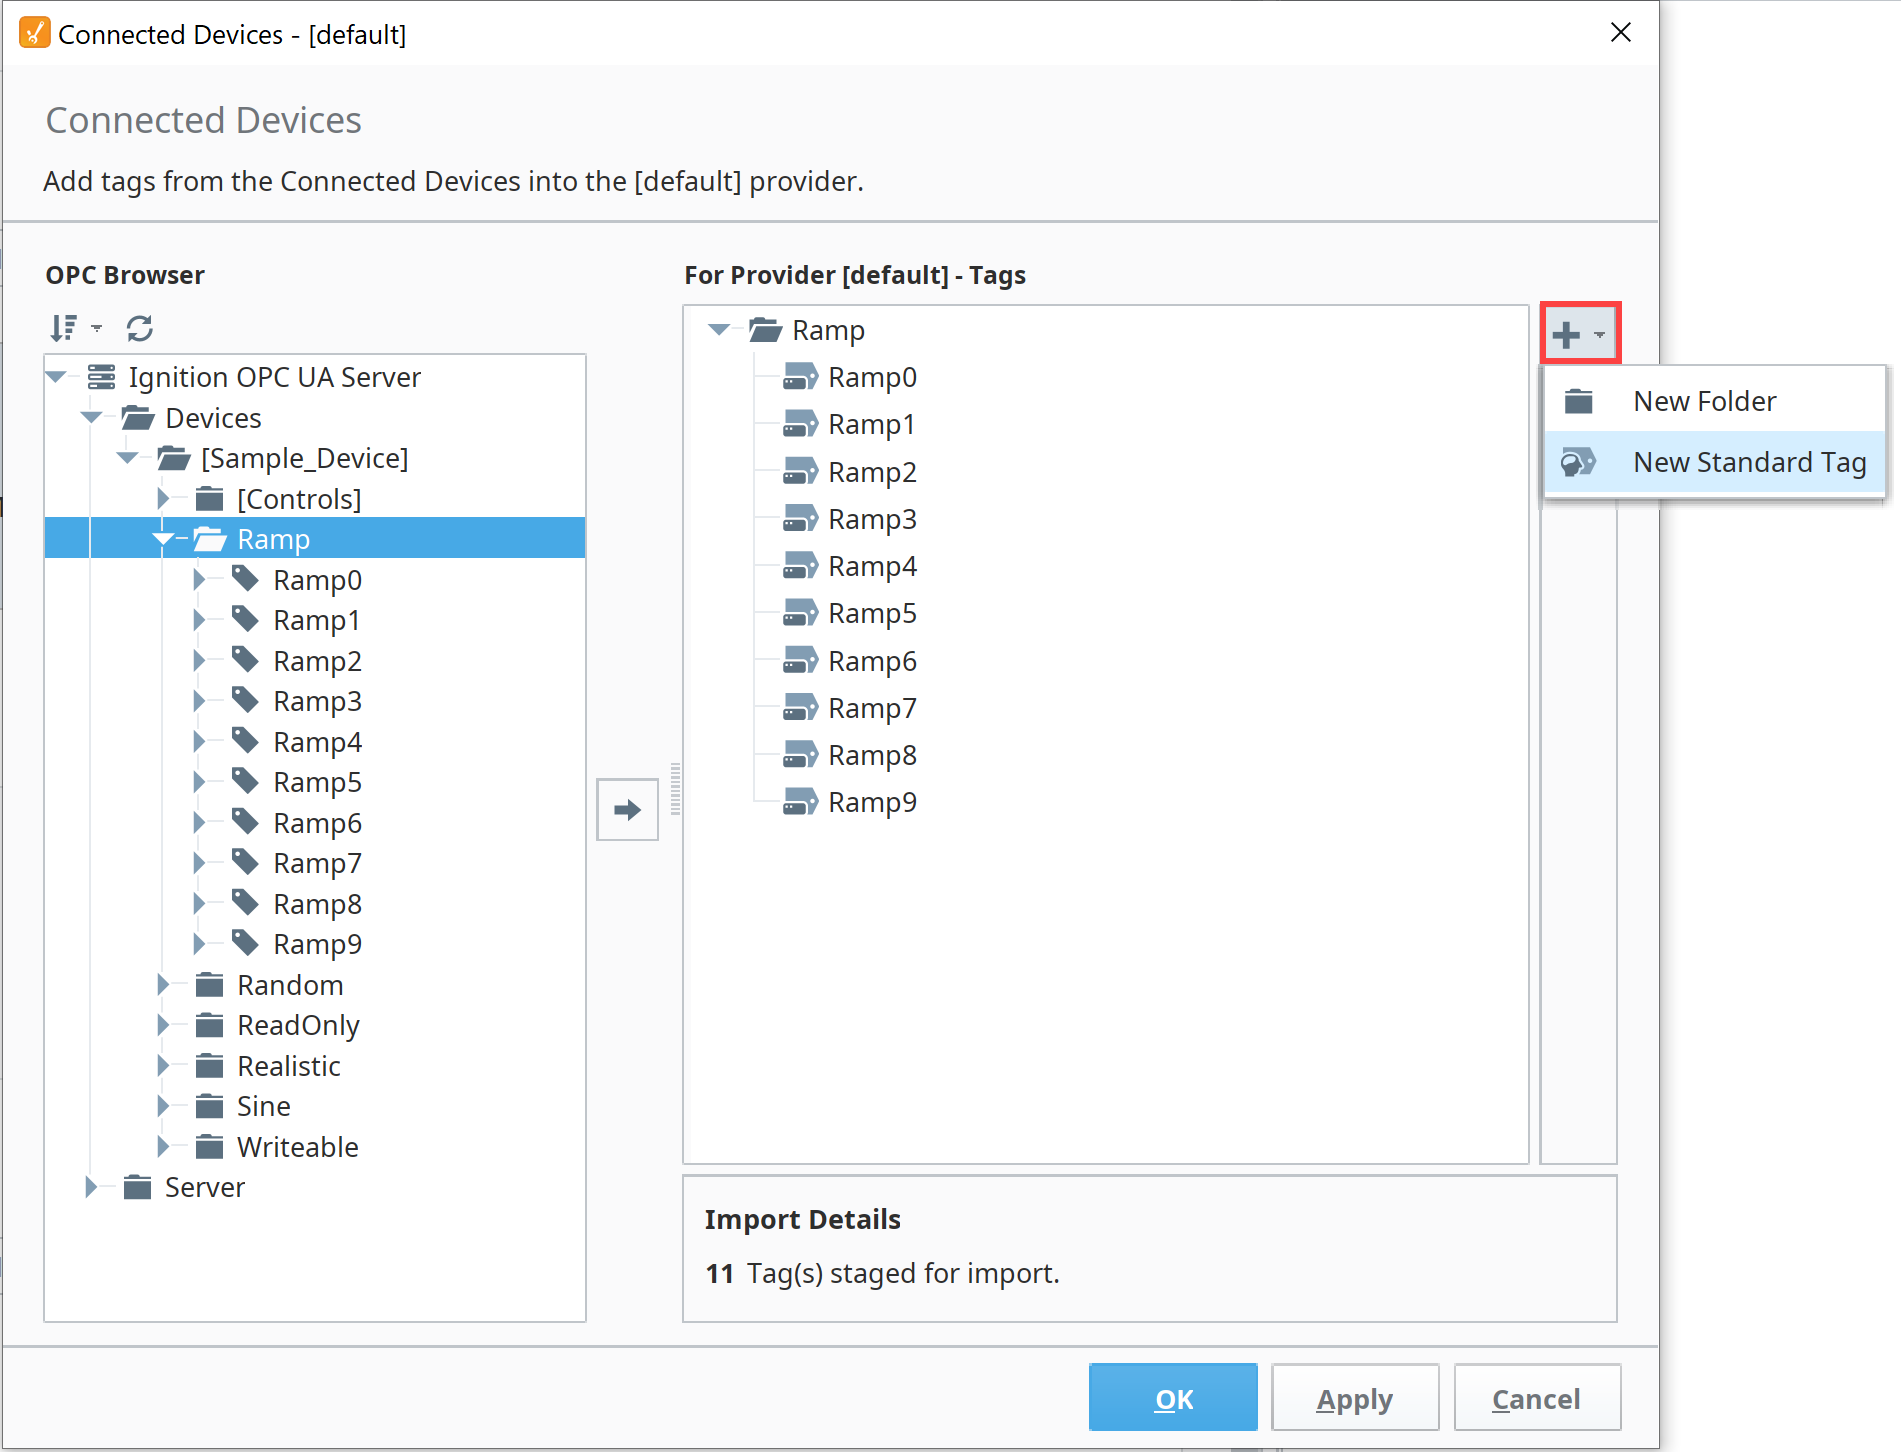
The Connected Devices window lets you browse all your connected devices and OPC Servers for datapoints. When the Tag you're interested in is not available for browsing, you can manually add a Tag and change any Tag properties directly in the Connected Devices interface. This approach is common for devices like Modbus and Siemens where memory addresses aren't browsable. This interface allows you to create any standard type of Tag. Note that the Connected Devices window is not available when the System or Vision Client Tags providers are selected.
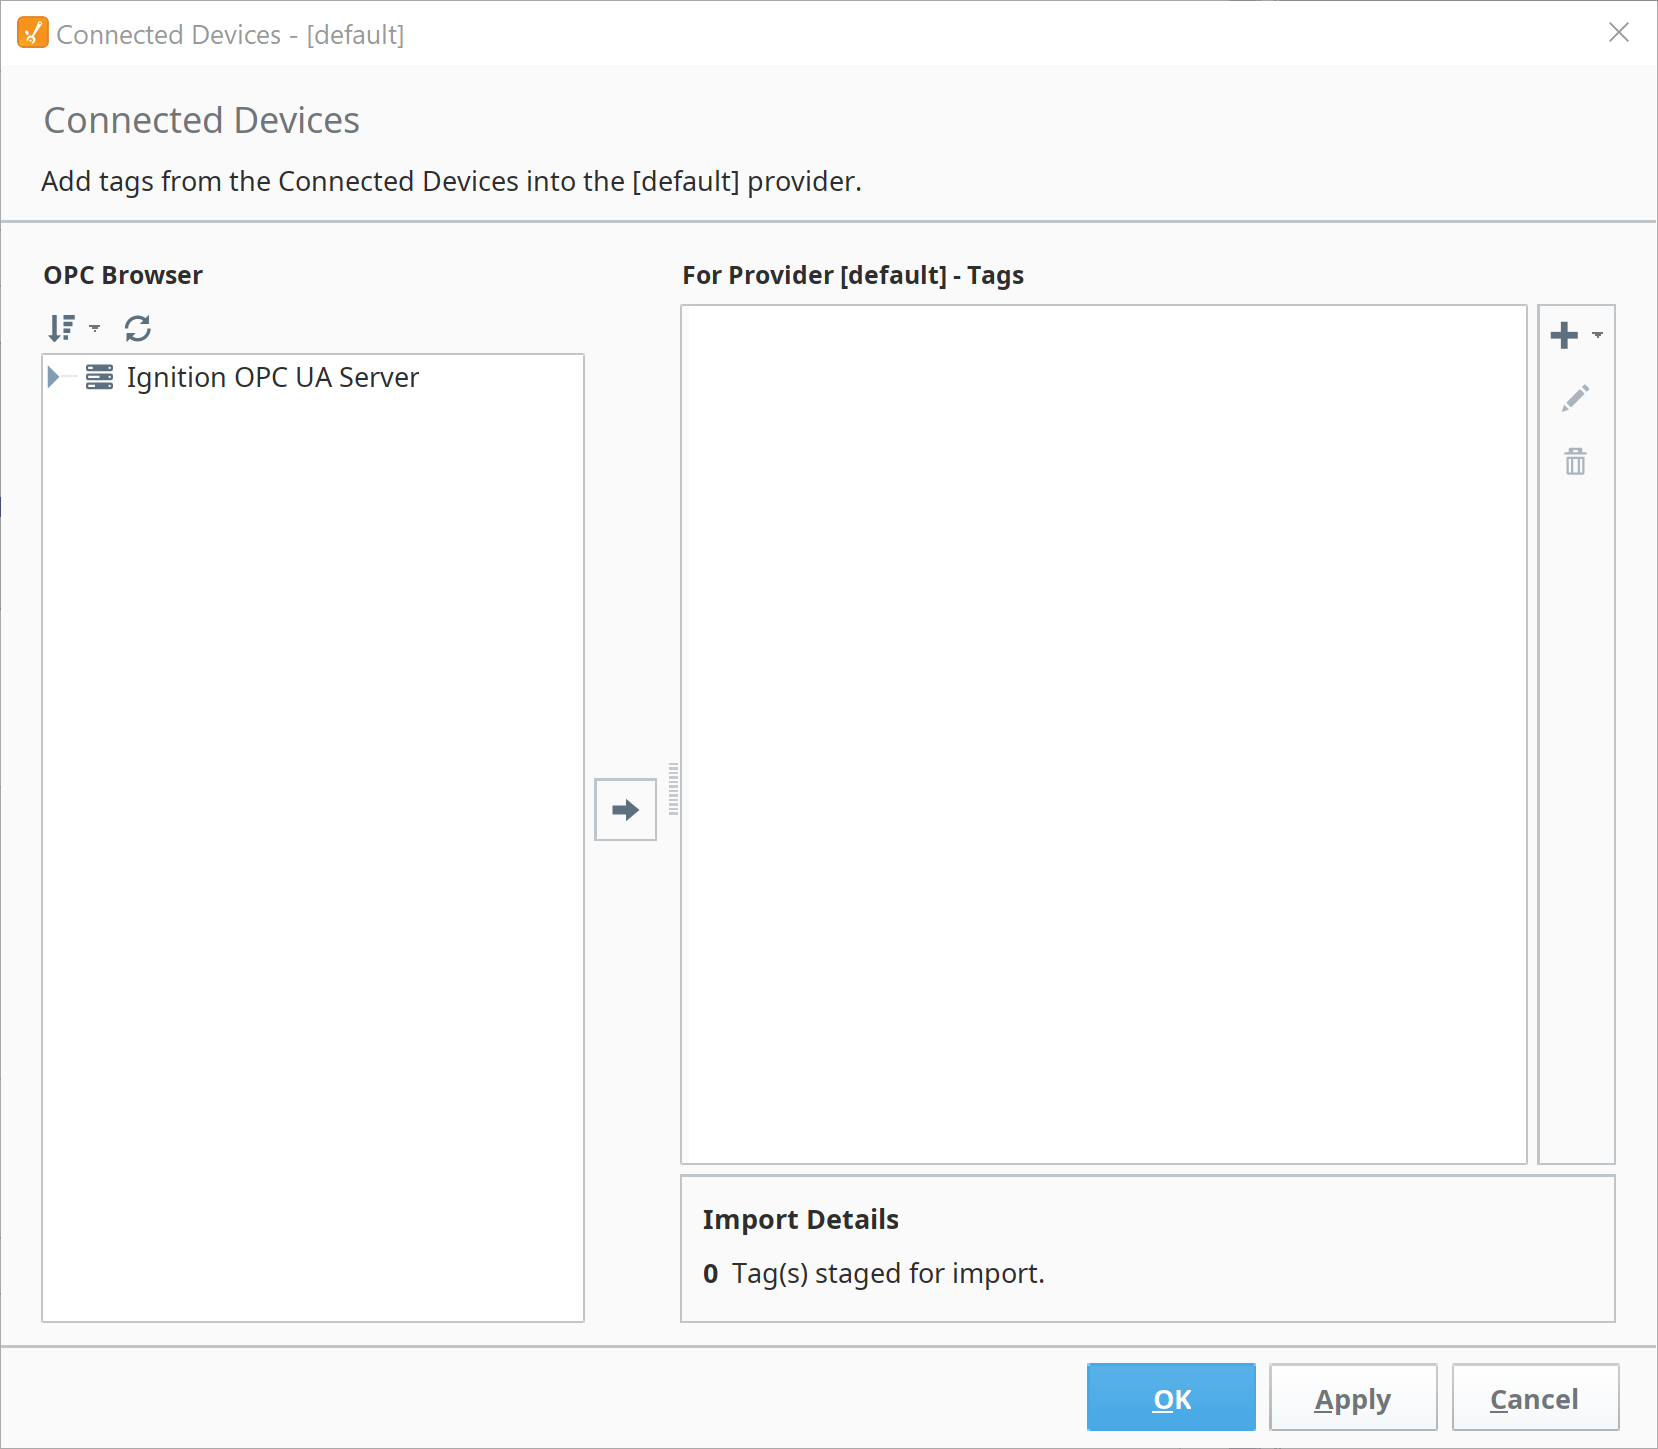
Tags that are grayed out in the For Provider area are Tags that already exist in your Tag Browser. The Tag Provider represented here is dependent on the Provider selected by the Tag Browser before the Connected Devices window was opened.
New Tags added by the Connected Devices window will appear in black font. These new Tags are effectively in a "staging" area, meaning they won't be added to the Tag Provider until you press OK or Apply. In the Connected Devices window, you can also select the Preview ![]() icon to see a summary of new Tags you are adding.
icon to see a summary of new Tags you are adding.
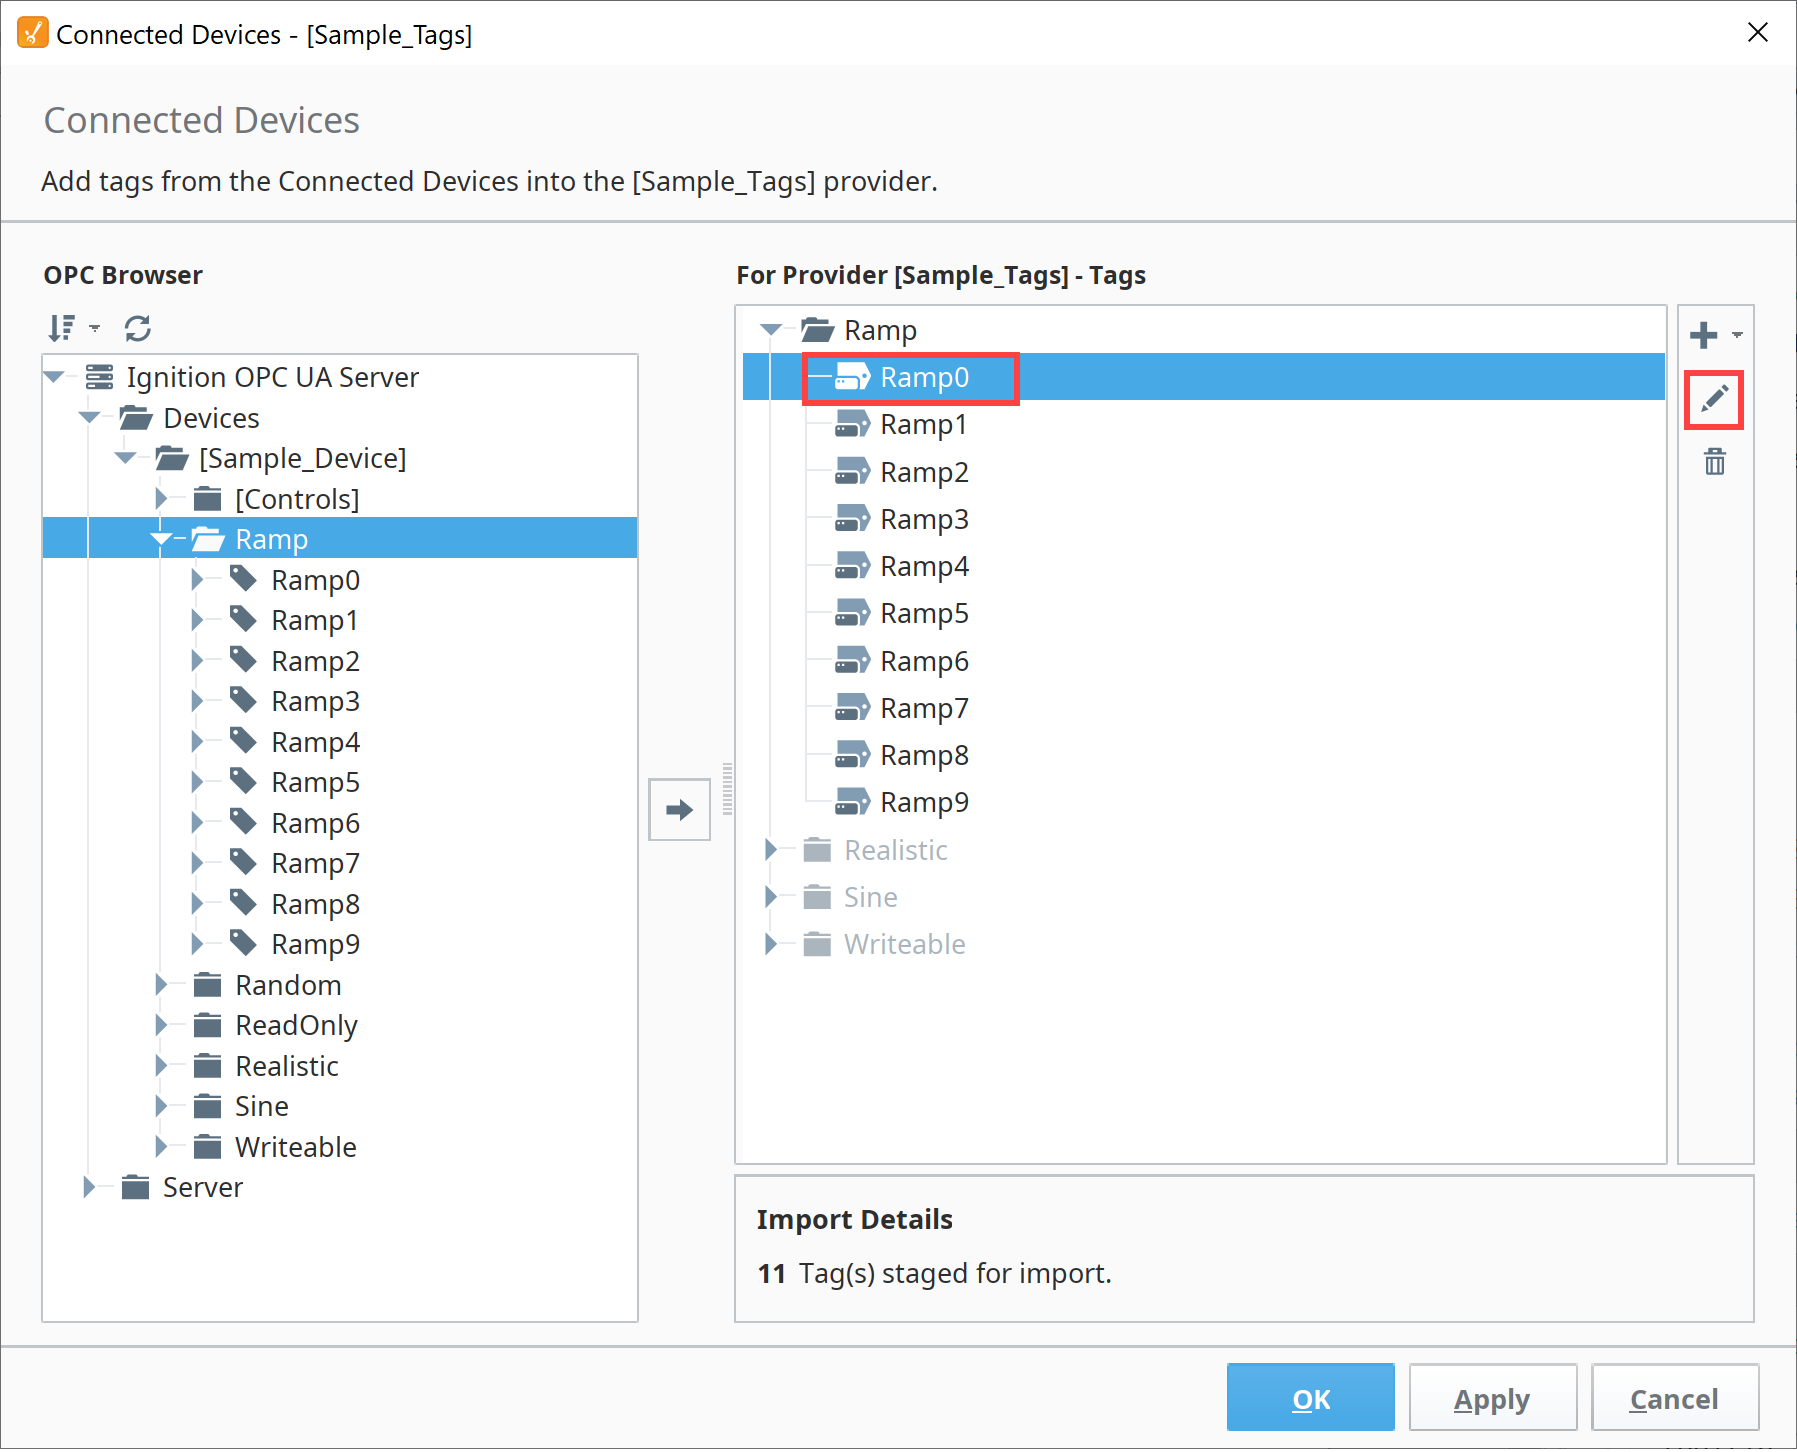
You have the option of editing your new Tags in the Connected Devices interface by selecting the Tag you want to edit in the For Provider area and double clicking or clicking on the edit (pencil) icon on the right. The Connected Devices edit window will open. Here you can edit any properties of the Tag. When you're finished, click Commit to accept your changes. When you are done adding Tags, click the OK or Apply buttons in the lower right corner to add your Tags to the Tag Browser.
Creating Tags
The example below describes creating Tags using the Connected Devices browser.
In order to have any items appear under the OPC Browser tree, you must have a device connection.
-
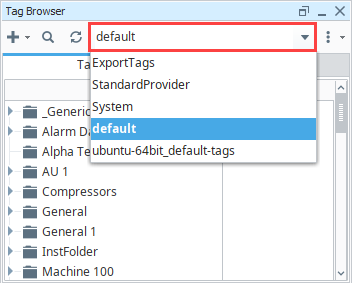
In the Tag Browser, choose a Tag Provider from the dropdown list where you want to place your new Tags. The project's default provider will appear in bold.
-
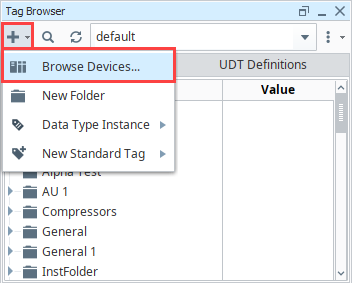
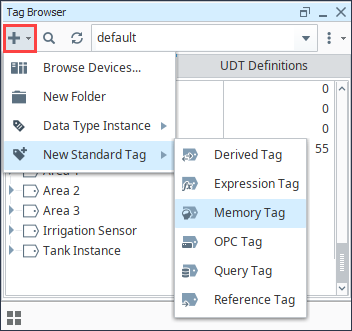
In the Tag Browser, click the Add
 icon to open the context menu. Here you can Browse Devices to add OPC Tags, or simply create a Tag or folder. Select Browse Devices...
-
The Connected Devices window will open where you can either add an OPC Tag or create a new standard Tag. To add an OPC Tag:
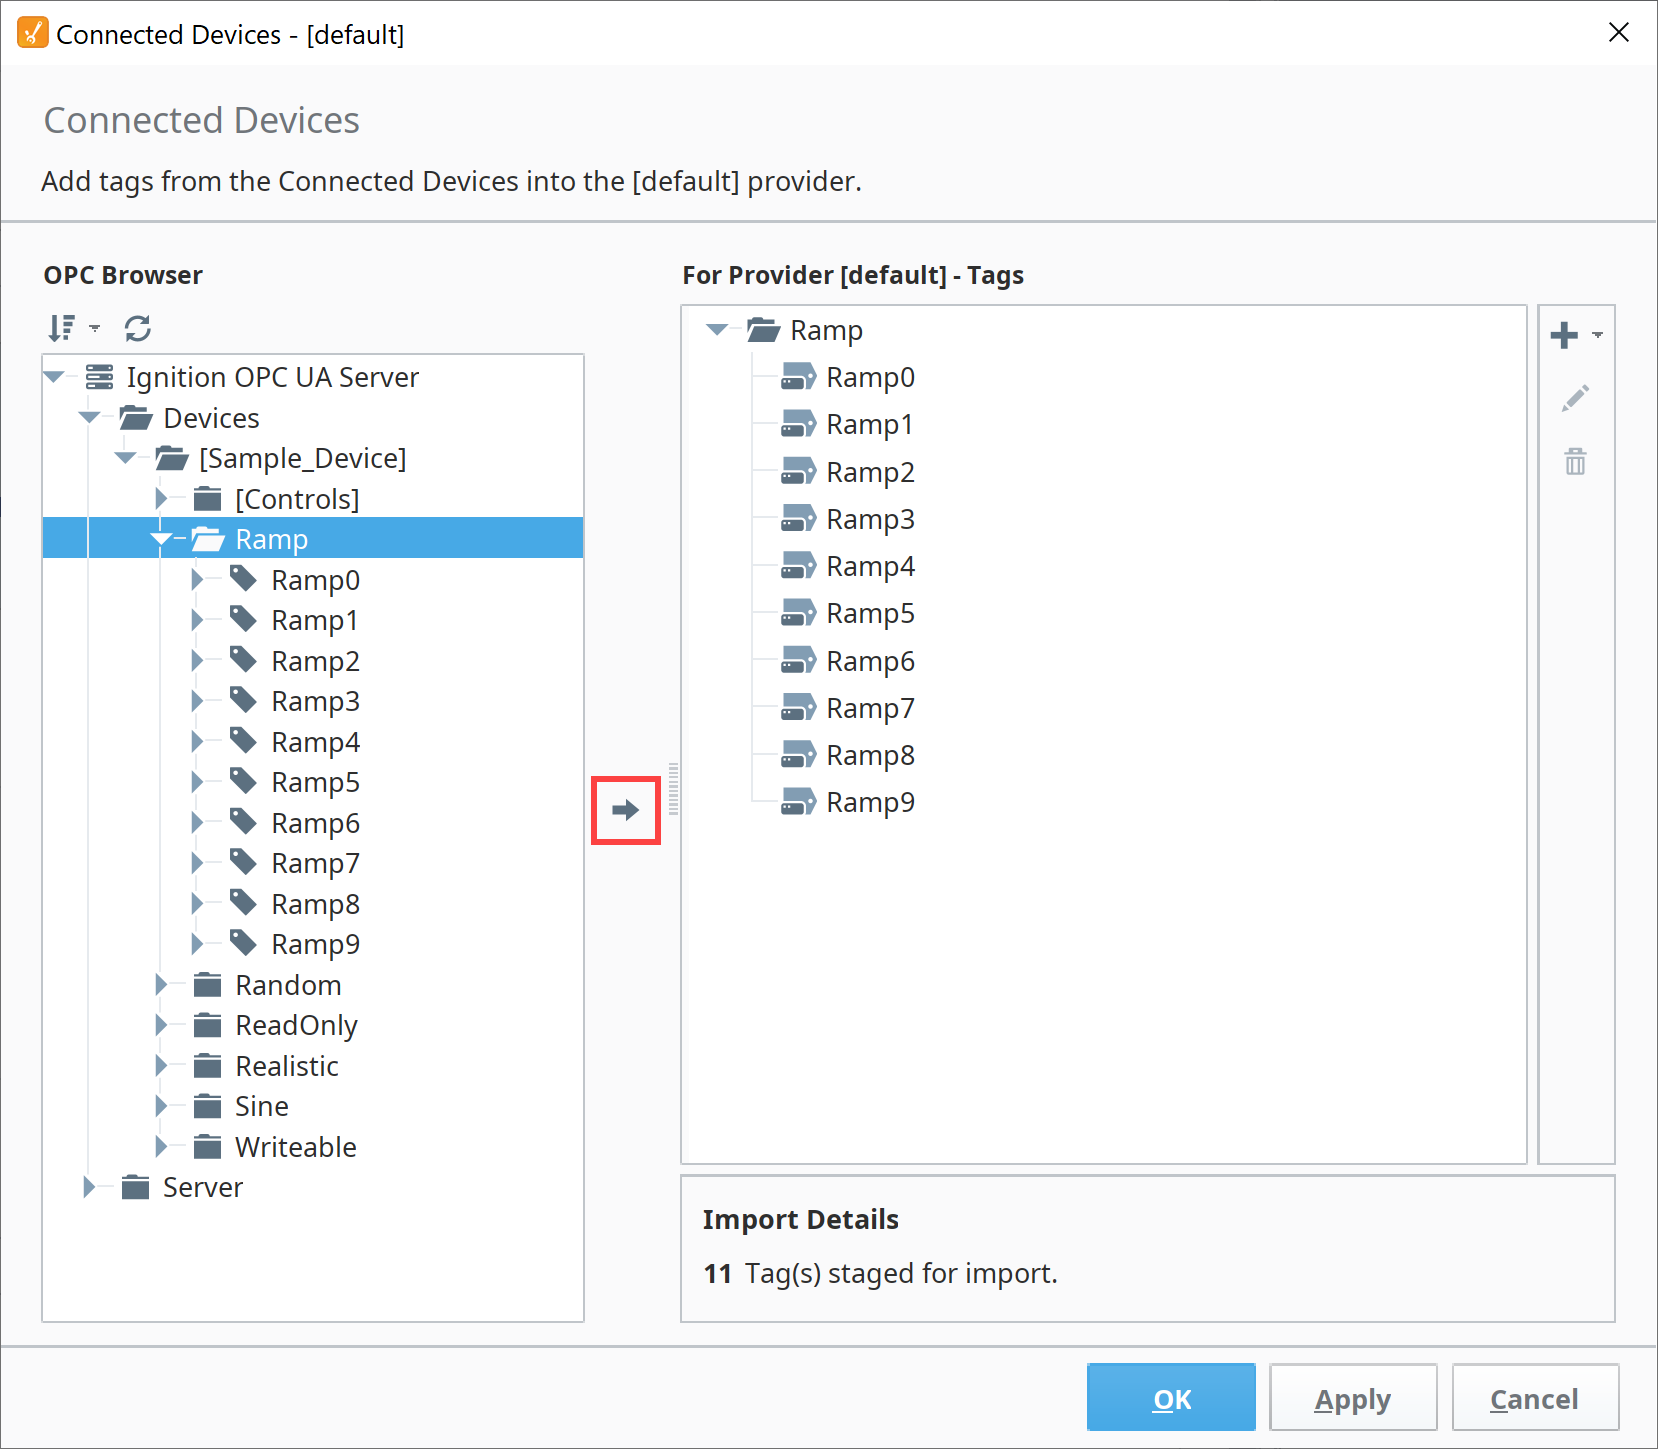
- Browse the OPC Tags area to find Tags that you're interested in.
- Select the folder(s) or Tag(s) you want to add. To unselect a row, click out on a blank area, thus clearing any selected row.
- Move the selected OPC Tags into your selected For provider area by clicking the Right Arrow icon or dragging them into the right panel.
 note
noteThe following characters are invalid and will be replaced by an underscore when dragging and dropping an OPC item into the Tag Browser: ! @ # $ ^ & * + [ ] Parentheses are valid characters but are not valid as a first character in a tag name. If an OPC item name starts with a parenthesis, the tag name will be prefixed with an underscore:

- To create a New Standard Tag, click the Add icon.
- Click New Standard Tag. A new blank Tag will appear in the For provider area in the currently selected folder (if one is selected), or at the bottom of the Tag list.
-
You have the choice of editing your Tags in the Connected Devices window or editing them in your Tag Browser. To edit Tags in the Connected Devices window, select a Tag and click on the Edit
 icon. Here you can change the Data Type, Item Path, set alarms or store history, and anything else that you can do to modify a Tag.
-
Click Commit to submit your changes.
 noteNew in 8.1.2As of 8.1.2, the For Provider area now features a right-click menu that also has Edit, Rename, and Delete options.
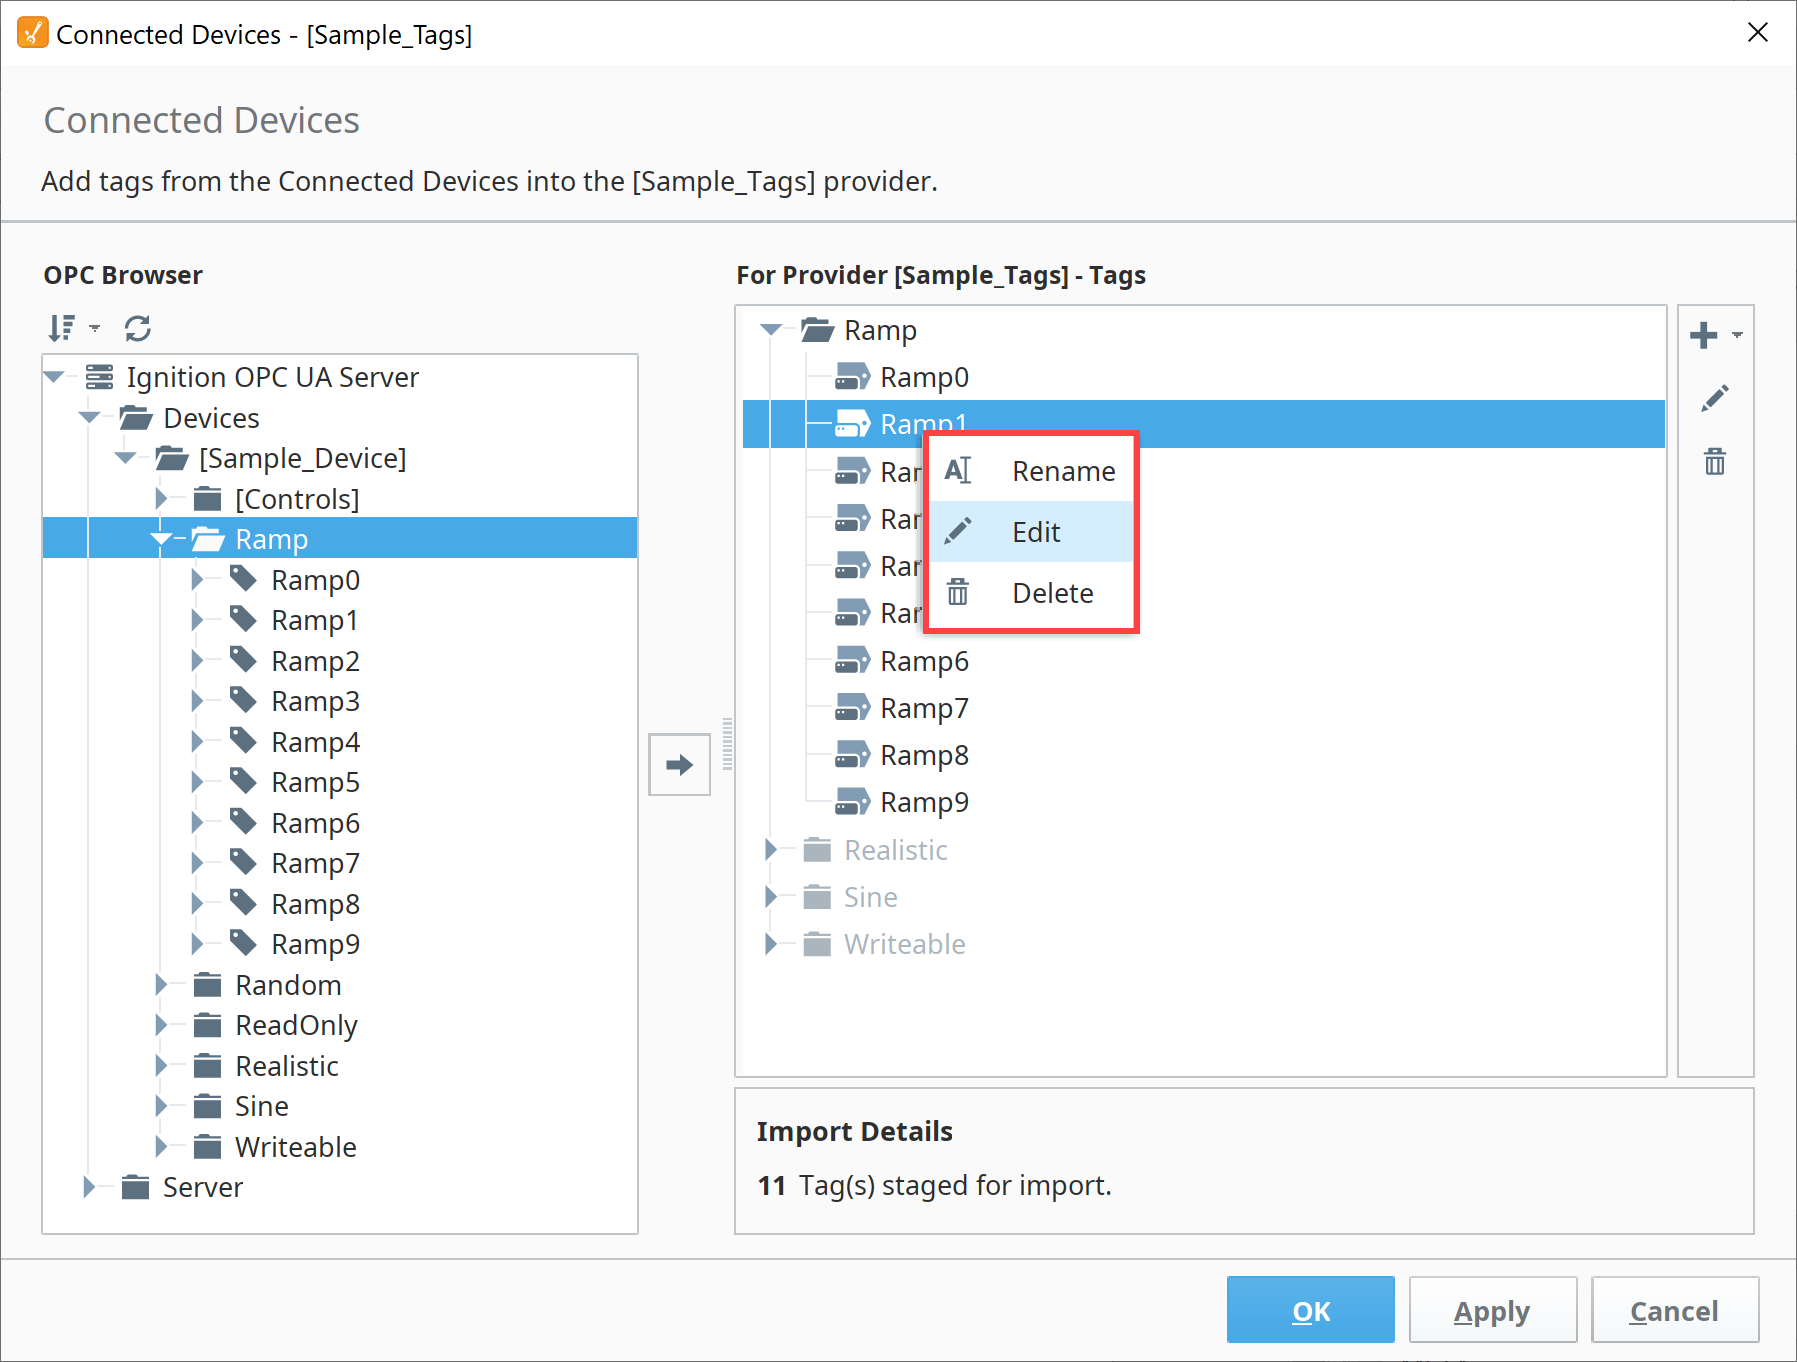
-
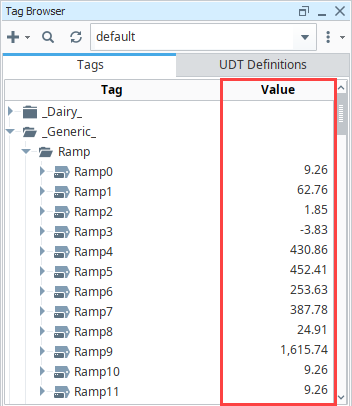
When finished, click the Apply button to add your new Tags to the Tag Browser. As soon as the Tags are in the Tag Browser, the values will start updating automatically.
Creating Tags in the Tag Browser
Tags can be created manually in the Tag Browser. You can create any of the Standard Tag Types or a Data Type Instance. This example creates a Memory Tag.
- You can create Tags in two different ways: click on the Add icon to open the context menu and select New Standard Tag and choose the Tag type, or right click any where in the Tag Browser and select New Tag and choose the Tag type.
- The Tag Editor will open to edit the Tag's properties.
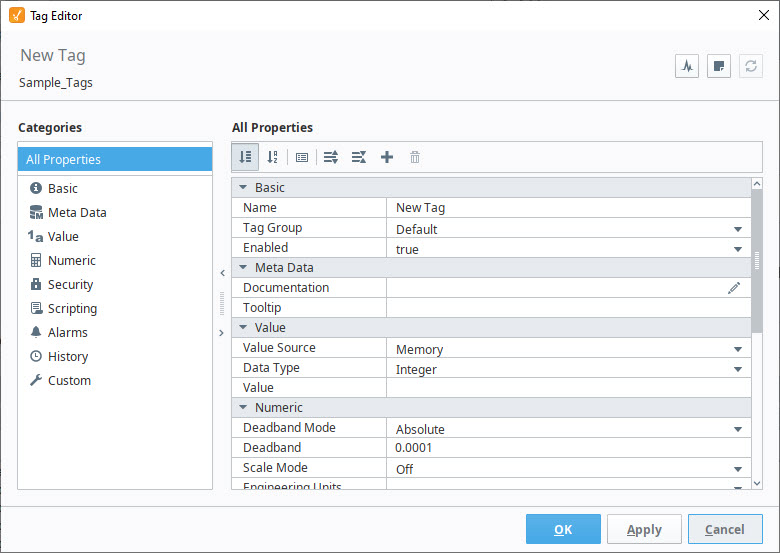
- Set the properties as follows:
- Name: My Memory Tag
- Value Source: Memory
- Data Type: String
- Value: Hello Ignition
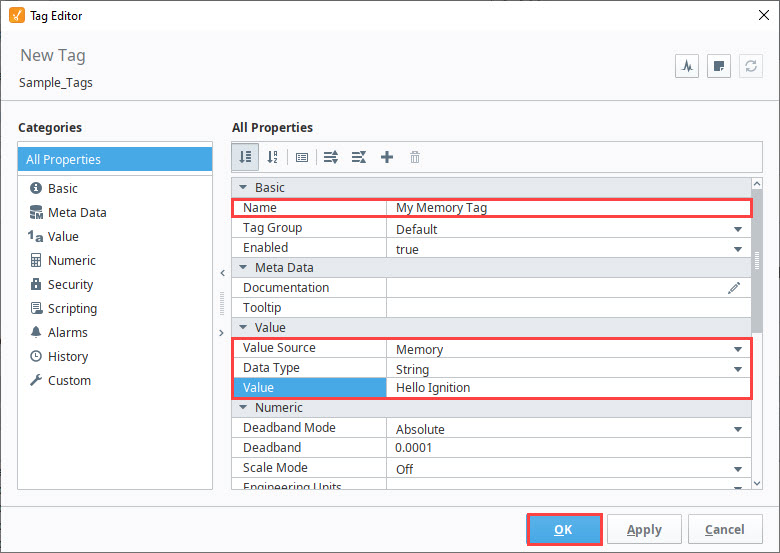
- When finished, click OK. Your new Tag will be placed in the Tag column of the Tag Browser. Since this is a Memory Tag, its value will not change unless you write to it.
Editing Tags
The Tag Editor is a powerful tool used when creating Tags and for editing them. The properties displayed in the Tag Editor are custom to the type of Tag you've selected. You can find additional information on Understanding Tags and the Tag right click menu here.
Edit a Tag
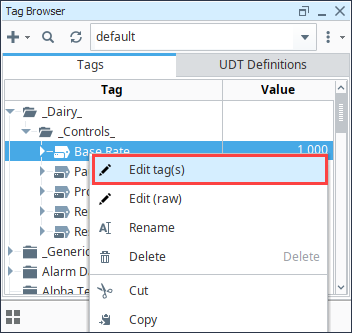
- To edit an existing Tag, right-click on the Tag, and select the Edit Tag icon.
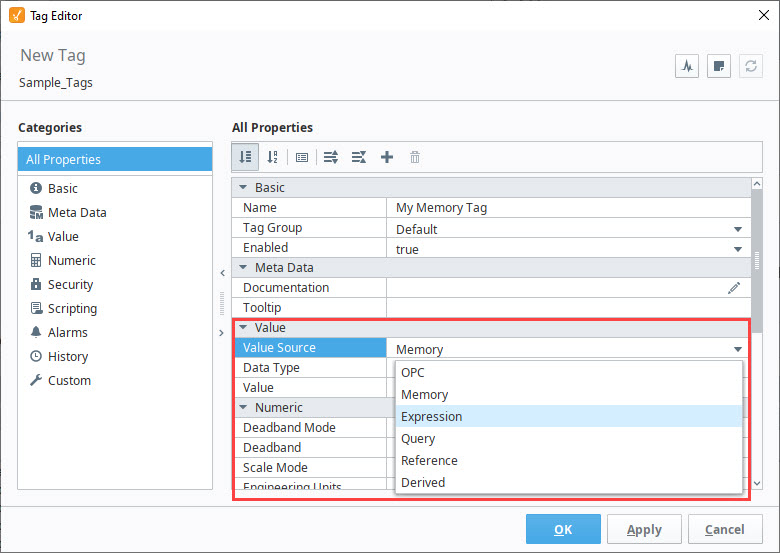
- Once in the Tag Editor, you can update the Tag properties. For example, if you want to change the Tag to a different type – such as from OPC to Expression – go to the Value Source property, click the Expand
 icon, and choose the type of Tag (OPC, Memory, Expression, Query, Reference, or Derived) that you want.
Rename a Tag
Tags names are flexible. For naming conventions, see Tag Browser.
- To rename an existing Tag, right click on the Tag in the Tag Browser and select the Rename option.
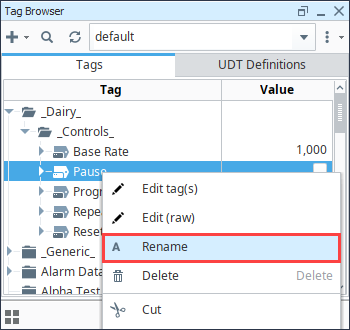
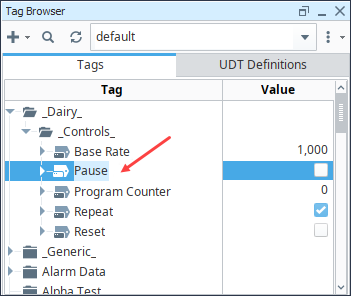
- The cursor will now blink inside the Tag name and you can type the new name.
Cut, Paste, or Copy a Tag
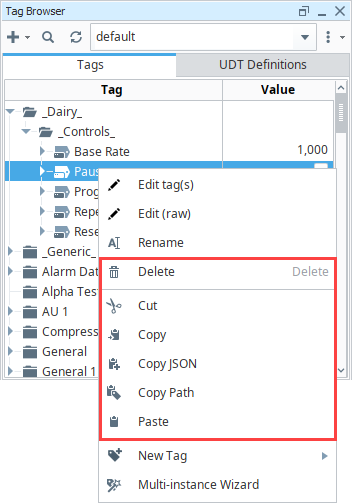
You can also cut, paste, and copy Tags within the Tag Browser. Right click on the Tag in the Tag Browser. Choose the command you want.
- Delete: Completely removes the Tag.
- Cut: Delete the Tag from the current location, but leave it in the clipboard to be pasted elsewhere in the browser.
- Copy: Make a copy of the Tag and leaves it in the clipboard to be pasted elsewhere in the browser.
- Paste: Pastes the Tag you've cut or copied into the currently selected location in the Tag Browser.
Addressing Bits
In bindings and scripting there are ways to read a single bit of a word, but you can also have a Tag to read and write to a single bit. In order to address individual bits in Ignition, you must create a separate OPC Tag pointing directly to the specific bit in the PLC.
When the integer values that come from the OPC Tags are a series of binary bits, it is then possible to address each bit. For example, an integer value can have a 16-bit binary representation as shown here:
| Integer | Bit Level Representation | How It Works |
|---|---|---|
| 4096 | 0,0,0,0,0,0,0,0,0,0,0,0,1,0,0,0 | 2^12 = 4096 |
| 1025 | 1,0,0,0,0,0,0,0,0,0,1,0,0,0,0,0 | 2^0 + 2^10 = 1025 |
Addressing bits may work differently depending on the type of device you are addressing. Most commonly you will either use /<bit> like /0 or /1, or [<bit>] like [0] or [1], or will use a . like .0 or .1. IE:
- Micrologix:
[device]N7:1/0 - ControlLogix:
[device]Folder/Tag.0 - Siemens:
[device]I0.0
Address an Individual Bit in a Micrologix
In this example, we want to address bits from a known integer value: 1025. This is represented as above, with the first (0) and eleventh (10) bits true and all others false. Our Gateway is connected to a MicroLogix PLC named MLX. To address an individual bit, do the following:
- From the Tag Browser window, create an OPC Tag to have a specific value:
- Data Type: Integer
- OPC Item Path:
[MLX]B3:0
- Once created, set the Tag value to 1025.
- Then create another new OPC Tag to show only the value of the first bit of our previous Tag:
- Data Type: Boolean
- OPC Item Path:
[MLX]B3:0/0(for Micrologic, you can specify the bit as: 0/0 or 0.0. That is, with a slash/ or a period.)[MLX]B3:0/0has a value of "1" or a Boolean value of "True" because the first bit is true (integer value is odd).
- You can create a Tag for any of the other individual bits. For example, create a new OPC Tag with a Boolean value to the second bit of the original Tag as follows:
- Data Type: Boolean
- OPC Item Path:
[MLX]B3:0/1
[MLX]B3:0/1has a value of "0" or a Boolean value of "False" because the second bit is false.
Once you have your Tags created, try changing the boolean values and see the Integer Tag change.