Using the Template Repeater
The Template Repeater component lets you easily create multiple instances of a master template for display on the HMI. Each instance shown in the Template Repeater has the same look, feel, and functionality of the master template. The instances can be arranged vertically, horizontally, or in a "flow" layout, which can either be top-to-bottom or left-to-right. If there are too many instances to fit, a scrollbar is added to the display. The Template Repeater also gives you the ability to pass parameters to each instance of the template, making the templates dynamic.
The Template Repeater can create multiple template instances in two different ways, which will also affect how it passes parameters to those instances. The first is Count mode, which will allow you to specify how many times the Template Repeater will repeat a template. It will then use the index number of each template as a parameter that it will pass into the template. The second method is Dataset mode, where each row of a dataset will be a new template instance and each column will be a parameter that will be passed into the template. This is useful if you have multiple parameters that need to be passed into a template. See the Vision - Template Repeater page for a more detailed description of this property and how it works. We will go over both methods of using the repeater below.
Creating a Template
Before we use the Template Repeater, we need to first have a template that we need multiple copies of. We used Ramp Tags in the Generic Simulator device built into Ignition. The template will have a label at the top with the ramp name, and it will display the ramp number value. To do this, our template needs to have two parameters. One called RampNumber, which will be used to display the ramp number and also used for in an indirect Tag binding. The second parameter called RampName, which is passed in a string name that is the name of the ramp that I made up. The steps for making this template are listed below, or you can skip ahead to the next section if you are familiar enough with making templates.
Making a Template
-
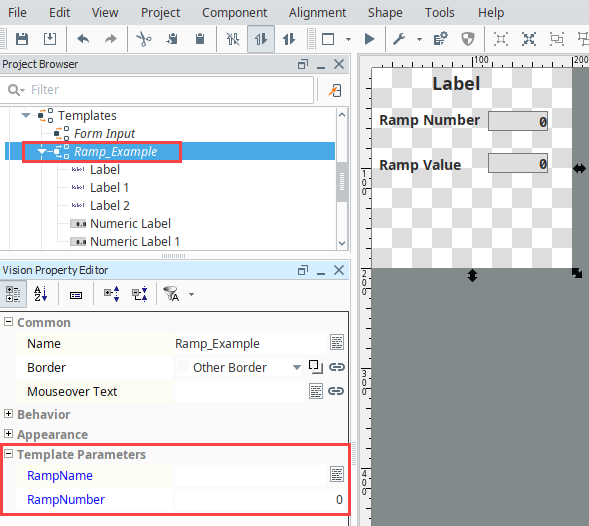
In the Templates section of our Project Browser, create a new template. I named mine, Ramp_Example. See the Templates section for a more detailed description on what templates are and how to use them.
-
We are going to want to pass in a value to the template, so we need to create a Template Parameter.
-
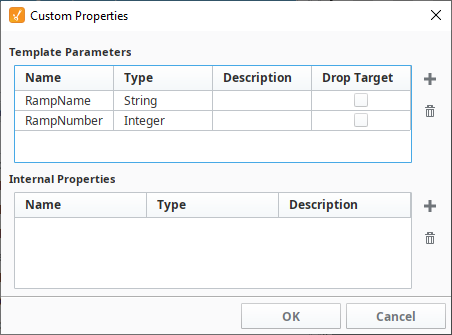
Right click on the Root Container, select Customizers > Custom Properties and add a Template Parameter called RampNumber, and make it an Integer type.
-
Add a second Template Parameter called RampName, and make it a String type.
-
-
Next, add some components to our Template.
-
Add two Numeric Labels and one Label. I also added two extra label components, and manually typed in some static text into their Text property. In one label, we entered "Ramp Number" and in the other, "Ramp Value".
-
Resize the components so that they are easy enough to read. Place the blank Label component at the top of the Template, and place each Label that we wrote text into next to a Numeric Label.
-
-
Next, set up some bindings on our Template.
-
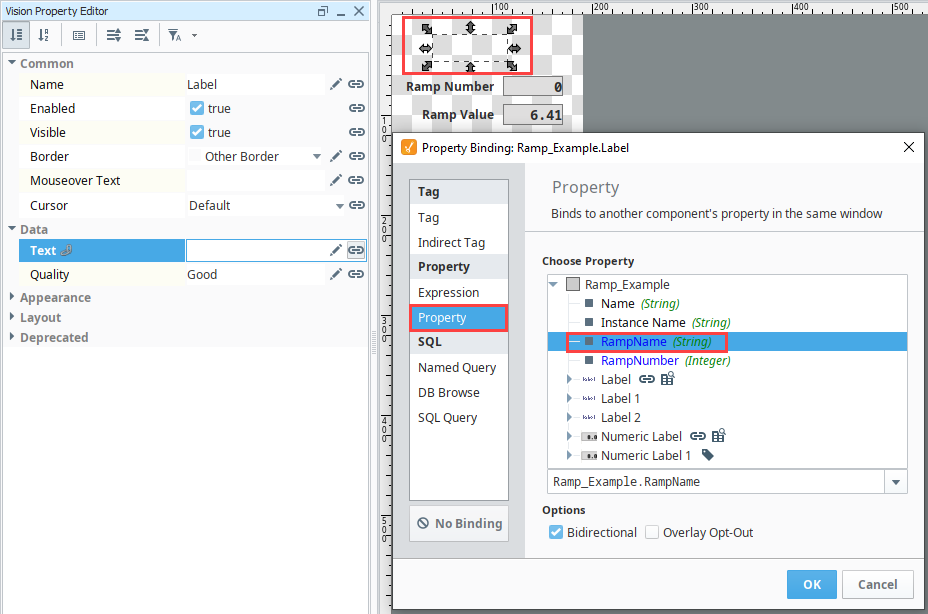
Using a property binding, bind the Text property of the blank Label component at the top of the Template to the RampName Template Parameter.
-
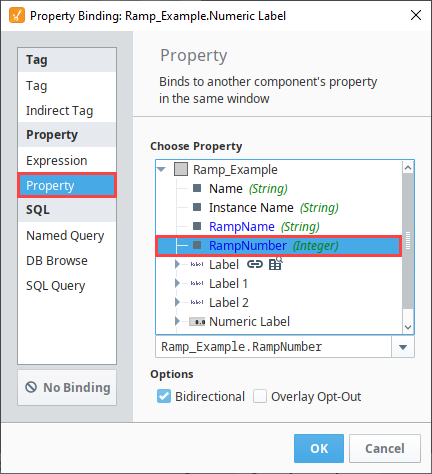
Using a property binding, bind the Value property of the Numeric Label next to the "Ramp Number" label to the RampNumber Template Parameter.
-
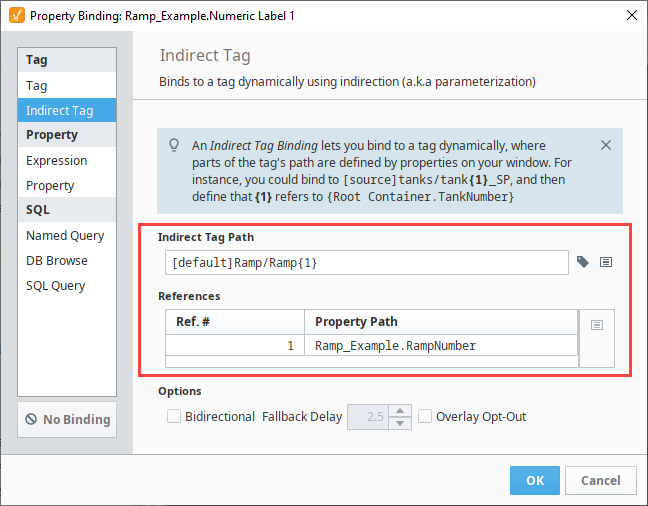
Using an indirect Tag binding, bind the Value property of the Numeric Label next to the "Ramp Value" label. We bound it to a Ramp Tag that is in our Tag Browser, using the RampNumber Template Parameter as the indirect reference for the number in the name of the Tag. It should look similar to the image below.
noteRemember to remove the number portion of the tag name and replace it with 1. For example, [default]Ramp/Ramp0 becomes [default]Ramp/Ramp1.
-
-
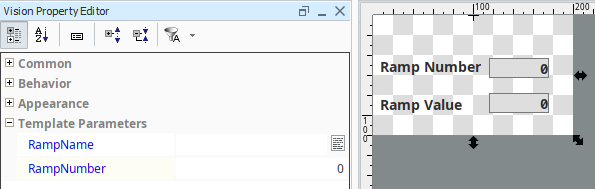
The template is now finished and ready to use. See the image below for an idea of what mine looks like. Yours should look similar. Notice the two Template Parameters, as well as the placement of the components. The label at the top that can't be seen because there is no text in it.
Using the Template Repeater with Count Mode
Now let's take a look at how to use the Template we just made in a Template Repeater.
-
On a new window, drag a Template Repeater component. Resize it so that it is taller than it is long.
-
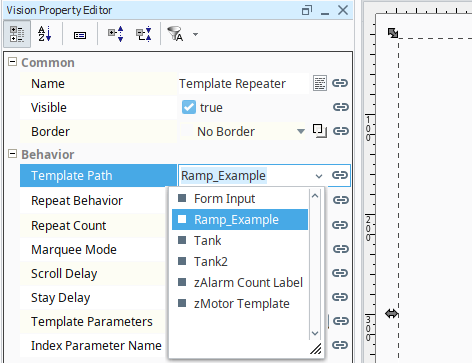
With the Template Repeater selected, find the Template Path property, and find the name of the template that we just created in the drop down menu.
-
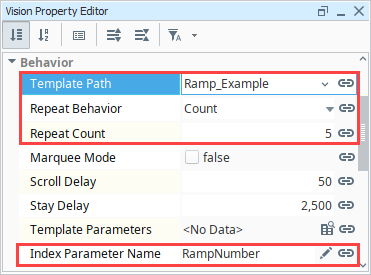
With the Template Repeater still selected, find the Index Parameter Name property. Enter in 'RampNumber', which was the name of one of our Template Parameters from our Template.
-
Ensure that the Repeat Behavior property of the Template Repeater is set to Count.
-
In the Repeat Count property of the Template Repeater, set the value to '5'.
-
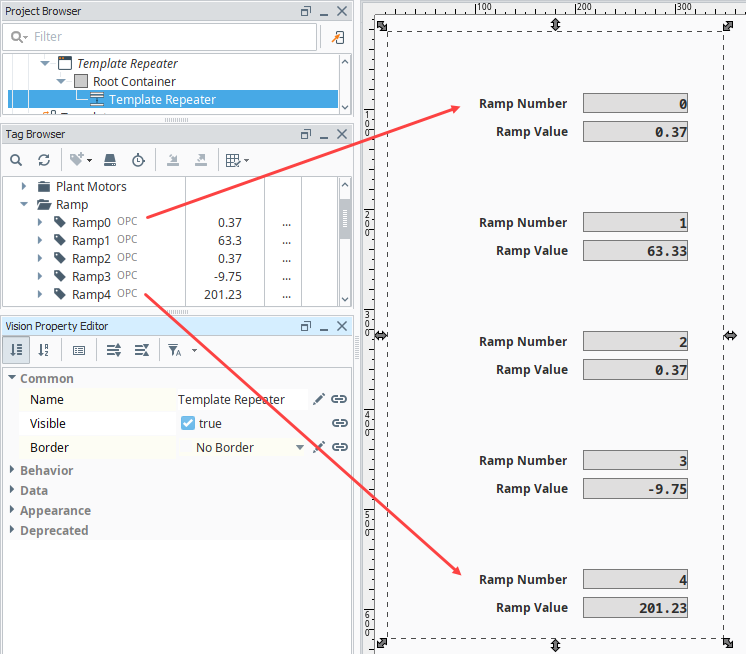
You should see your Template repeated five times within the Template Repeater. Our Ramp Number value in the Template corresponds to the index value of the Template, 0 through 4 because it is 0 based. You will see that the value in our Ramp Value component corresponds to the value of one of our Ramp Tags.
Your Repeater is complete. You can modify the Repeat Count to change how many times the Template gets repeated.
Using the Template Repeater with Dataset Mode
In our previous example, although we were able to successfully pass in the index parameter into our Template, we were not passing anything into the RampName Template Parameter and because of this, the blank label at the top of our Template remained blank. This is because Count mode only allows a single index parameter to be passed in. However, since we want to pass in two parameters, we can instead use Dataset mode. In addition, because we are going to be defining a dataset to pass in parameters, we don't have to use a 0 indexed parameter, and can instead use whatever values we want. We will use the same Template and Template Repeater from before.
-
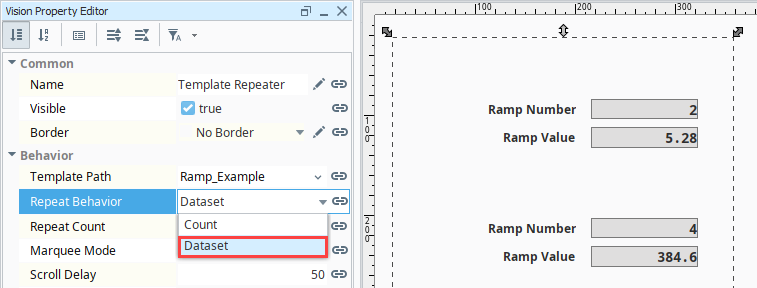
On the Template Repeater, set the Repeat Behavior to Dataset. All of the Templates that were previously in will temporarily disappear.
-
Click the Dataset Viewer
 icon on the Template Parameters property of the Template Repeater. You should see a new popup that allows you to build a dataset.
-
First, we'll add two columns to our dataset.
-
Click the Add Column
 icon. Set the Name as 'RampNumber' in Position '0', and enter 'Integer' as the Type. Click Add Column.
 -
Click the Add Column
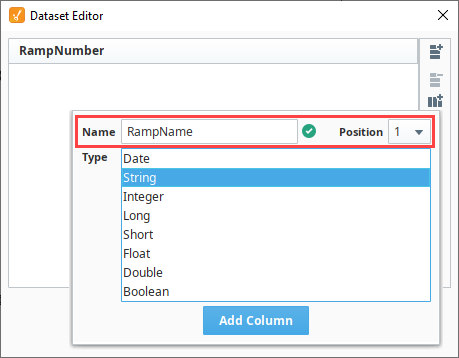
icon. Set the Name as 'RampName' in Position '1', and enter 'String' as the Type. Click Add Column.noteMake sure the name of each column exactly matches the names of the Template Parameters (RampNumber and RampName). They are case sensitive.
-
-
Next let's add some rows by clicking the Add Row
 icon. Click it five times to add five rows.
 -
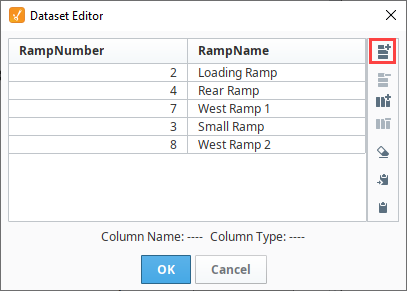
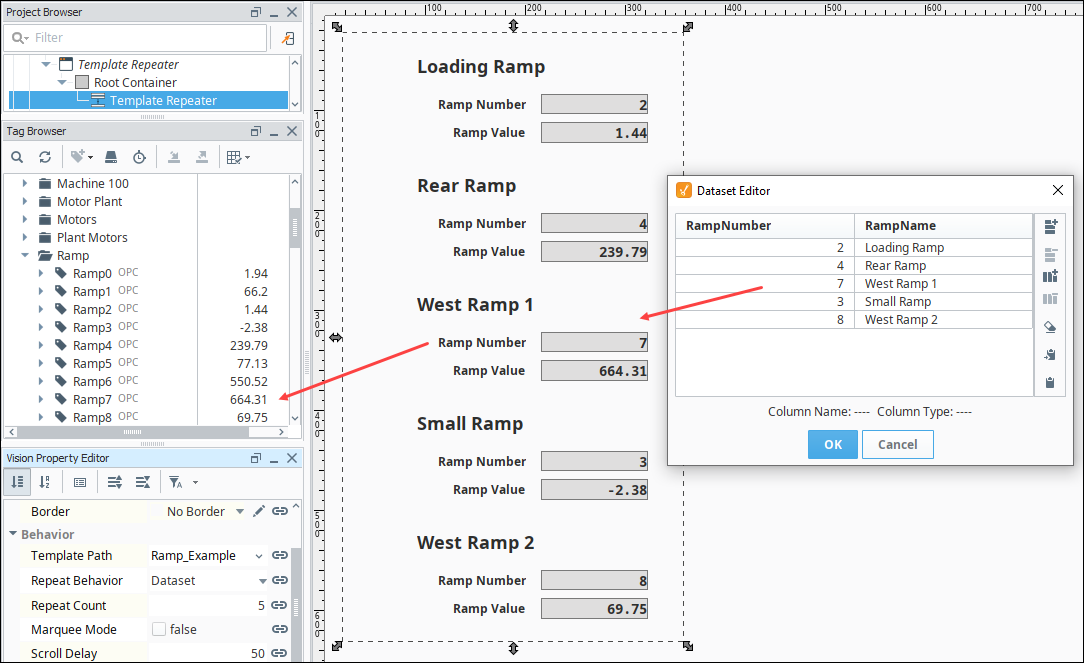
Add in some values for the RampNumber column. Since we are defining all of the values, we don't have to start with a RampNumber of '0'. In fact, we don't even need to have them be in sequence! We do need to make sure that the numbers each correspond to one of our Ramps, so enter in a value '0' through '9' for the RampNumber column for each row. In this example, we used 2, 5, 7, 3, 8 in that order.
-
Next, add some values for the RampName. These can be whatever you want, since we are going to be giving unique names to each of our Ramps. When finished, the dataset should look something like the image below. Click the OK button to save your dataset.
-
Notice how we now have our five templates back, and they are using the parameters that we are passing in from the dataset we just created. The Templates are receiving the parameters in the order that you made them in the dataset. We can also see that each Template instance corresponds to a specific ramp.
Dataset mode is great when you need to pass in multiple parameters, or if you have a single parameter that is not zero based. In addition to manually specifying values like we did in this example, you can instead set up a binding on the Template Parameters property to something like a database table. This allows you to easily modify the templates that are being displayed in the window simply by modifying the database table.