Client Tags for Indirection
Vision Client Tags can be used as a variable across all windows to indirectly point to a set of Tags, such as an area of the plant. Suppose that a window has a Dropdown List component that allows a user to select different areas of the plant. If the drop-down is bidirectionally bound to a Client Tag's selected string value property, the user can change the drop-down's value, therefore resulting in the indirect binding throughout the project reflecting the change in the Client Tag.
The Client Tag can be bound to a custom property on a window's Root Container. This Custom property can be bound to the Client Tag. The components inside the window can have indirect bindings on their properties that leverage the Custom property on the window. Therefore, the components on the window will be dependent on the Client Tag. Client Tags are managed inside the Client, therefore each Client will be independent of other Clients.
Client Tag Indirection Example
In this example, we will set up Client Tags for indirection which can be shared between different windows in our project.
-
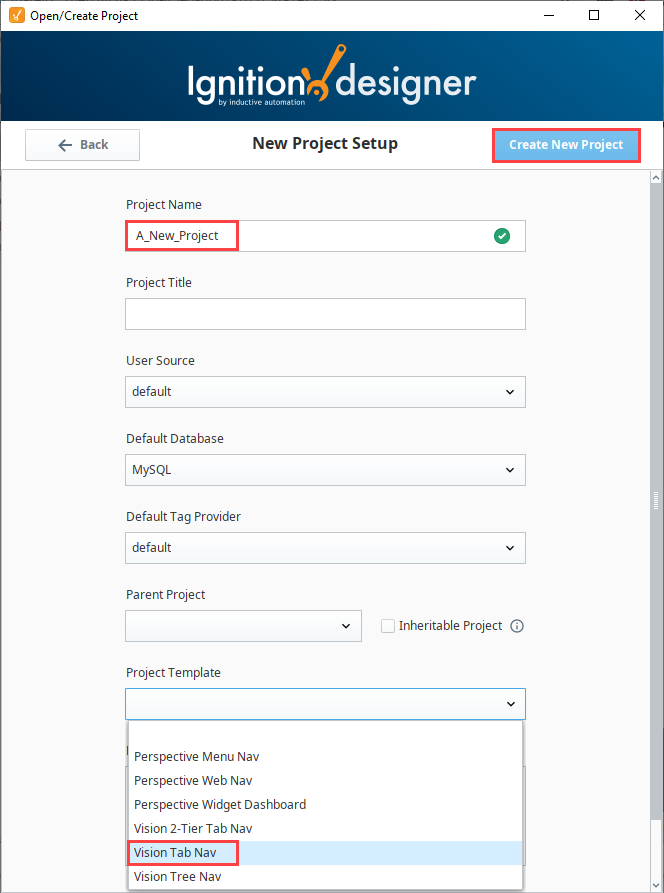
We need two windows and a way to navigate between them. If you don't already have a project that meets this criteria, create a new project using the Vision Tab Nav project template.
-
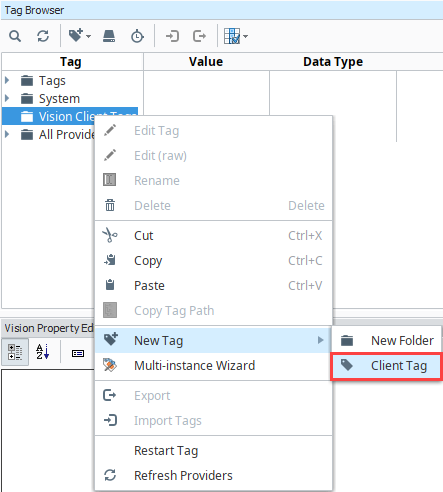
Add a Client Tag. In the Tag Browser, right click on Vision Client Tags, then choose New Tag > Client Tag.
-
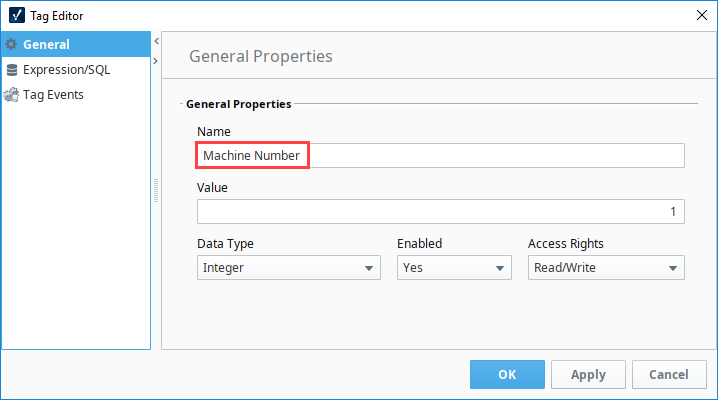
Name the Tag Machine Number and set the Value to 1.
-
Add a window to show data based on the Client Tag. Create a new window named Machine Overview.
-
Next, we'll add a Custom Property to the Root Container of the window.
-
In the Project Browser, select the Root Container for the Machine Overview window.
-
Right click on the desktop and choose Customizers > Custom Properties.
-
Click the Add
 icon.
icon. -
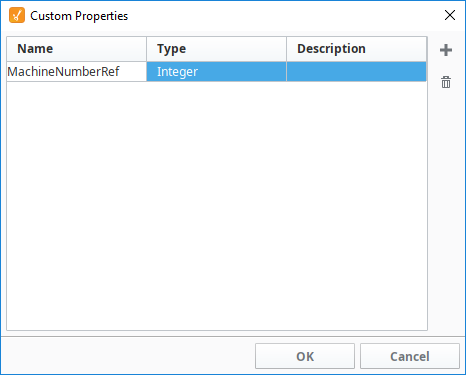
Enter MachineNumberRef as the name, and make sure the Type is Integer. Click OK to save the new custom property.
-
-
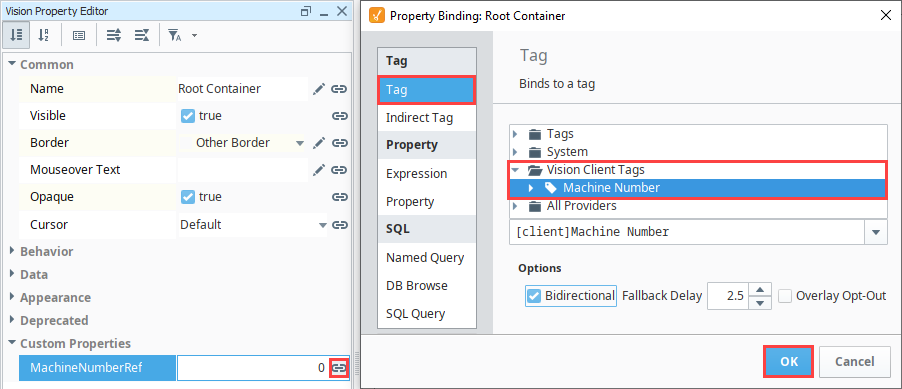
Next we'll bind the custom property to the Client Tag. In the Project Browser, select the Root Container for the Machine Overview window.
-
In the Vision Property Editor, click on the Binding
 icon next to the MachineNumberRef custom property.
 -
Choose the Tag binding type.
-
Select the Machine Number Vision Client Tag.
-
Click OK to save the binding.
-
-
Drag a Label component onto the window. Next we'll add an Expression binding to show the page title.
-
In the Vision Property Editor, click on the Binding
icon next to the Text property. -
Choose the Expression binding type. Enter the following expression:
"Machine "+{Root Container.MachineNumberRef}+" Overview"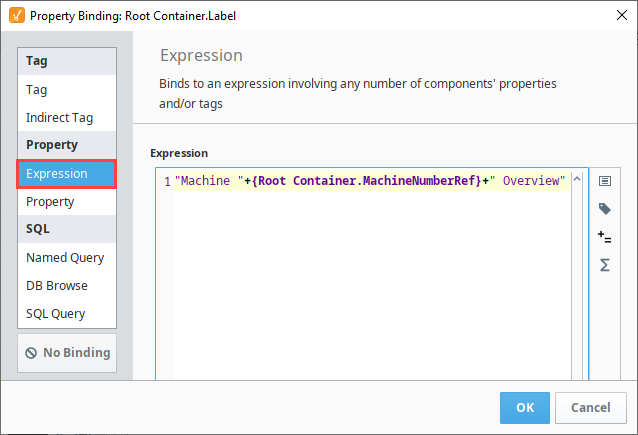
-
Click OK to save the binding.

-
-
Next we'll set up an LED Display component for the value.
-
Drag an LED Display component onto the window.
-
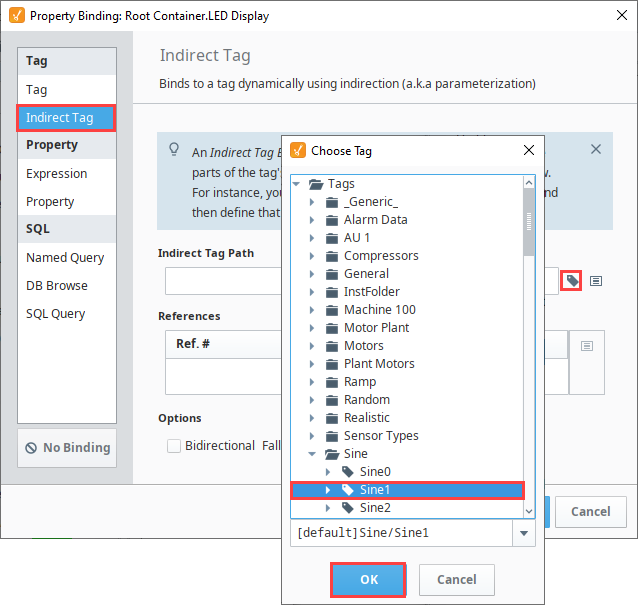
Click on the Binding
icon next to the Value property. -
Select the Indirect Tag binding type.
-
Click on the Tag
 icon. Navigate to a Tag you want to use. We used the Sine1 tag from the simulator.
 -
Click OK to save the Tag path.
-
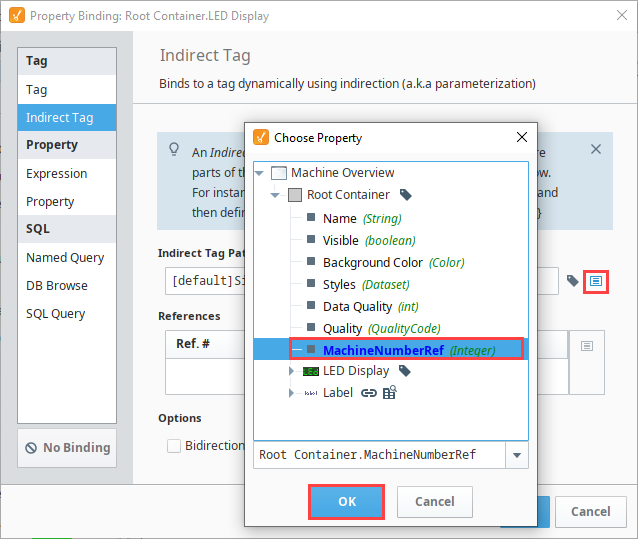
Next, click the Insert Property Value
 icon.
icon. -
Choose the MachineNumberRef property from the root container. Click OK.
-
In the Indirect Tag Path field, delete the "1" before the 1.

-
Click OK to save the binding.
-
Save your project.
-
-
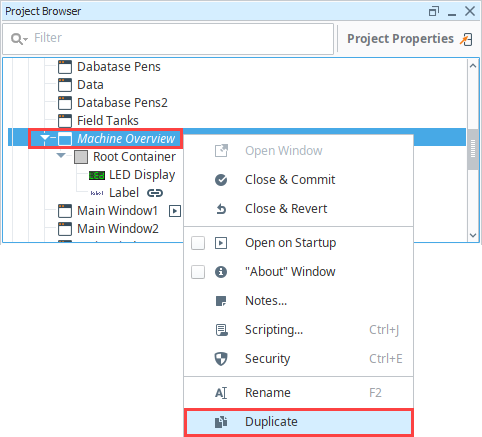
Next we'll make a details screen so we can switch between the two. In the Project Browser, right-click on the Machine Overview window and select Duplicate.
-
Rename the copy as "Machine Details."
-
On the Machine Details window, select the Label component.
-
Click on the Binding
icon next to the Text property. Change the word "Overview" to "Details." Edit the Expression binding as follows:"Machine "+{Root Container.MachineNumberRef}+" Details"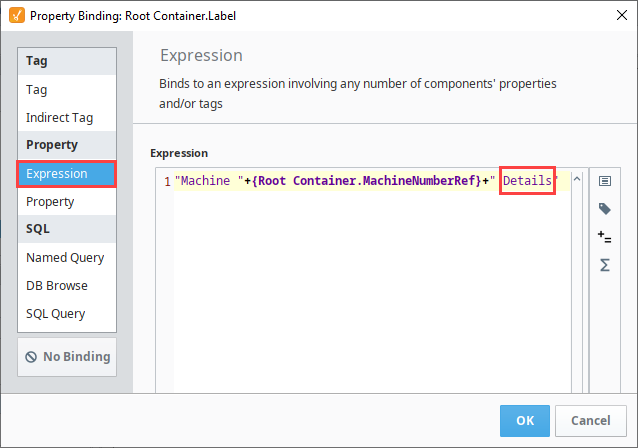
-
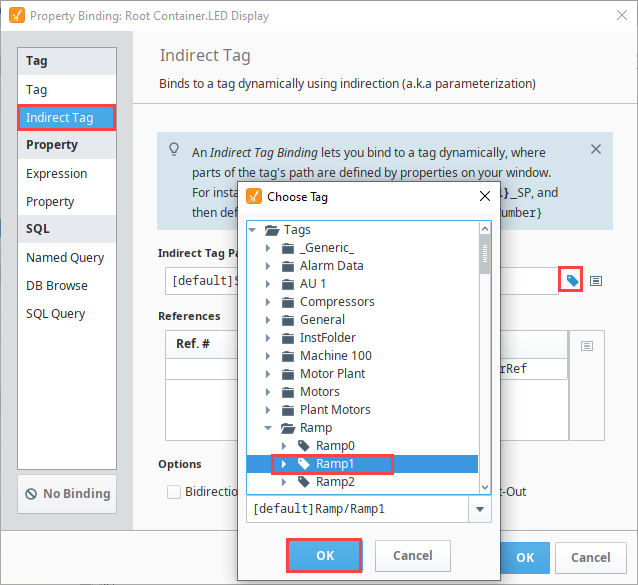
On the LED Display, update the Indirect Tag binding on the Value property to point to the Ramp Tag instead of the Sine Tags.
-
Select a Ramp tag from the Tag selector and click OK.
-
Click the Insert Property Value
icon. Choose the MachineNumberRef property from the root container and click OK.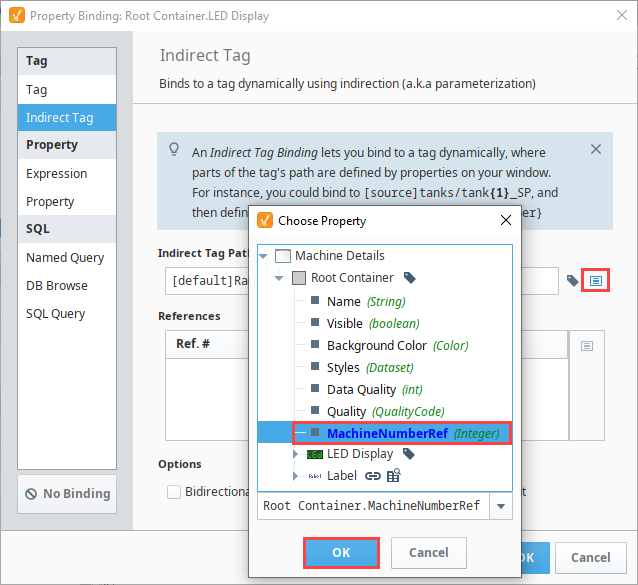
-
In the Indirect Tag Path field, delete the "1" before the 1. Click OK to save the binding.

-
-
Next we'll add the two new windows to the Navigation. Open the Navigation window.
-
Right click on the Tab Strip component and select Tab Strip Customizer.
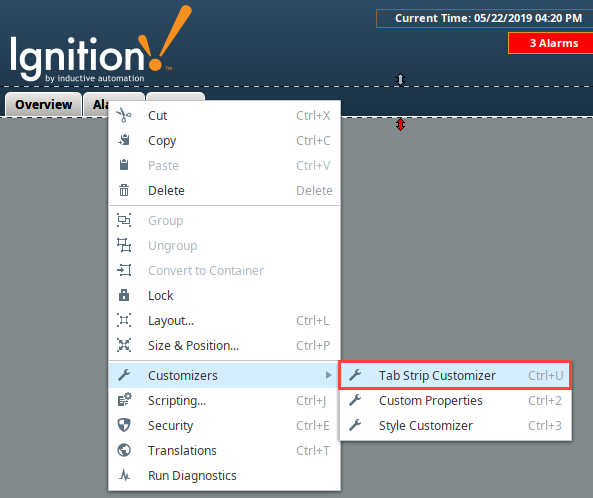
-
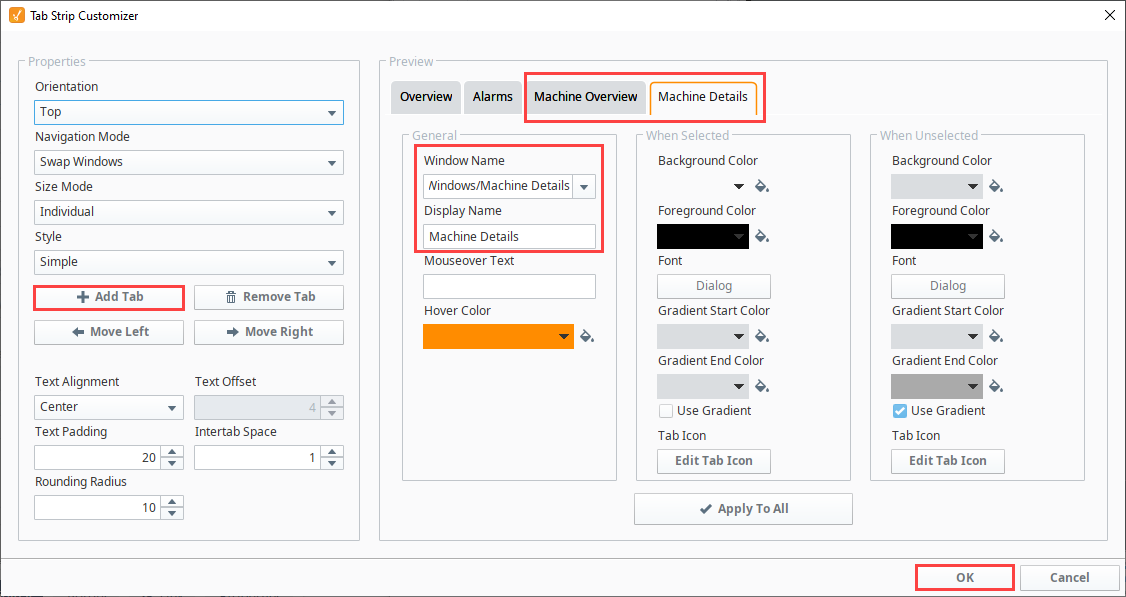
In the Tab Strip Customizer, click on the Empty tab. Change the Window name and the display name to "Machine Overview."
-
Click the Add Tab button. Change the Window name and the display name to "Machine Details."
-
Click OK to save the changes to the Tab Strip.
-
-
Add a way to change the Client Tag value in the Client. There are two ways to do this:
-
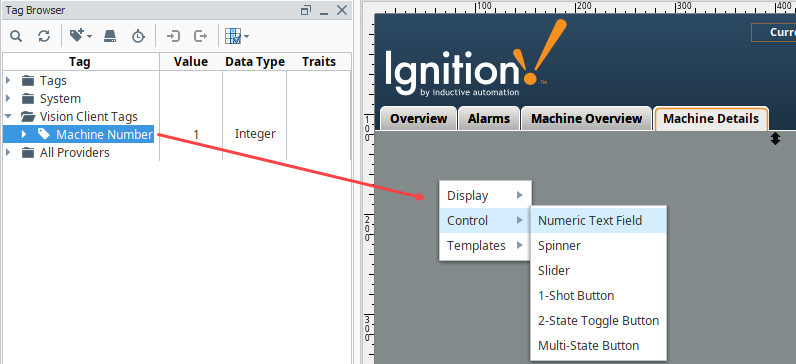
Drag a Numeric Text Field component onto the Navigation window, and then drag the Machine Number Client Tag onto the Numeric Text Field component.
-
If your Header doesn't have a background component, you can just simply drag the Machine Number Tag directly onto the window and select Control > Numeric Text Field.
-
-
Save the project.
Testing Your Work
Remember that the point of a Client Tag is to have different values across multiple Clients, so there is no way to test it in the Designer. To test the functionality of this example, do the following:
-
Open two Vision Clients.
-
In the first Client, change the Client Tag Value from "1" to "2" in the header.
-
Click between the Machine Overview and Machine Details screen. Notice that they are both showing the Tags for Machine 2.
-
Switch to the second Client. Notice that the Machine Overview and Machine Details screens still show the Tags for Machine 1.