Driven Tag Group Examples
Driven Tag Group - Machine State
Driven Tag Groups that are based on a machine can be very important when you only want to poll values differently based on machine state. A machine state Tag Group is when the Tags are polled at one rate with the machine ON, and a different rate when the machine is OFF. You can easily see the rate change in the the Tag Browser using this type of condition.
Create a Machine State Tag
First, you need to create a driving Tag if you don't already have one.
- In the Tag Browser, right-click on the Tags folder, then go to New Tag > Memory Tag to create a memory Tag.
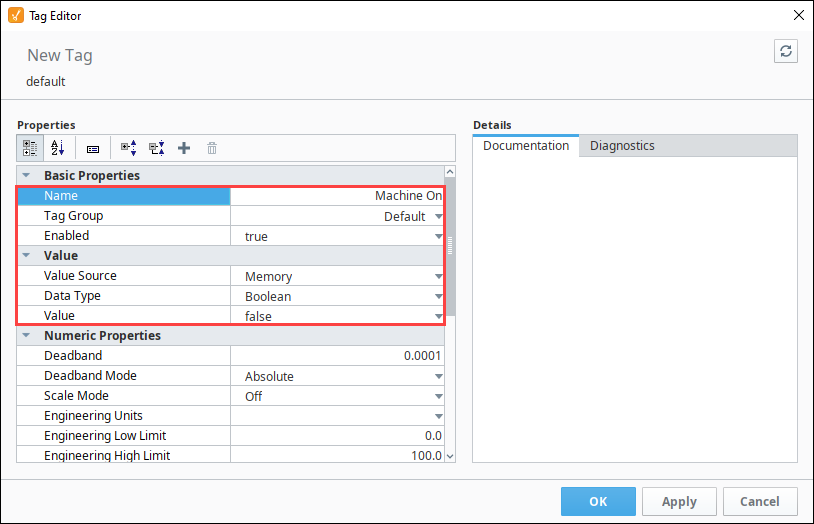
The Tag Editor window is displayed. - In Tag Editor, enter the following:
- Name: Machine On
- Tag Group: Default
- Enabled: true
- Data Type: Boolean
- Value: false
- Click OK to add the Machine On Tag to the Tag Browser.
Add a Driven Tag Group Based on the Machine State
Once you have your driving Tag created, add a Driven Tag Group that updates the Tags based on when the machine is ON.
- In the Tag Browser, click on the Edit Tag Groups
 icon to open the Tag Group Editor.
 - To create a new Tag Group, click Add
 icon.
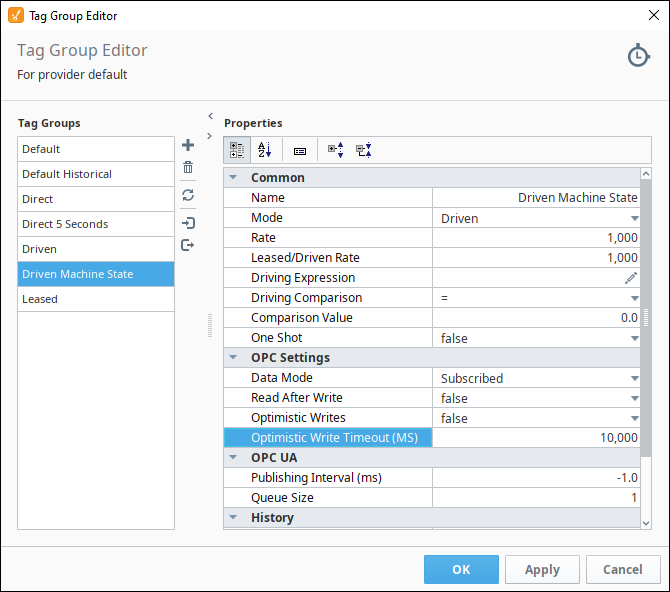
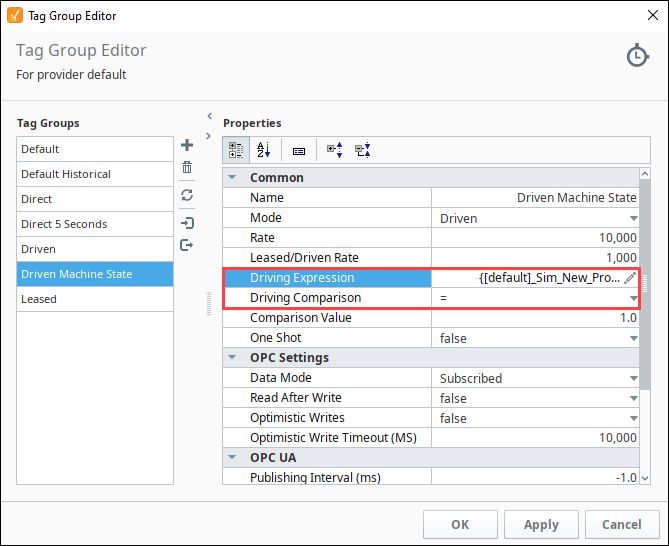
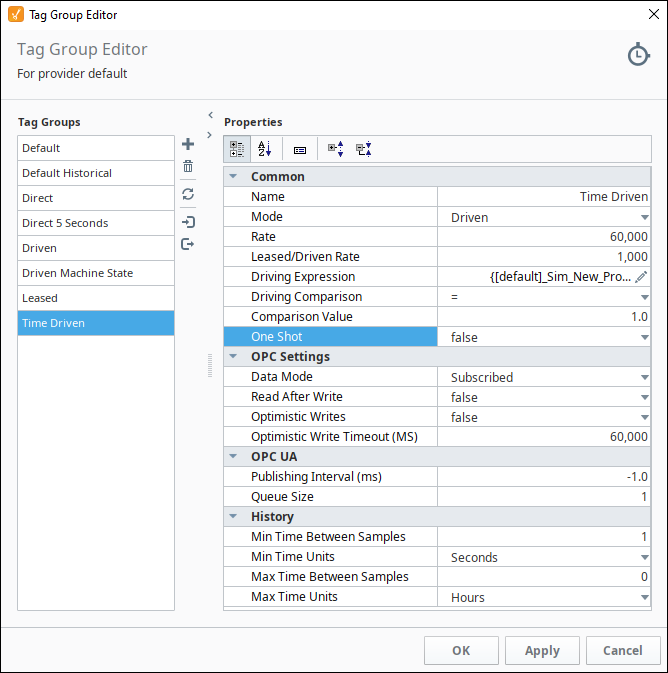
icon. - Enter the name of the Tag Group. For example, you can name it Driven Machine State, and set the Mode to Driven.
- Set the Rate to 10,000 (10 seconds) and the Leased/Driven Rate to 1000 (1 second).
- This Tag Group executes based on the condition you set on the Driving Expression. Set the Driving Expression by clicking the Edit
 icon.
icon.
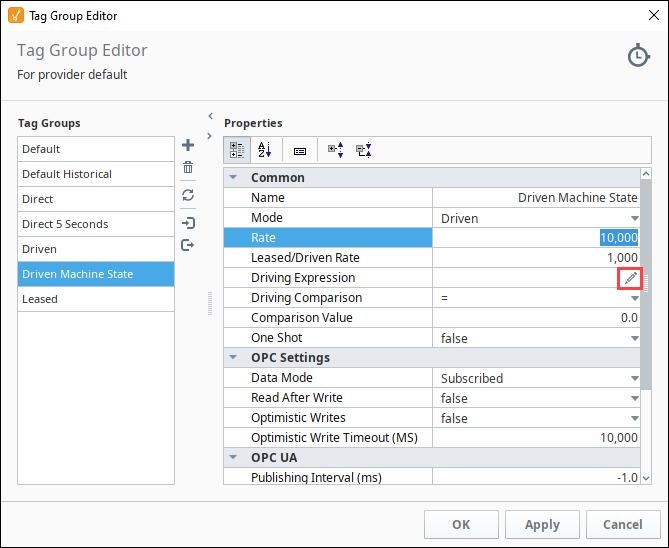
- This Tag Group executes based on the condition you set on the Driving Expression. Set the Driving Expression by clicking the Edit icon.
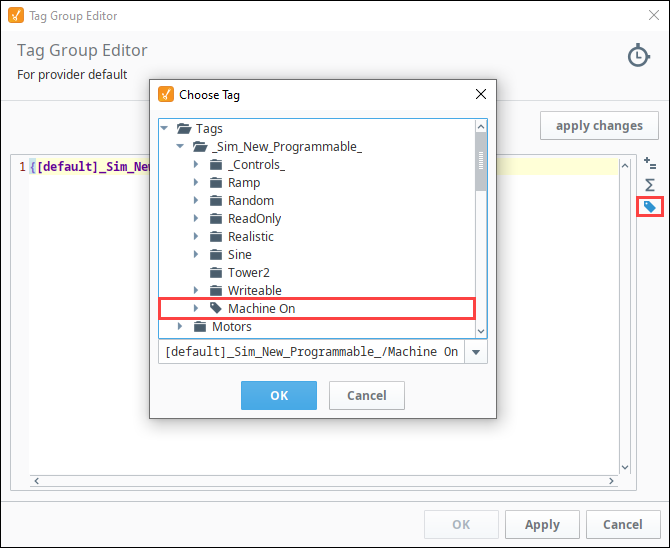
- Click the Tag
 icon and choose the Tag you want to set the condition on (i.e., Machine On).
 - Click OK on the popup and apply changes in the upper right of the Tag Group Editor.
- While still in the Tag Group Editor, set the following values:
- Driving Comparison: =
- Comparison Value: 1
- Click OK in the lower right of the Tag Group Editor.
- When the machine is on, it will use the Leased/Driven Rate (1 second). When the machine is off, it will use the Rate (10 seconds)
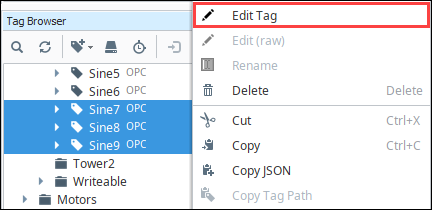
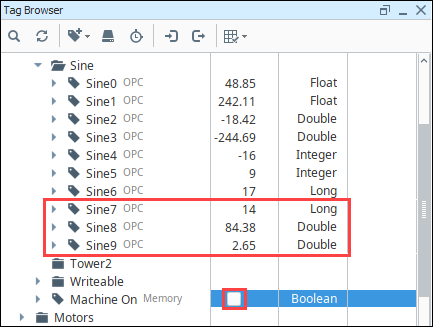
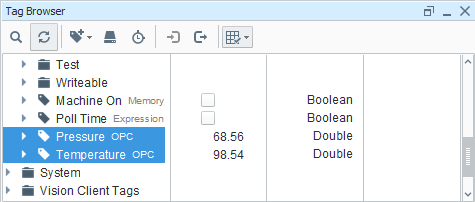
- Next, select all the Tags that you want to use for the Drive Machine State Tag Group. This example uses Sine7, Sine8, and Sine9 Tags.
- Right click on the selected Tags and choose Edit Tag.
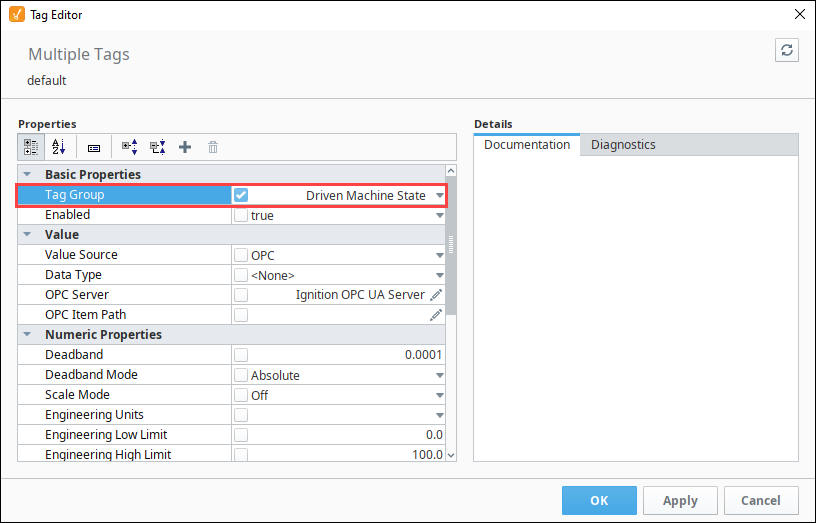
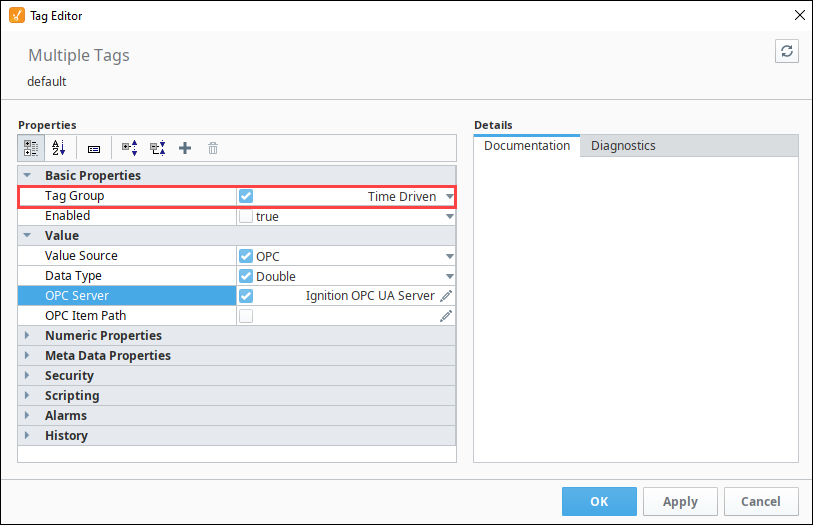
- The Tag Editor will open showing you are editing multiple Tags. From the Tag Group dropdown list, choose Drive Machine State, and click OK.
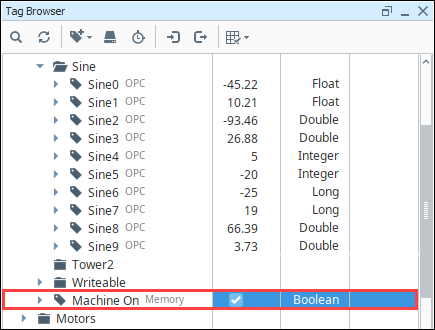
- Now let's turn the machine on. In the Tag Browser, mark the checkbox next to the Machine On Tag that we created earlier.
Now, when the machine is on, polling will be a at the 1 second rate for the Sine Tags. When the machine is off, polling will be at the 10 second rate for the Sine Tags. Test it by toggling the Machine On Tag on and off.
You can also set the Rate (slow rate) to a value of 0, which means polling is stopped when the condition is false. So for example, when the machine is off, you will see the Tags stay at the last known value.
Once the machine is turned back on, the Tags resume polling.
Driven Tag Group - Time of Day
Driven Tag Groups can be used as the polling rate for Tags to trigger at different rates at different times of the day. They can also be used as a one-shot event at a specific time of the day. You can accomplish this by setting the condition of the Driven Tag Group to be true at certain times of the day, and false at other times.
Keep in mind, that if you use a Driven Tag Group based on the time of day with a 0 Slow Rate for history, the Tag will only store history during those specified times.
Add a Driven Tag Group Based on the Time of Day
Let's add a Driven Tag Group that updates the Tags based on a time of day. We will use an Expression to drive the Tag Group. You can use the functions that are in the expression language to poll the PLC during the hours of 8am to 5pm.
-
In the Tag Browser, click on the Tag Groups
icon to open the Tag Group Editor. -
To create a new Tag Group, click on the Add
icon. -
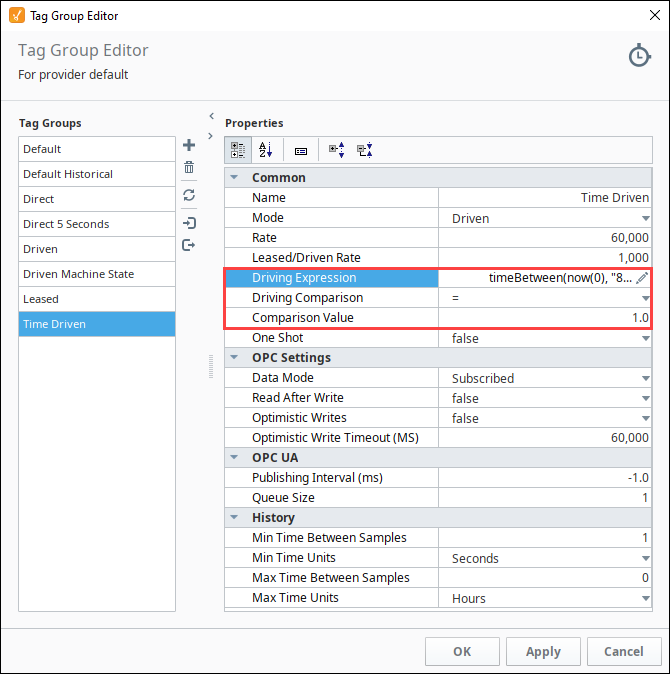
Enter the name for the Tag Group. In this example, we named it Time Driven, and set the Mode to Driven. This Tag Group executes based on the condition of the Driving Expression. In this example, we'll use the Poll Time Tag we created above.
-
Set the Rate to 60,000ms so it polls at a slow rate, and the Leased/Driven Rate to 1,000ms so it polls at a faster rate.
-
Enter the Driving Expression. Click on the Edit
icon, and copy and paste the following expression in the expression box, then click Apply Changes.timeBetween and Machine On expressiontimeBetween(now(0), "8:00:00 am", "5:00:00 pm")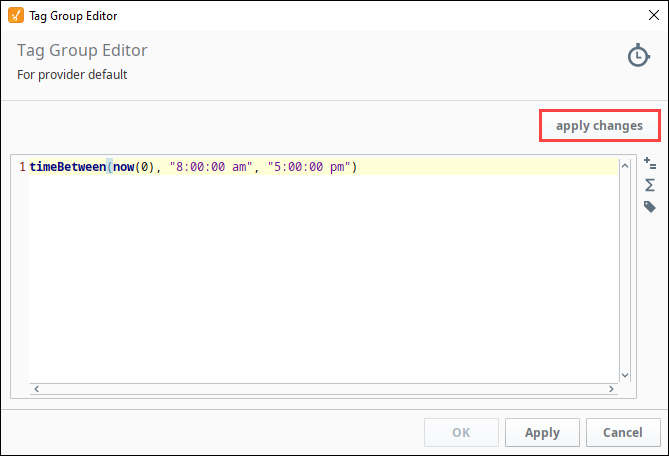
-
While still in the Tag Group Editor, set the following values:
- Driving Comparison: =
- Comparison Value: 1
-
Click OK.
-
Next, select all the Tags that you want to specify in the Tag Group (i.e., Pressure and Temperature). Right-click on the selected Tags, and choose Edit Tag.
-
The Tag Editor will open showing you are editing multiple Tags. To change the Tag Group, choose Time Driven from the dropdown, and click OK.
-
In the Tag Browser you can look at the Tags to see they are updating at the correct rate. Try adjusting the time range in your expression to change the rate of polling. When the driving conditions are true, that is the time between hours of 8am and 5pm, polling is at the Leased/Driven Rate of 1000 ms. When not, polling is stopped, and the last known value is displayed.