Security in Perspective
Security in Perspective is managed through Identity Providers (IdP). IdPs offers a way for users to log in to Ignition using credentials stored outside of Ignition. This level of security is set up through the Gateway. Setting up security is covered in the Security section of the User Manual.
Once you have an IdP set up with Security Levels, Security Level Rules, and User Grants you can utilize additional security features for the following items to further control user access:
- Perspective Sessions
- Perspective Views
- Event actions on Perspective components
Perspective Sessions Security
For each Project, you can set the security for an associated Perspective Session. When you select the security levels, you are granting any user with that security level access to the Perspective Session for that project.
-
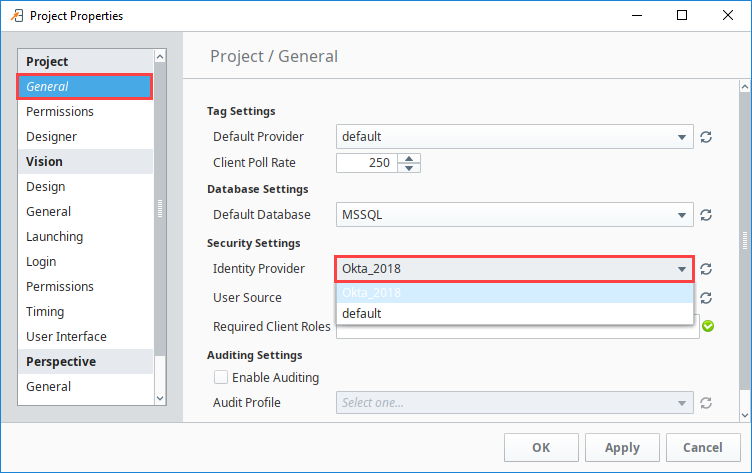
In the Designer, select the Project Properties on the Project menu.
-
Select Project > General.
-
In the Identity Provider field, use the dropdown to select the IdP you want to use or to select the default user source.
-
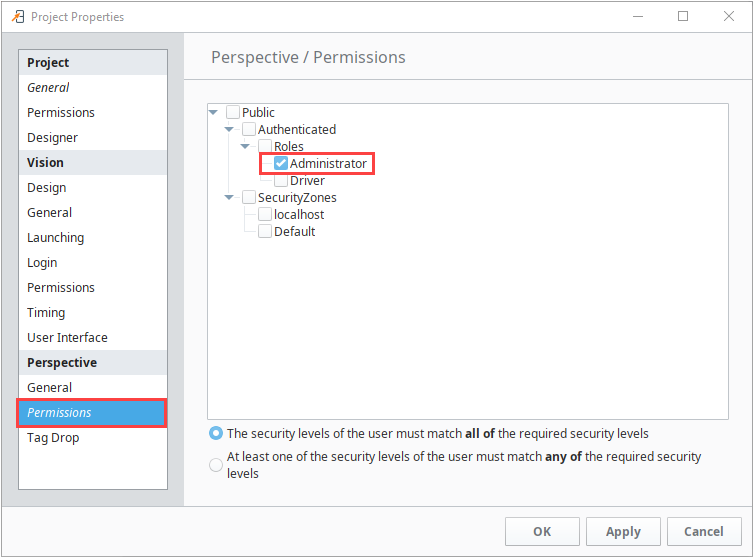
Scroll down and select Perspective > Permissions.
-
Expand the tree to view the available security levels.
-
Click the check box next to each of the security levels you want to grant access to for this project in a Perspective Session.
-
Click OK to save all Project Properties changes.
Perspective Views Security
You can set the security for an individual View in Perspective. When you select the security levels, you are granting any user with that access to the Perspective View for that project.
Note that you must have the IdP selected in Project Properties > Project General before any additional security can be applied to a View.
-
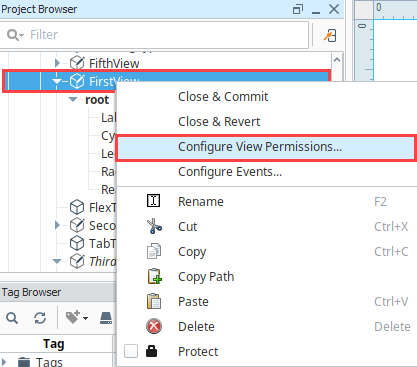
In the Project Browser, right-click on the View and select Configure View Permissions....
-
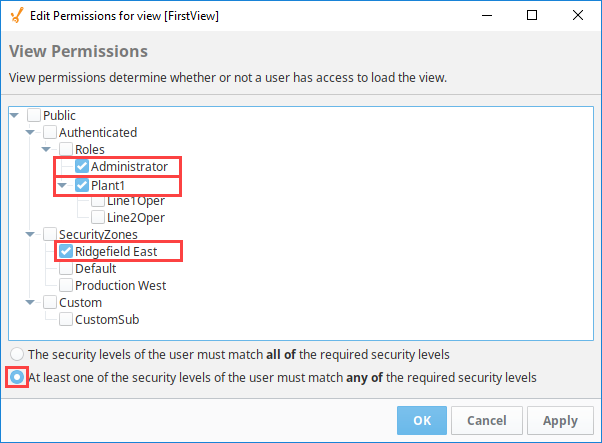
On the Edit Permissions screen, click the check box next to the Roles that will be able to access this View.
-
Click the check box next to the Security Zones that will be able to access this View.
-
Select one of the radio buttons at the bottom of the screen to indicate whether the user must match all of the required security levels you've checked or if matching at least one is enough.
In the example below, a user must have either the Administrator security level, Plant1 security level, or be in Ridgefield East to access this View.
-
Click OK to save the permissions for this View.
Event Actions on Perspective Components
All Perspective components can have event scripts. These are scripts that run on an action, such as when the user clicks with a mouse on a component. For more information about event scripts see Perspective scripting. Security can be configured on events. In the following example, we will set security for the action of clicking on a Button component in a Perspective View.
Before you begin, make sure you have an IdP selected in Project Properties > Project General.
-
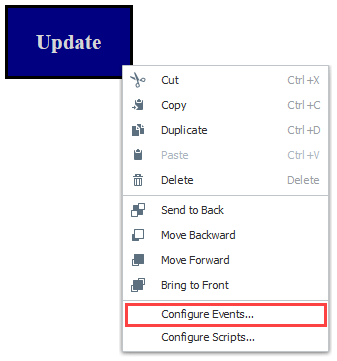
To add security to an event on a component, right-click on the Button component and select Configure Events....
-
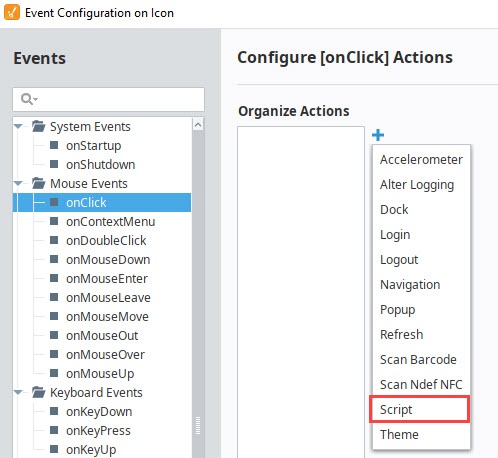
Choose Mouse Events > onClick in the Events Configuration screen.
-
Under Organize Actions, click the Add
 icon, then select Script from the list.
-
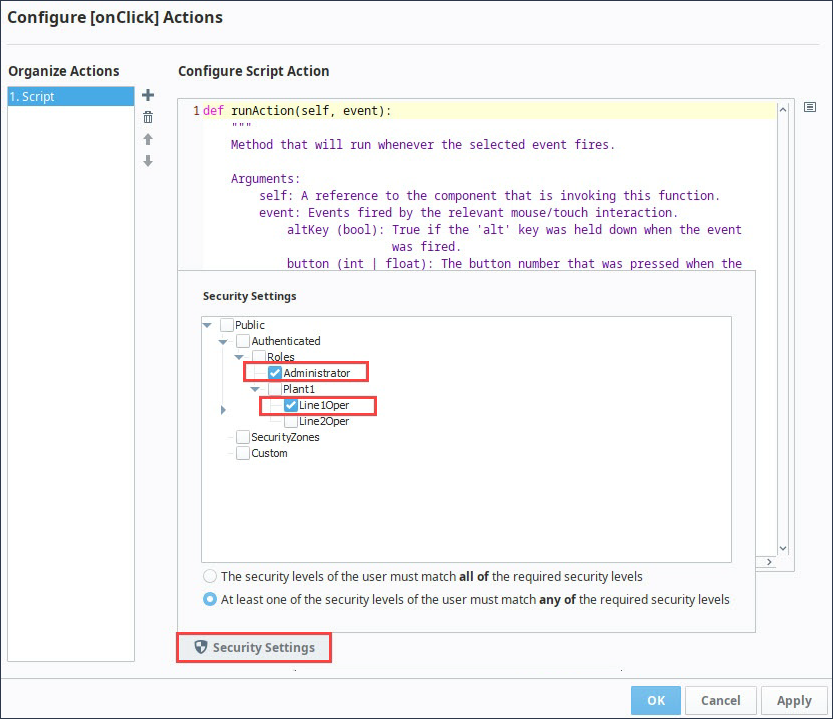
Click
 Security Settings near the bottom of the screen.
 -
Click the check box next to the security levels you want to grant access.
- In the example, we checked Administrator and Line1Oper for the security Roles. Then, we chose the requirement option that at least one of the security levels for the user must match for access. This means anyone with Administrator or Line1Oper security levels will have permission to run the script associated with the onClick event on this button.
-
Click
Security Settings again to close the window, then click OK to save changes.
Using Component Bindings to Indicate Authorization
Once component security settings have been configured, component property bindings can also be used to signal to users if they have access to a certain component. For example, if a component has an "Enabled" property that you want to toggle based on security levels, then you can apply one of the following approaches.
The resulting changes from these bindings serve only as visual indicators of the security settings. They do not impact the security that was already configured on the Gateway.
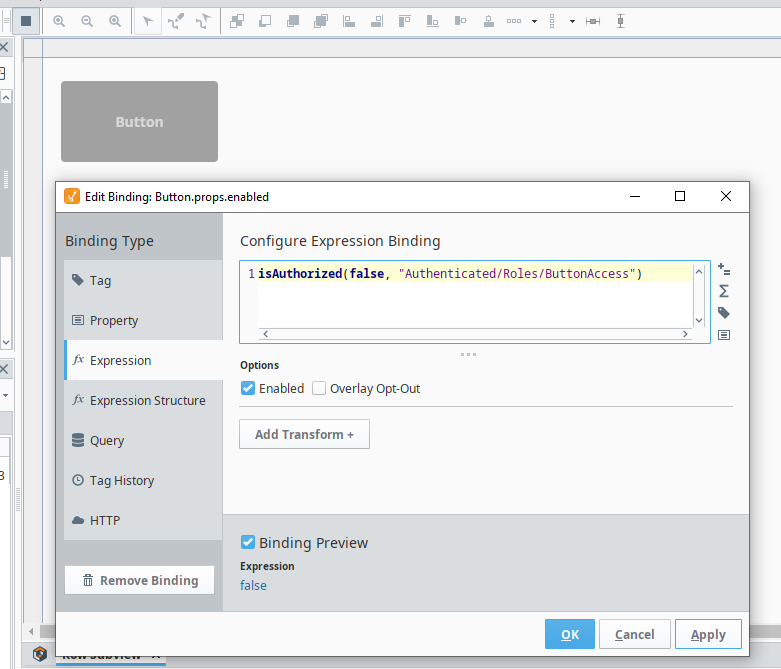
Using isAuthorized in an Expression
The simplest method involves configuring an expression binding that uses the isAuthorized function.
isAuthorized(false, "Authenticated/Roles/YourRoleGoesHere")
In the image below, an isAuthorized function Expression binding is configured on a Button's enabled property, which causes the property to change to false if a user doesn't have the specified security level. This has the additional benefit of preventing the onClick or onActionPerformed scripting event from triggering in cases where a user doesn't have the security level.
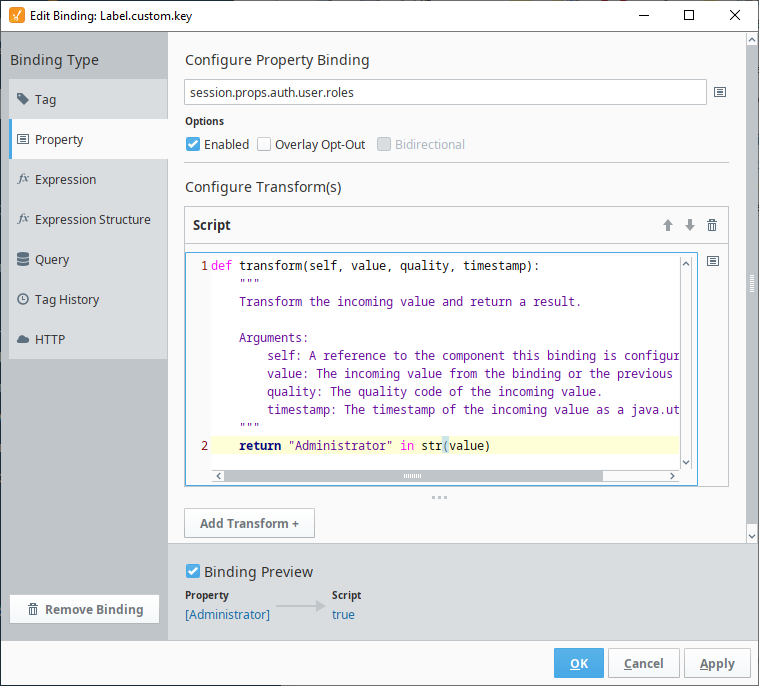
Using Session Props to Check Roles
Alternatively, a script transform can be used to examine the session.props.auth.user.roles property to determine if the current user has the desired role. In this case, we can configure a property binding to the roles session property, and use the following line in a script transform:
return "Administrator" in str(value)
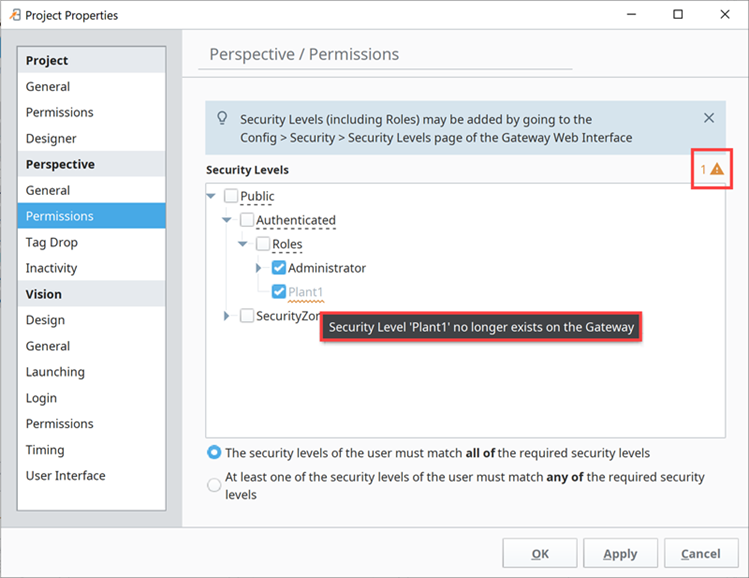
Deleted Security Level Indicators
Since security levels are set through the Gateway, it may not be immediately obvious in the Designer that a security level has been deleted. This can be checked by accessing the Project Properties window and navigating to Perspective > Permissions. In the example image below, the Plant1 role has been deleted. This is indicated by the security level, and any child levels, appearing grayed-out with a red warning underline. Hovering over the security level displays a tooltip informing the user the security level no longer exists on the Gateway. A warning indicator icon will also appear in the upper right-hand corner with the number of selected security levels that no longer exist. If you follow the security levels tree up to the parent levels, you'll notice affected levels include a dotted underline.
All warning indications are removed when deleted security levels are unchecked and new settings are saved. Additionally, the deleted security level will no longer be visible.
These security level indications are visible on the Event Configuration, Edit Permissions, and Tag Editor windows when applicable.