Security Levels
With Security Levels, you define a hierarchy for access inside a Perspective Session or Vision Client. This authorization system provides a way for you to map roles from an Identity Provider (IdP) to Ignition roles. Any IdP can be used to provide roles, and security levels are independent of the type of IdP being used. Any role from the IdP is automatically granted to the user as a role, but only roles in your Security Levels are available to the security screens in the Designer. You can also use the User Grants option to grant additional access for each user.
Security Levels are defined at the Gateway and they are arranged in a tree structure. Each child (nested) level of the tree inherits the security of its parent levels. There are four reserved Security Levels in the platform:
-
Public
-
Authenticated
-
Authenticated/Roles
-
Security Zones.
To access Security Levels, go to the Gateway Webpage under the Config tab, and choose Security > Security Levels.
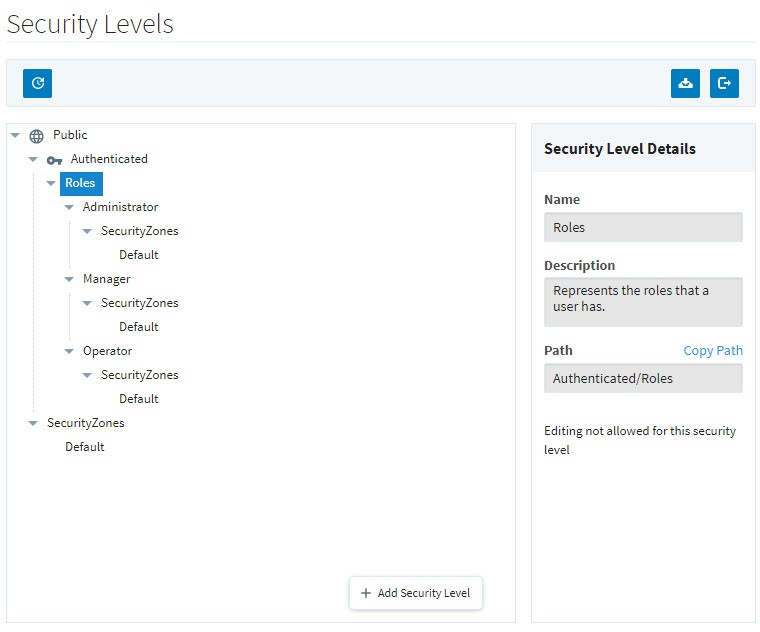
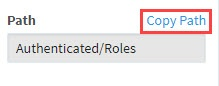
You may now copy the selected Security Level Path to your clipboard by clicking Copy Path in the Security Level Details panel:
Adding or modifying a role in the Security Levels section of the Gateway will not impact or change roles located in the Users, Roles section, as they are separate entities within Ignition. You will need to update the roles in the Users, Roles section separately from the roles in Security Levels.
Reserved Security Levels
The reserved security levels are mostly created for you, and have special rules that determine when a user is granted that level. They can't be renamed or deleted.
Public
All users are always granted the Public security level, even if they are not authenticated (logged in). Public security level indicates open access and the least amount of security. A session that only has the Public security level is not authenticated. This is similar to being a guest or anonymous. Unless another security level is required, guest access will be allowed. The Public security level is the ancestor of all other security levels in the hierarchy.
Authenticated
The Authenticated Security Level is a child of the Public Security Level. If a session has authenticated against the configured IdP successfully, the Authenticated Security Level is granted. Users are required to be logged in in order to have access to this level.
Authenticated/Roles
The Roles level is a special level which itself has no special rules, but it acts as a parent placeholder for potential roles returned from the IdP. This particular level is not configurable; however there can be levels added underneath the Roles level as children. You can only add one level of children to the Roles Security Level, but Custom Roles can be nested as deeply as you want. These levels should correspond to the names of roles that would be expected from the IdP. If the IdP provides role information, these roles are automatically mapped to the child security levels underneath Authenticated/Roles. The names of the roles must match exactly for them to be correctly mapped to.
For example, if you authenticate against the Ignition IdP configured to delegate to the Internal user source, and your user was granted the roles “A”, and “B”, you would have (at a minimum) the following security levels granted to you:
- Public
- Authenticated
- Roles
- A
- B
- Roles
- Authenticated
Only roles under the special Authenticated/Roles level can be used with the Classic Authentication Strategy.
SecurityZones
The SecurityZones level is another special placeholder level that itself has no rules but is a parent for all of the Security Zones on the Gateway. Security Zones are automatically pulled in from the Gateway. A Security Zone is a list of Gateways, Computers, or IP addresses that are defined and grouped together. This group is a zone on the Gateway Network, which can have additional policies and restrictions placed on it. Security Zones provide a way to bridge the IdP method of permissions with location-based permission modeling. You cannot add, edit, or remove the SecurityZones node or any node in the SecurityZones sub-tree.
Custom Security Levels
Custom Security Levels can be added to almost anywhere within the tree. When these levels are granted to a user is determined by the Security Level Rules, which can pull information from the IdP, Security Zones, and even tags. The placement of custom Security Levels can affect when they may be potentially granted to a user. Any custom levels set under the Public level, but not within Authenticated, do not need to have a user authenticate against the IdP to be granted to a user. However, custom levels within Authenticated do need to have the user authenticate to be granted to the user, even if the rule for that level does not use any of the IdP attributes.
Custom Security Levels do not work with the Classic Authentication Strategy.
Add a New Security Level
-
From the Gateway Webpage Config tab, click on Security > Security Levels.
-
In the Security Level tree, select the level that will be a parent for the new level.
-
Click the Add Security Level button.

-
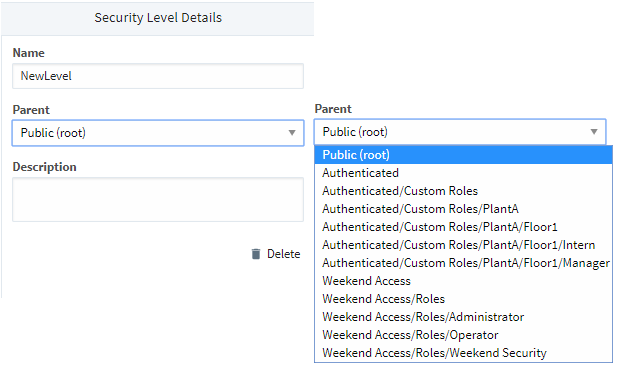
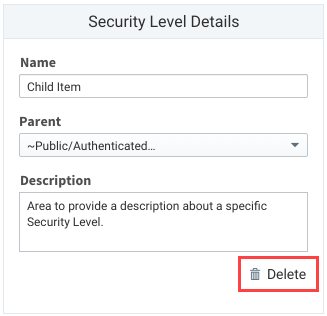
In the Security Level Details screen area, enter the Name for the level.
noteSecurity Level names within the same parent must be unique.
-
The path for the parent is filled in automatically. Use the Parent dropdown list if you want to change the parent for this new level.
-
Add a Description for the new level (optional).
-
If you make changes to Security Levels, but decide not to save them, you can use the Reset button
 to return the tree view to its currently saved configuration.
 -
To save the changes, press Save.
Edit a Security Level
-
From the Gateway Webpage Config section, click on Security > Security Levels.
-
In the Security Level Tree, select the level that you want to edit.
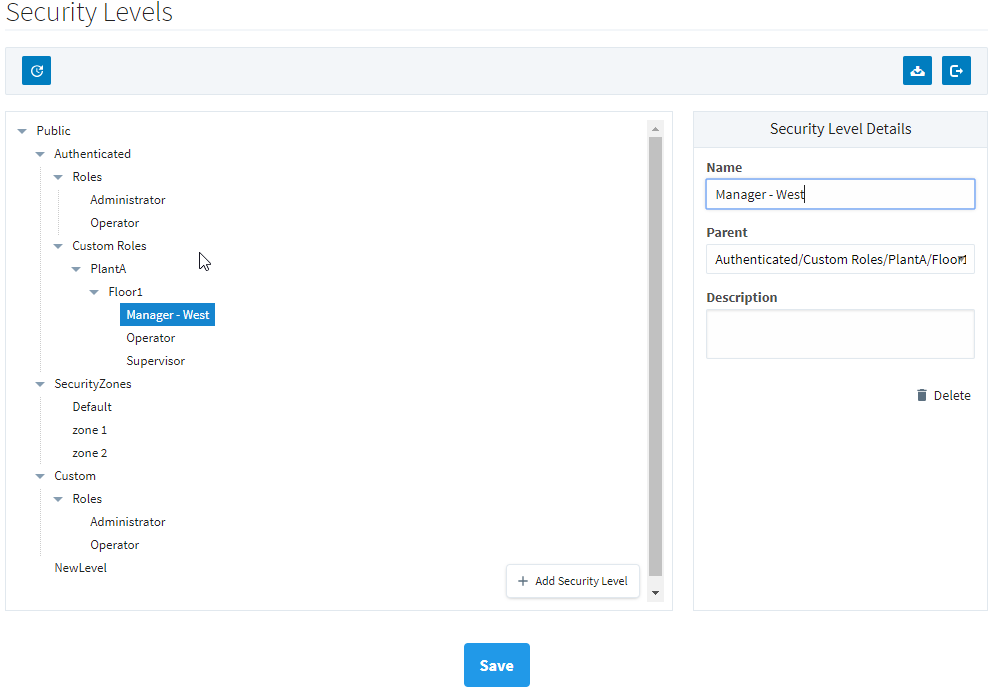
-
Make the desired changes in the Security Levels Details screen area.
-
If you make changes to Security Levels, but decide not to save them, you can use the Reset button
to return the tree view to its currently saved configuration. -
To save the changes, click the Save button.
Delete a Security Level
When you delete a Security Level, all children under that level will also be deleted.
-
From the Gateway Webpage Config tab, click on Security > Security Levels.
-
In the Security Level tree, select the level that you want to delete.
-
Click the Delete button on the Security Level Details screen.
-
In the confirmation box, click Delete to confirm the delete.
noteNew in 8.1.25Deleted security levels will need to be unchecked in the Designer permissions configurations with new settings saved to avoid permission errors. Warning indicators for selected security levels that no longer exist will be visible on the Project Properties, Event Configuration, Edit Permissions, and Tag Editor windows when applicable.
Import a Security Levels Configuration
-
From the Gateway webpage Config tab, click on Security > Security Levels.
-
Click the Import icon
 .
. -
Choose Import on the confirmation screen.

-
Choose a security levels configuration file to import.
-
Click Open.
Export a Security Levels Configuration
-
From the Gateway Webpage Config tab, choose Security > Security Levels.
-
Click the Export icon
 .
. -
The security levels configuration will be saved as a .json file with a unique number, for example:
