Popup Views
A Popup View typically floats on top of the primary view in a Perspective Session, and it can be resized and moved around at the user's discretion. Popup Views are great for displaying additional information about an item on the primary view. Popup Views are often opened by components such as a Button on another view. When a user doesn't need to have the additional information displayed on the screen, it can be closed by clicking the Button again or simply closing the view.
Title Bars on Popups
When called as a popup, a built-in title bar will be applied to the view if any of the following conditions have been met via the Popup Action configuration, or the corresponding parameters have been set on the appropriate system function, such as system.perspective.togglePopup:
- A non-empty string title is provided (the
titleparameter on scripting functions) - The popup is marked as with a "close" icon, meaning the "show close Icon" setting is enabled (the
showCloseIconscripting parameter) - The popup is marked as "Draggable", (the
draggablescripting parameter).
Configuring a Popup View
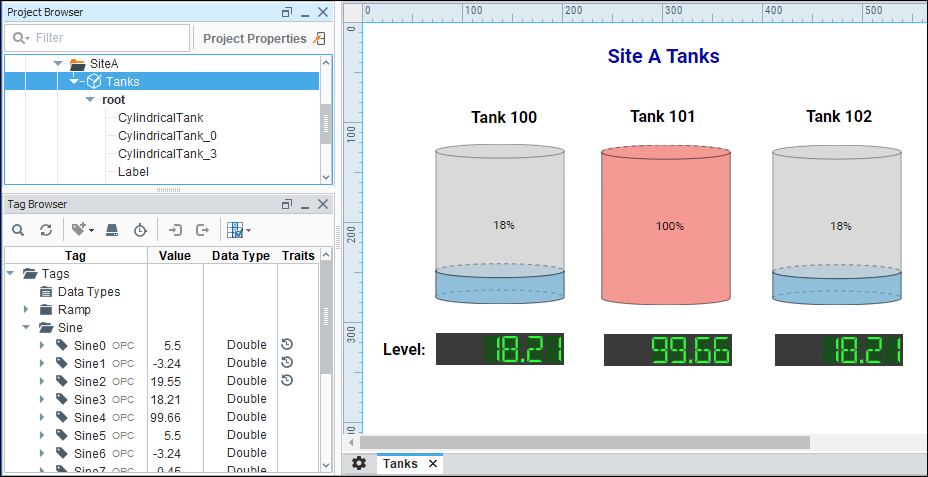
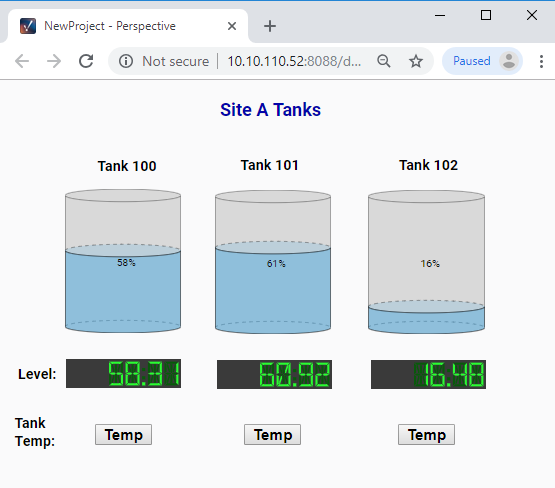
Let's assume you already have a primary view that contains some Tanks. At a glance, an operator can view some basic information on all the Tanks at a particular site, but they cannot see the additional information that is being collected that is unique to each Tank. The perfect way to display that unique information is to use a Popup View for each Tank.
Here is an example of how to use a Button component to set up a popup view for displaying the current tank temperature and history for the last 24 hours of the selected tank.
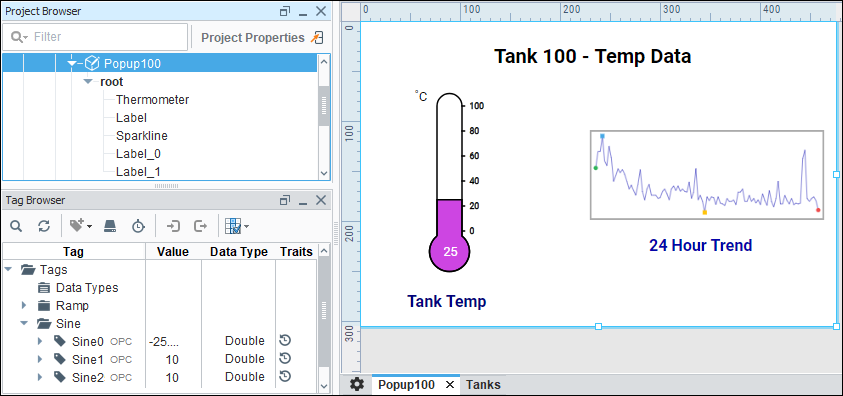
- First create a new view, and give it a name. You many want to assign a name that you can easily recognize as a Popup View and the Tank ID number. This example uses the name Popup100.
- Next add some components to the Popup View. In this example, a Thermometer, Sparkline, and Label components were added.
To display the additional data for all Tanks, you will need to create a Popup View for each Tank. You can use the Flex Repeater component to easily create multiple instances of components for display in another view each having the same look, feel, and functionality of the original components.
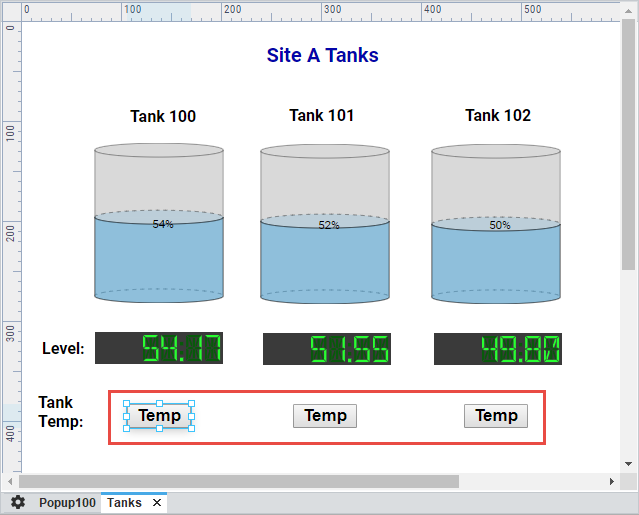
- Now, let's go back to the primary view and add a Button component for each of the Tanks and label them 'Temp'.
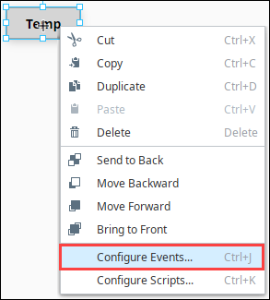
- Right-click on the Temp button for Tank 100, and select Configure Events.
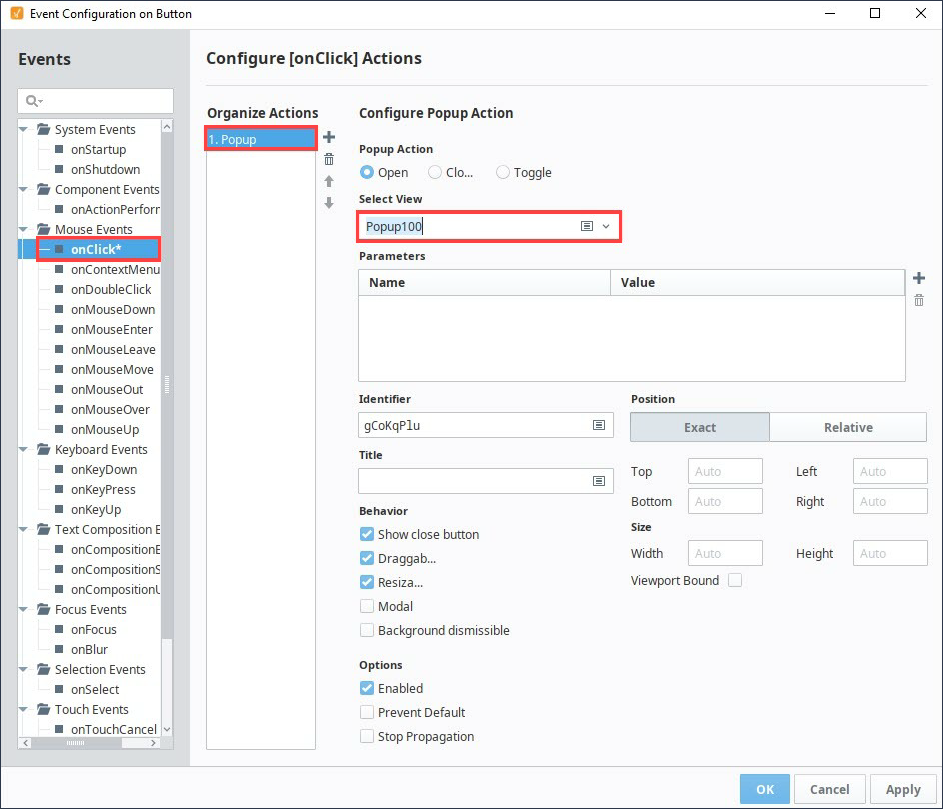
- The Event Configuration window opens. Under Events, select onClick.
- Under Organize Actions, click the Add
 icon to choose the appropriate action for the Temp button. Since we are opening a Popup View, select Popup from the dropdown list.
 - You have several Popup Actions to choose from.
- Open - Opens the Popup View.
- Close - Closes the Popup View.
- Toggle - Opens and closes the Popup View. Select Toggle so you can use the Temp button to both open and close the Popup View for the specified tank.
- In the Configure Popup Action area under Select View, select your Popup View that you created in Step 1. This example uses Tank 100 and the Popup View is 'Popup100'.
- You also have some additional settings for customizing the behavior and appearance of your popup. Some of these options are set by default, and others you can customize. When you're finished, click OK.
- Repeat Steps 4 through 9 for Tank 101 and Tank 102.
- Save your project.
- Now let's see how your Popup View works in a Perspective Session. While in the Designer, go to the top menubar and click Tools > Launch Perspective > Launch Session.
- Click on the Temp button for Tank 100. You'll notice Tank 100's Popup View will open displaying its Temp Data. You can drag the Popup View around the screen or even change its size.
- To close the Popup View, click either the Temp button, or click the Close
 icon in the upper right corner of the Popup view.
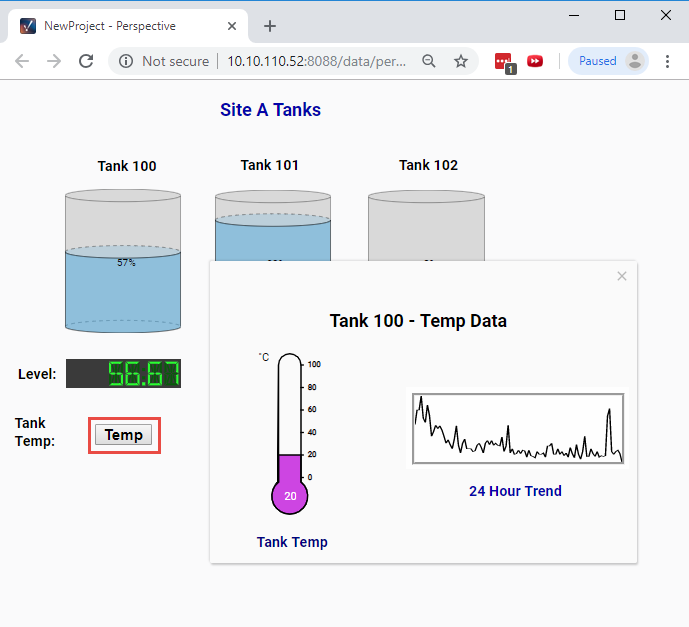
Configuring a Parameterized Popup View
It is often useful to pass information to a popup view as it is being opened. The popup can use this information in its design, usually to make it dynamic in some way. For this example, we will build a dynamic message box. We will have a message box view which will accept a parameter value, the message to display.
- Create a new popup view, and name it Message Box. We can use the Coordinate root container type for this example. No page URL is required.
- Add a Label component to this View.
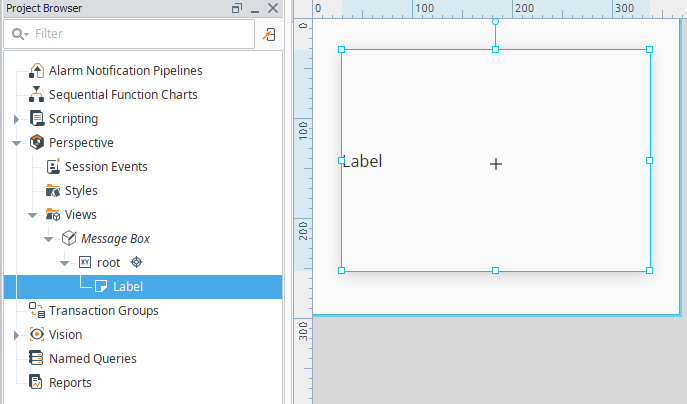
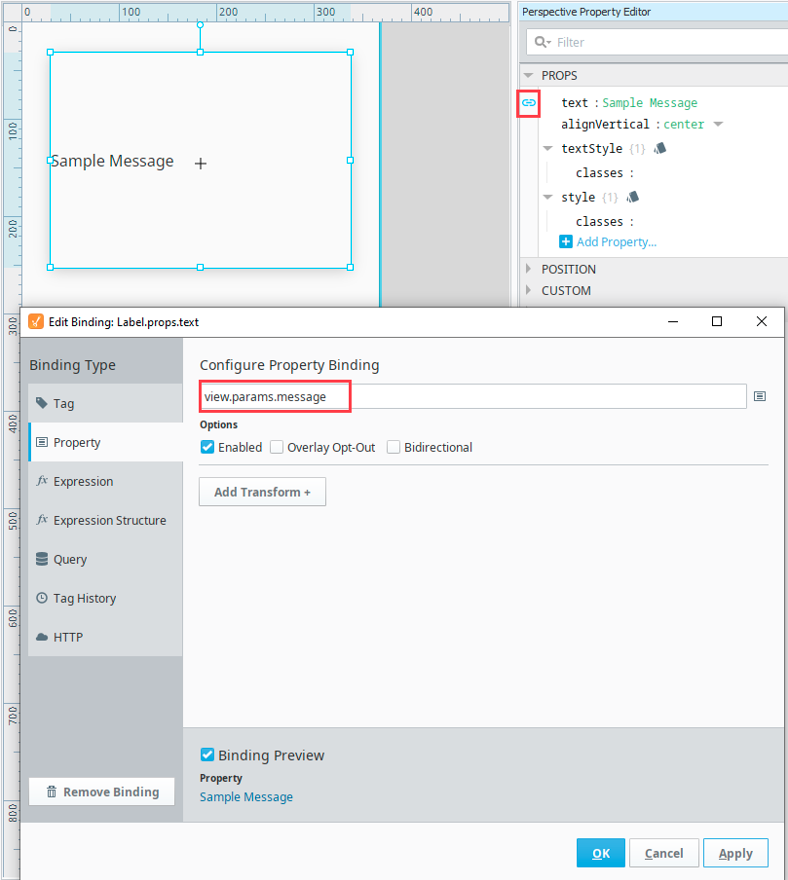
- Select the Message Box view from your Project Browser, and from the Property Editor, define a new value parameter named "message" with a default value of "Sample Message."
- Bind the Label component to our newly created view parameter.
Our popup is now ready to be used.
Next we have to trigger this popup to open, passing the appropriate parameter value. You can use a Popup Action from any Component Event like in the previous example. The only difference will be that now you are passing in a value for the Message Box view's message parameter. Pressing the + button on the upper right-hand corner of the Parameters table will allow you to pass in a value for the Message Box's message parameter. In this example, we are passing the popup text property value of a simple Text Field component.
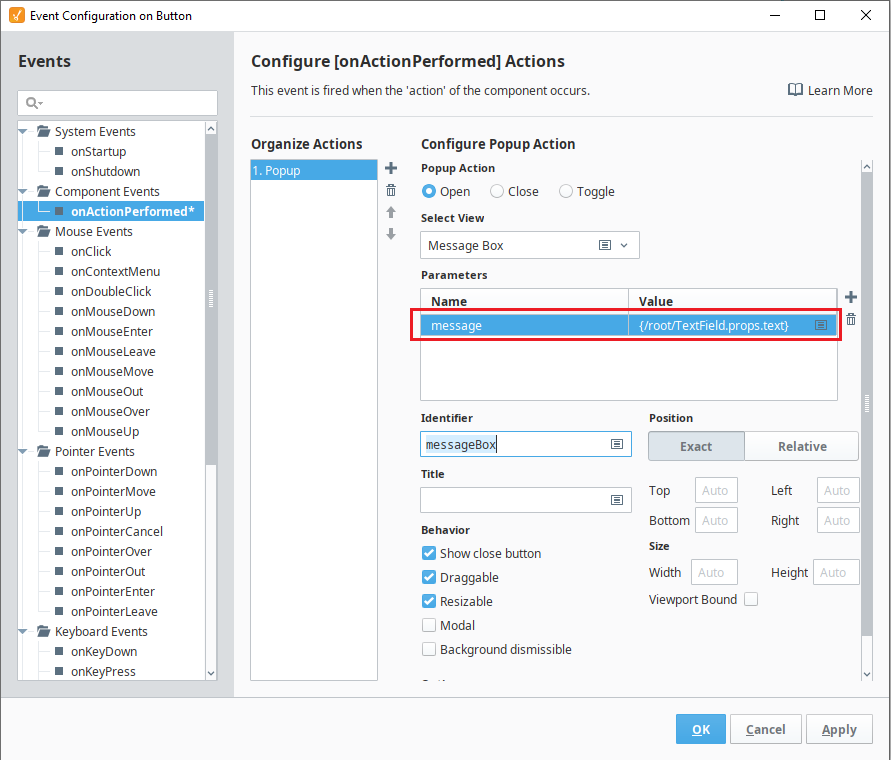
The "messageBox" identifier is the string that specifies a unique popup identity. If you want to close this Message Box popup from a popup action, you'll need to supply the identifier that was used to open it.
It is also possible to trigger the opening of the popup using scripting through the use of the system.perspective.openPopup()
system.perspective.openPopup("messageBox",'Popups/MessageBox', params = {'message':self.getSibling("TextField").props.text})