Perspective - Custom Controls Example
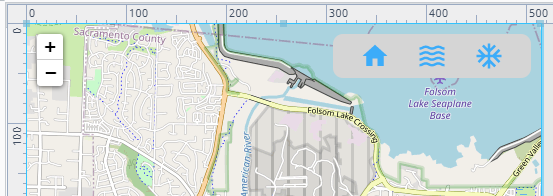
In this example, we'll set up three custom controls on a map component. The controls will be icons in the top right corner. When a user clicks on the home icon, the map will return to its default settings. When they click on the waves icon, the map navigates to the big island of Hawaii. When the snowflake icon is clicked, the map navigates to the Sierra Mountain range near South Lake Tahoe California.
-
Create a folder under Views called Components.
-
Next we'll create the view that will have the custom controls. In the Components folder, create a flex view called MapLocations. The MapLocations view will be embedded directly into the map component, and will provide some icons that users can click on to modify the map.
-
Set the Direction to "Row", and Justify to "Space Evenly".
-
You'll want to resize MapLocations so that it's close to the size you'd like to see it. Using the guides in the Designer, we'll set the width to about 200px and the height to about 50px.
-
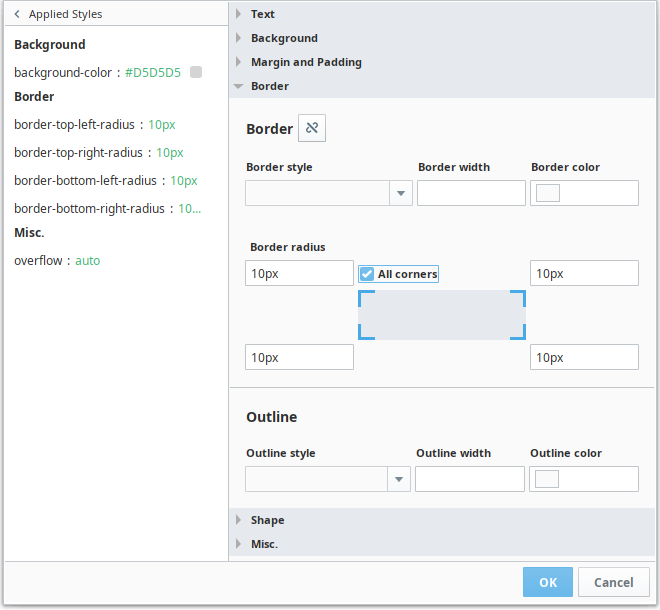
To help the controls stand out from the map, let's give them a background. Select the root container, open the Style Editor, and apply the following changes:
-
backgroundColor: #D5D5D5
-
BoarderRadius: Set to 10px on each corner
-
-
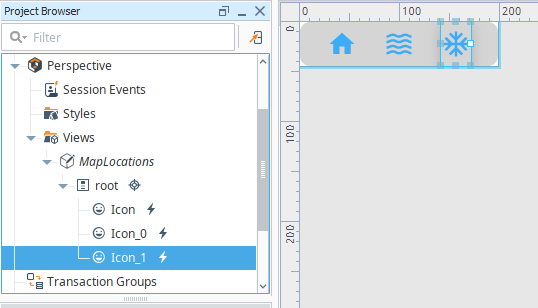
Drag an icon component onto the view.
- Set the following properties for the icon:
- color: #3CACF9
- path: material/home
- style: Open the style editor. Under Misc, set Cursor to "Pointer"
- color: #3CACF9
- Right-click on the icon and select Configure Events.
- Select the Mouse Events, onClick event.
- Click the Add
 icon and select the Script action:
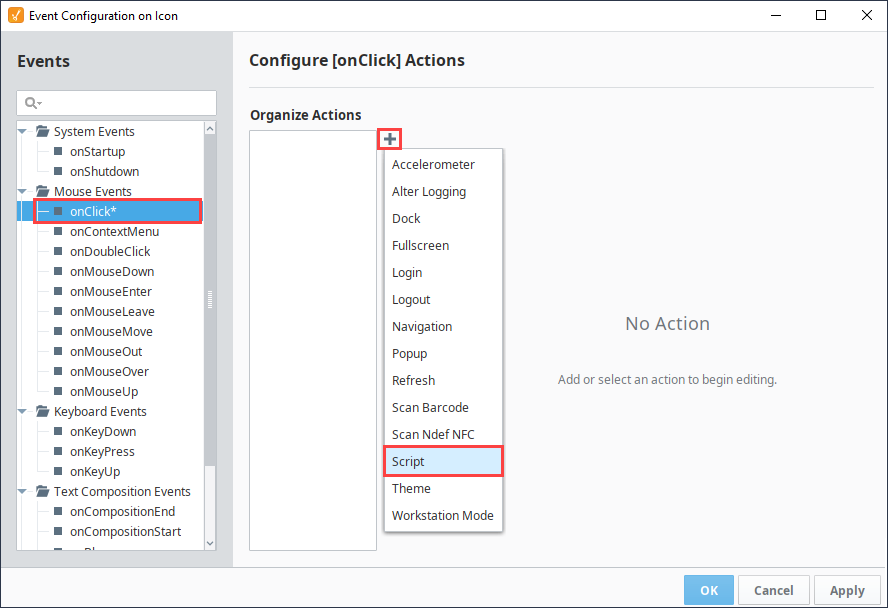
- In the Configure Script Action window, scroll down to the second line and enter the following:
system.perspective.sendMessage("NavigateMap", payload = { "lat": 38.660867, "lng": -121.159728, "zoom": 13 }, scope = "session")The script above will attempt to invoke a message handler named "NavigateMap", and pass some coordinates to it. At this point, we have not configured NavigateMap yet. We will do so in a later step.
- Click OK to save the script.
- Next, duplicate the icon. We'll configure this icon to represent a different location. Select the first icon, copy it, and paste it. Make the following property change to it:
- path : material/ waves
- Right-click on the second icon and select Configure Events.
- Select the Mouse Events, onClick event.
- There should already be an action defined on this event, since our copy also has the script we wrote earlier. Select the script action.
- In the Configure Script Action window, scroll down to the second line and replace the "lat" and "lng" values in the payload with the following:
- lat: 19.6089562306
- lng: 155.385131836The script should look like the following:
system.perspective.sendMessage("NavigateMap", payload = { "lat": 19.6089562306, "lng": -155.385131836, "zoom": 13 }, scope = "session") - lat: 19.6089562306
- Click OK to save the script.
- Next, duplicate either of the icons again, and change the following property:
- path : material/ac_unit
- Right-click on the third icon and select Configure Events.
- Select the Mouse Events, onClick event.
- Select the Script action.
- In the Configure Script Action window, scroll down to the second line and replace the "lat" and "lng" values in the payload with the following:
- lat: 38.8665777761
- lng: -119.848823547The script should look like the following:
system.perspective.sendMessage("NavigateMap", payload = { "lat": 38.8665777761, "lng": -119.848823547 }, scope = "session") - lat: 38.8665777761
- Click OK to save the script.
- Set the following properties for the icon:
-
Next we'll set up the view with the Map component. In the Components folder, create a new Flex view and name it Map.
-
Drag a Map component onto the view.
-
In the Perspective Property editor, set position.grow on the map to 1, so the map takes up all available space.
-
Also in the Perspective Property editor, expand the props.customControls property.
-
Click the Add
 icon to add an array element.
 -
For the props.customControls.0 properties, set the following:
- enabled: true
- path: Components/MapLocations
- position: top-rightYou'll now see the icons from the MapLocations view appear in the upper right corner of the Map component.
- enabled: true
-
Next, we need to configure a message handler on the Map, so when our icons the map will respond. With the Map component selected, right-click and select Configure Scripts.
-
Double click on Add handler to add a new message handler.
-
Set the Message Type to the handler name we used in the icon scripts: NavigateMap.
-
Set Listen Scopes to only "Session".
-
Type the following script:
self.panTo(payload)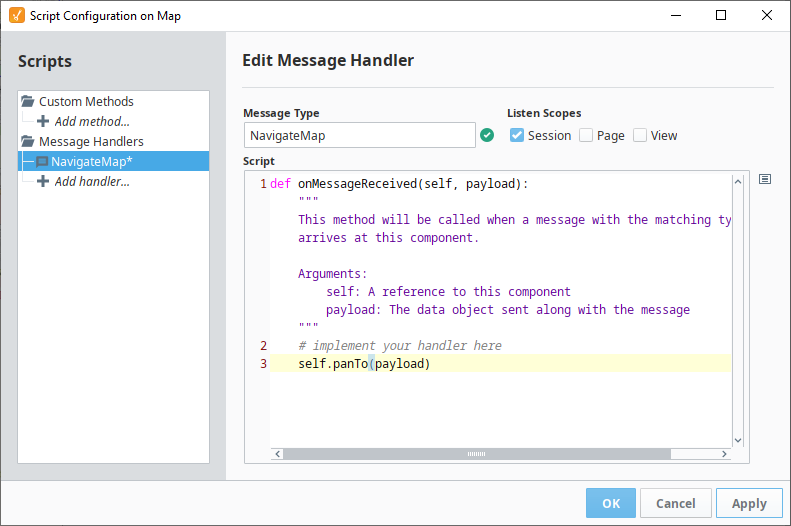
-
Click OK to commit the script.
-
Save your project.
-
Put your project into Preview mode and test it out. Click each icon and see how the location on the Map changes.