OpenID Connect 1.0 Example
This section provides an example of how to connect an Identity Provider that is using the OpenID Connect 1.0 protocol. This example uses the Okta IdP service. Your IdP vendor may differ and the specific links will differ.
Prerequisites
Before you begin configuring Ignition there are some preliminary requirements that need to be done outside of Ignition:
-
A configured remote IdP (Okta in this example)
-
The metadata file specific to your IdP
-
The scope data specific to your IdP
-
Login credentials to use as a test
Configured IdP
An IT department is usually the one to set up and configure a remote IdP. You need a configured remote IdP that is compatible with OpenID Connect 1.0. protocol. At minimum there needs to be an account set up with the IdP, users added to the IdP account, and applications added to the IdP.
Metadata File
You will need the metadata file specific to your IdP. This document defines how to communicate with the IdP. It is usually a web page that allows the metadata file to be exported to a JSON file. Often it is a URL that ends with “.well-known/openid-configuration”.
You will need the URL link to this page or a JSON export of this page. For example, if your IdP user login URL is something like this:
Then the metadata import URL may look like something like this:
Here is an example of part of a metadata file for Okta. Notice that the URL link has "/.well-known/openid-configuration" at the end and is very similar to the login URL. It is recommended to use the URL specific to your IdP. Your IT department may choose to export this JSON file of this page and provide it to you. Either option will work.
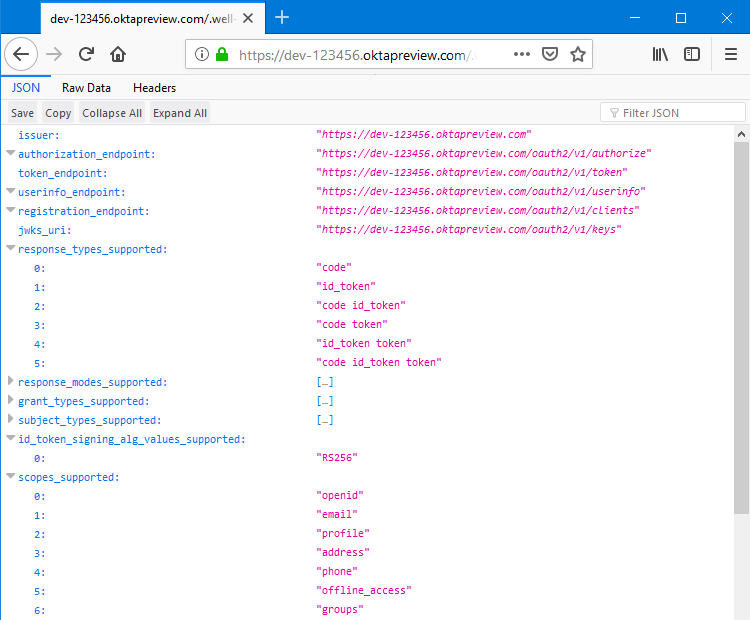
It is recommended to use the URL specific to your IdP. Your IT dept. may choose to export this JSON file of this page and provide it to you. Either option will work.
Scope Data
When a user is verified by the IdP a lot of the user specific data is not returned in the response file by default (i.e., username, email, firstname, lastname, etc). This user specific data is called the scope, and it can be returned if the Scope section of the Ignition Gateway is configured. The list of available scope definitions may be available from your IT deptartment or available from the developer documentation of the IdP you are using.
For this Okta example, the scope data is in the developer notes at https://developer.okta.com/docs/api/resources/oidc#scope-dependent-claims-not-always-returned
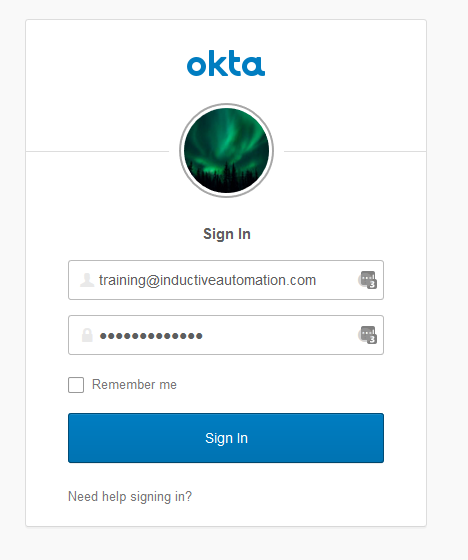
Test Login Credentials
You need an account specific to the IdP for testing purposes (Okta in this example). To test and verify the IdP account, login to your IdP. For our example, the Okta login page is shown here:
Configure Ignition Gateway
-
On the Gateway Webpage, click on the Config tab. You will need to log in if you aren't already.
-
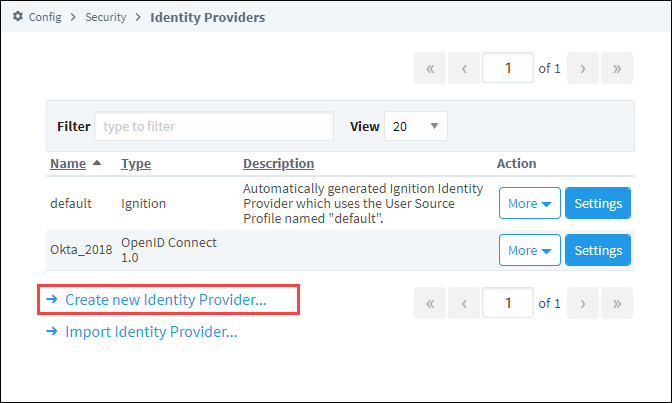
Under the Security section, click on Identity Providers. The Identity Providers screen is displayed. This screen will list all IdPs that have been configured. You can filter by name or adjust the number of IdPs displayed per page in the view.

-
Click on the Create a New Identity Provider... link.
-
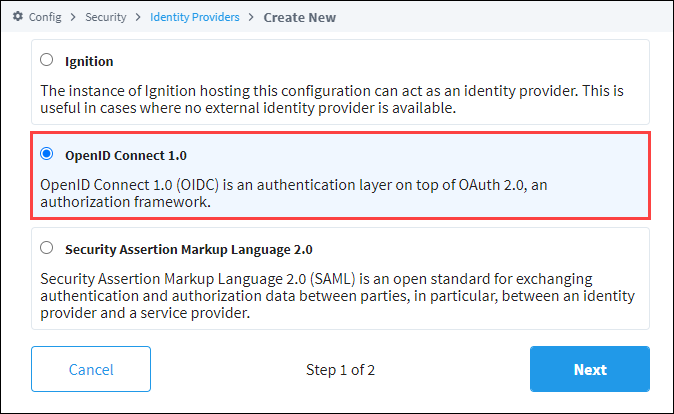
Select the OpenID Connect 1.0 option and click Next.
-
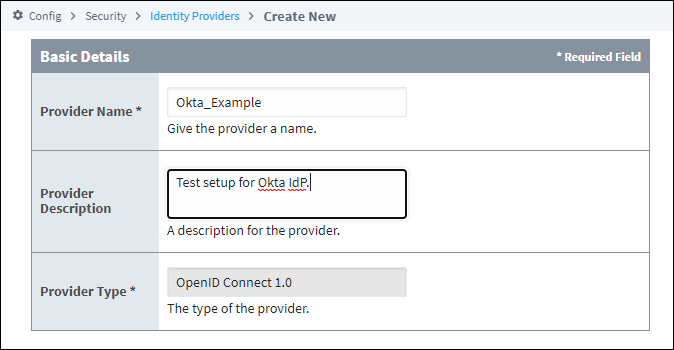
On the Basic Details screen, provide an Provider Name. You can also add an Provider Description if desired. The Provider Type field will fill in automatically from the previous screen.
-
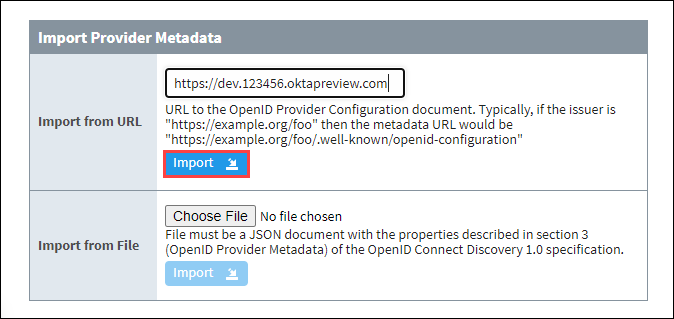
The next section is Import Provider Metadata. In the Import from URL section, enter in the URL from earlier that shows the “.well-known/openid-configuration” link specific to your IdP. You can also import a file below if it was provided by your IT department.
-
Click on the Import button.
-
Ignition will now generate a URI redirect address for your Ignition server. It is listed just below the “Import Provider Metadata” area of the configuration page. In our example it is
http://localhost:8088/data/federate/callback/oidc. You need to provide this URI to your IdP (usually this means giving it to your IT department).
The URI should be a web address that is accessible from the end user's web browser.

- Once you've given your IT department the redirect address, they can add your Ignition server as an application to the IdP.
Once they have done this, they can provide you with a “Client ID” and “Client Secret”. This is needed for the Ignition Gateway to properly communicate with the IdP.
The IdP can use the same redirect address for the Login, Logout, and Initiate Login.
-
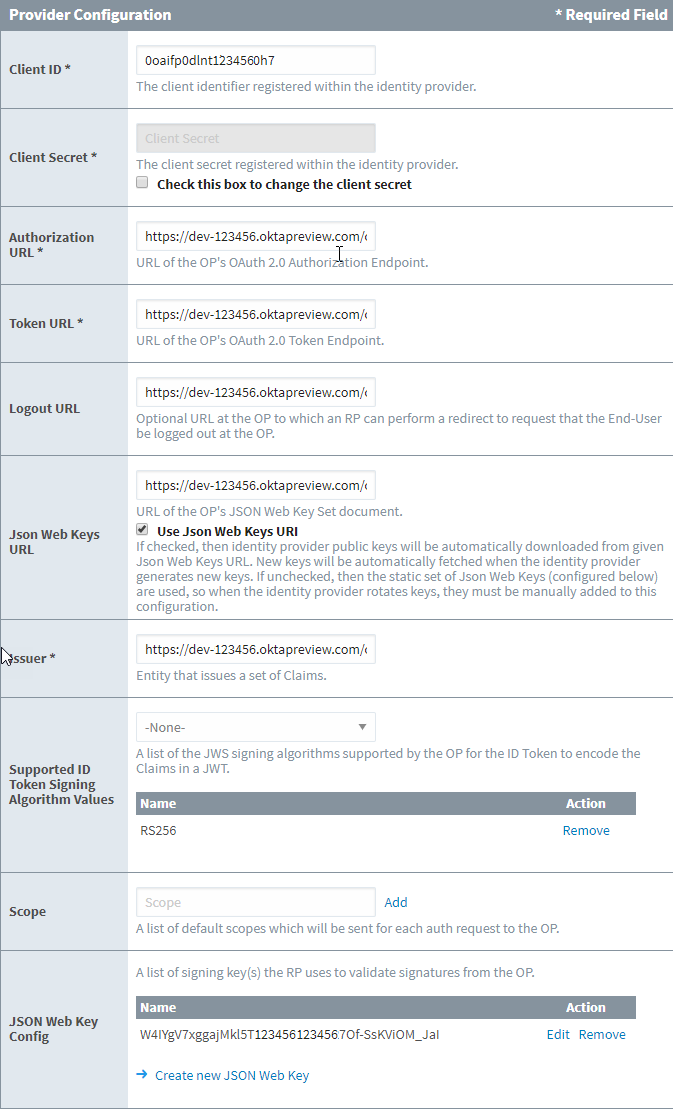
The next section is Provider Configuration. Most of the fields below should now be filled in when you imported the IdP Metadata. Fill in the Client ID and Client Secret fields with the information obtained from your IdP (or IT department). If you don't know them yet, you can put in bogus values for now and edit them later once the correct values are provided to you.
-
Providing scope is optional. These fields are specific to your IdP, and you may need to find the developer documentation specific to your IdP.
Enter "email" in the Scope field and press the Add button. Repeat for each scope you want returned. For our example, the list of available scopes is in the Okta developer documentation: https://developer.okta.com/docs/api/resources/oidc#scope-dependent-claims-not-always-returned.

-
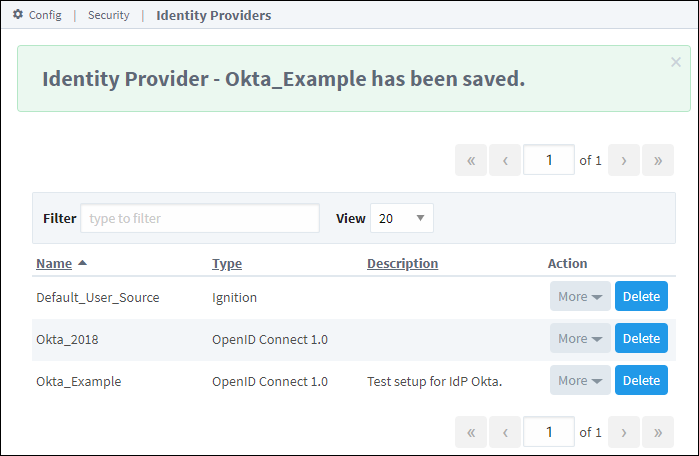
Press the Save button at the bottom right of the page. You'll see a confirmation message.
-
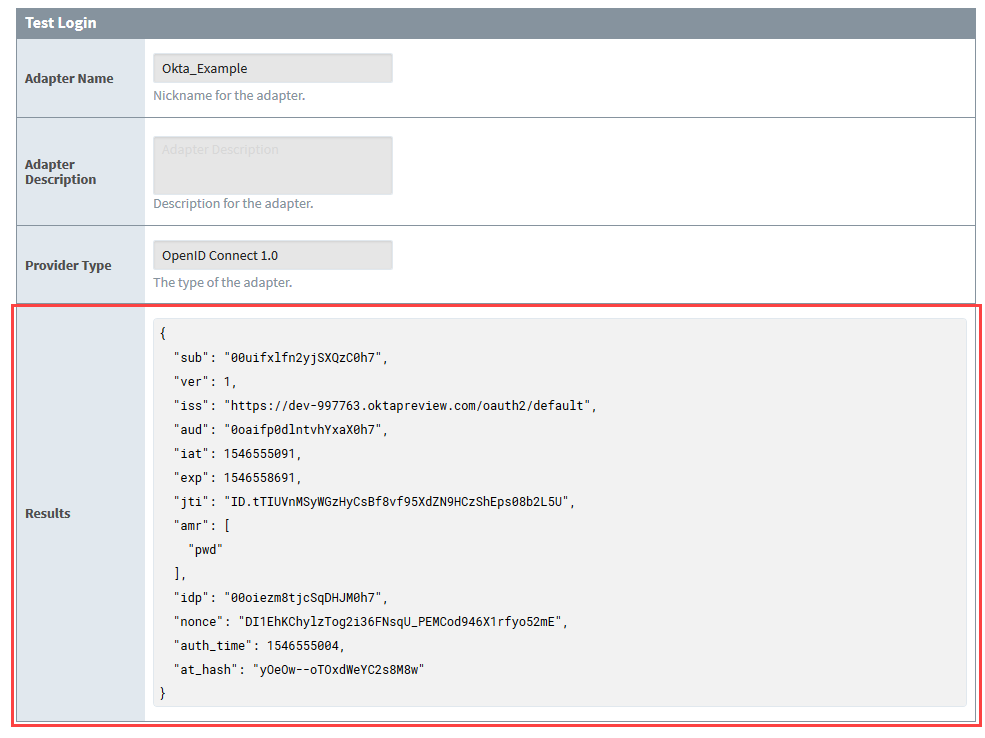
The next step is to perform a test login. From the Identity Providers screen, select More and then Test Login.
-
You will be re-directed to the Okta login. Enter in your test login credentials and click the Sign In button.
-
If the login is successful, you will be returned to the Identity Provider Test Login screen. The returned results will be displayed in the Results section.
noteIn this example, we did not add the username or email to our scope. Thus they have not been returned.