Pipeline - Filter on Alarm Associated Data
Note: The examples in this section assume you have an alarm, alarm associated data, a notification profile, and an existing on-call roster configured.
How to Filter on Alarm Associated Data
Once associated data is added to an alarm, you can easily filter for associated data in an alarm pipeline. It’s possible to add associated data that can be either static or dynamic. Below is an example of how to filter a notification pipeline based on associated data added to an alarm.
A WriteableFloat1 Tag is used for this example.
-
In the Tag Browser, double-click on WriteableFloat1 to open the Tag Editor.
-
Scroll down to Alarms.
-
Click on the Edit
 icon to view the alarms. This example has three alarms set up: Fault1, High Alarm, and Low Alarm.
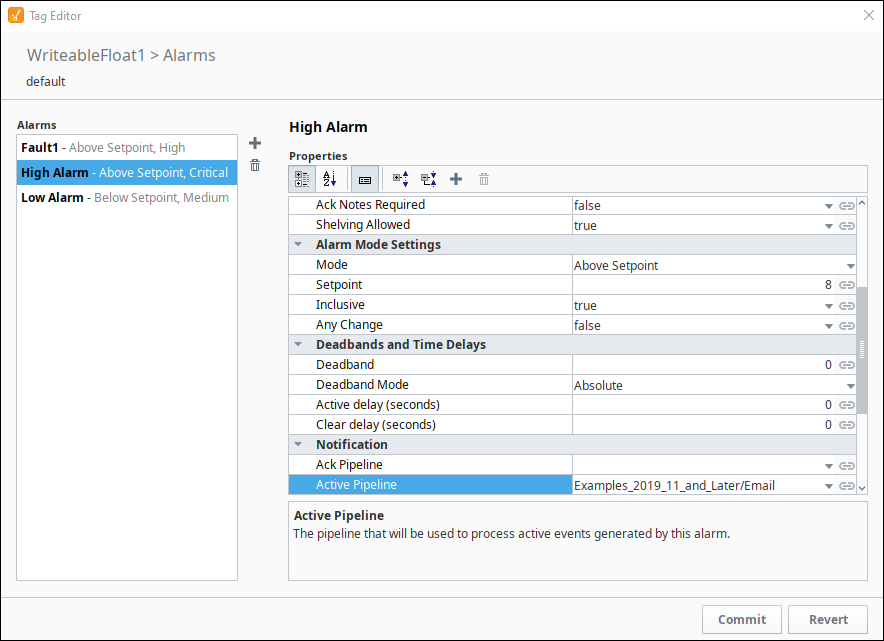
-
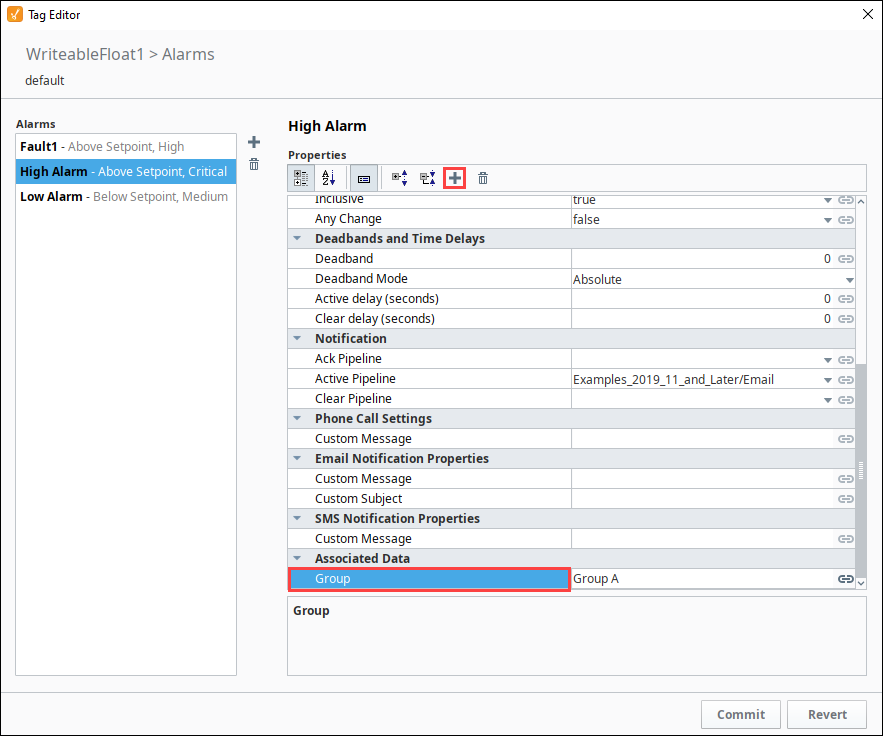
Expanding the High Alarm configuration shows the Associated Data called Group, and a value of either "Group A" or "Group B". We are going to use this associated data to filter the alarm notification pipeline.
-
For this example, drag in the Switch block to your pipeline, and connect the Start block to the IN of the Switch block. There are two blocks that can be used for filtering, either the Switch block or the Expression block. The Switch block allows you to switch on a value and do something different for Group A and Group B. The Expression block does the same thing, but only returns values of True or False.
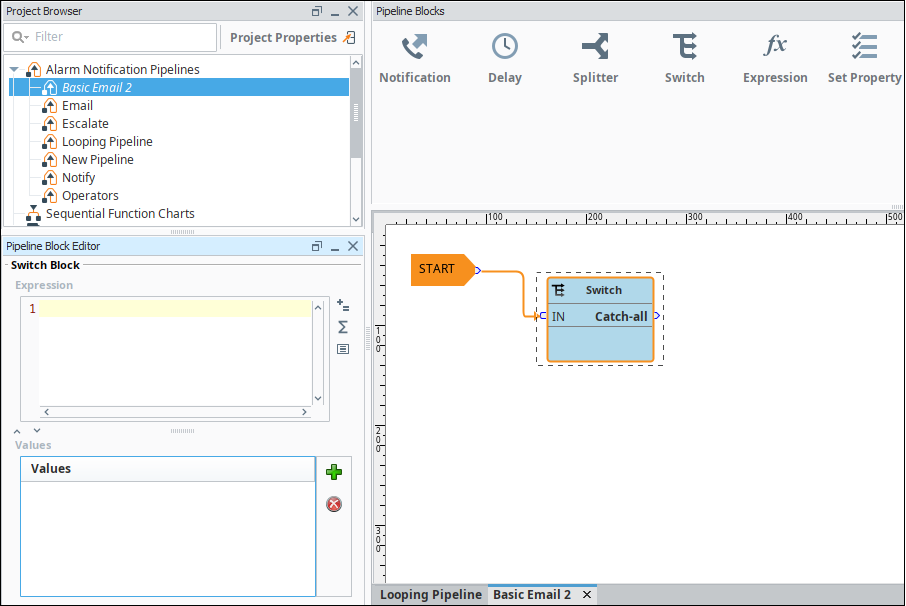
-
In the Pipeline Property Editor, you have to manually enter the expression because you will not find any of the associated data properties in the dropdown list. Enter the name of the associated data property in curly braces as follows,
{Group}. The Group associated data property acts as a placeholder for the real values.
-
Next, you need to add some values to the expression. You can add as many values that you have values for. Click on the Add
 icon and add two values: Group A and Group B. Once you enter both values, you will have outputs in the Switch block for Group A, Group B, and by default, Catch-all. Now you can notify a different list of people based on each Group.
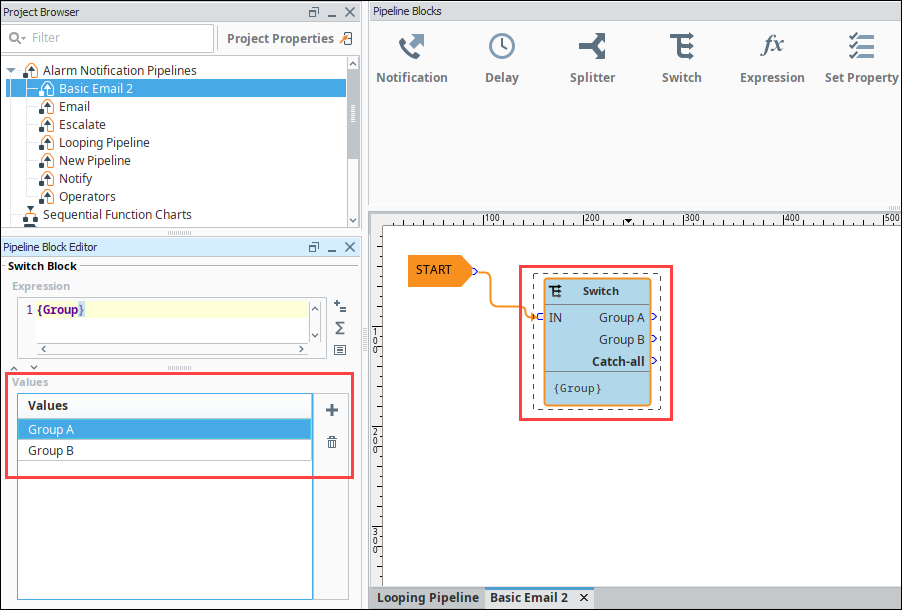
-
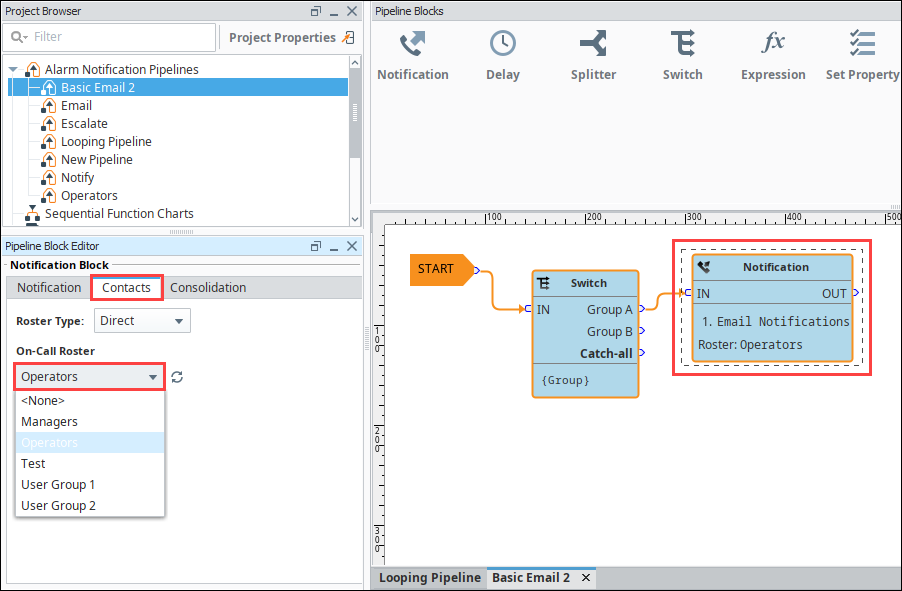
Drag a Notification block into your pipeline, and connect the output of Group A in the Switch block to the IN of the Notification block.
-
In the Pipeline Block Editor, under the Notification tab, choose Email as your notification type.
-
In the Contacts tab, under the On-call Roster icon, select the roster you want to notify (i.e., Operators).
-
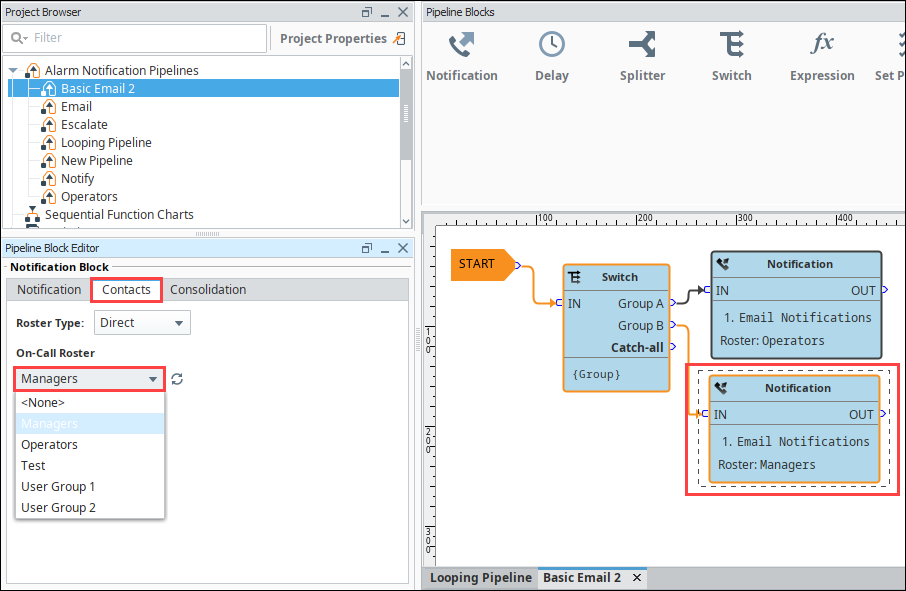
Drag a second Notification block to your pipeline, and connect Group B from the Switch block to the IN on the second Notification block.
-
Choose Email Notifications as your notification type, and specify a different On-call Roster to notify a different group of people (i.e., Managers).
Now, you are notifying people based on Group A (Operators) and Group B (Production Supervisors) by filtering on alarm associated data.