Alarm Pipeline Designer Interface
The Alarm Pipeline Designer Interface is where you create your own custom pipelines to control the the flow of an alarm to its notification. It provides all the functionality to create tasks that customize how alarms going through the pipeline notify people of the alarm.
The Pipeline Designer Interface is an easy to use graphical mechanism, and uses the drag and drop method for building complex alarm notification scenarios. Like other Ignition module interfaces, the Pipeline Designer Interface is organized into panels, some of which are specific to the Pipeline Designer Interface such as the Pipeline Blocks and the Pipeline Block Editor, and some you have seen before, such as the Project Browser and Tag Browser.
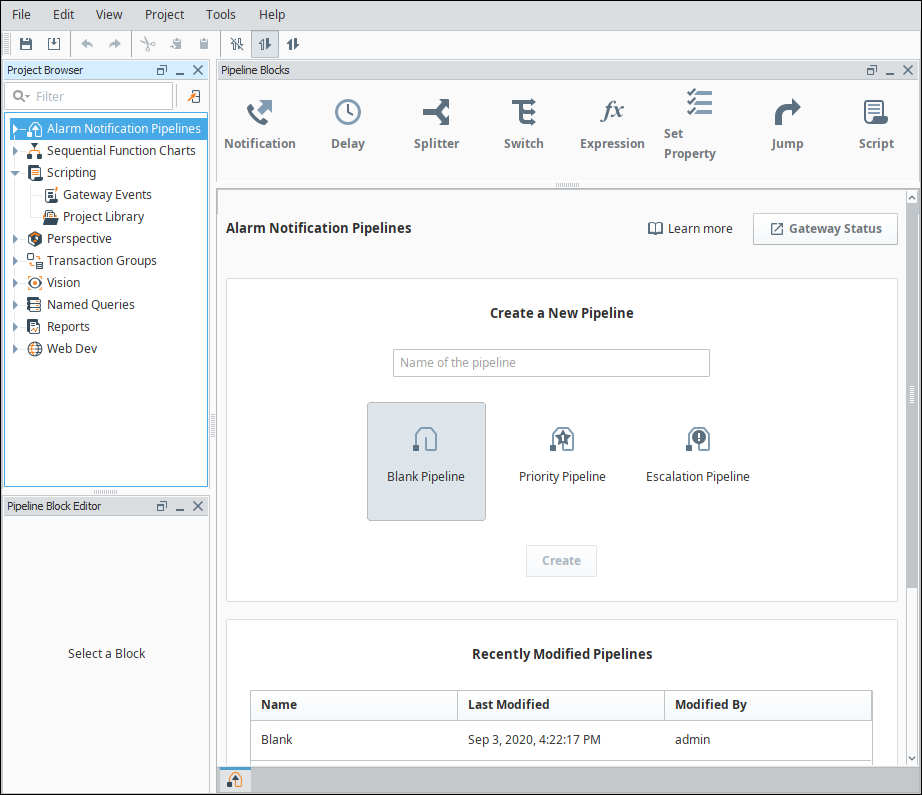
On the Alarm Notification Pipeline Welcome tab, you'll notice that there are some basic template pipelines to help get you started creating your own alarm notification pipelines. You can choose from the Priority and Escalation pipelines, or have the option to start from the Blank pipeline. These pipelines provide a basic skeleton for you to get started creating a priority or escalation pipeline which are common pipelines for alarm notifications. Once you have your several pipelines created, it will also show you the most recently modified pipelines along with the date it was last modified and who modified it. You can double click on a recently modified pipeline to easily open and update it.
The Alarm Notification Pipeline Welcome tab provides a quick way to create a new custom pipeline and update existing ones.
Project Browser
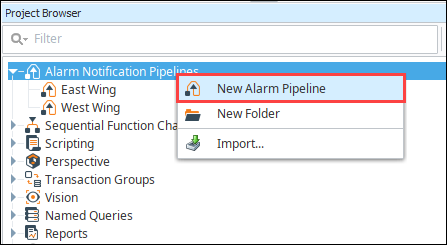
You'll find alarm pipelines in the Project Browser panel which appears in the top left corner of the Designer. Here you can create new alarm pipelines, organize your pipelines into folders, and import pipelines from other projects. Like other resources, pipelines are inheritable, so a pipeline can be configured in one project, and inherited by another.
Pipeline Blocks
Pipeline Blocks are the building blocks of the Alarm Pipelines and are located at the top of the Designer. Each pipeline block has unique functionality that performs tasks such as sending notifications, alarm escalation, setting a delay, and evaluating an expression. Simply drag any of the pipeline blocks to your design area and configure each pipeline block's properties.

Pipeline Block Editor
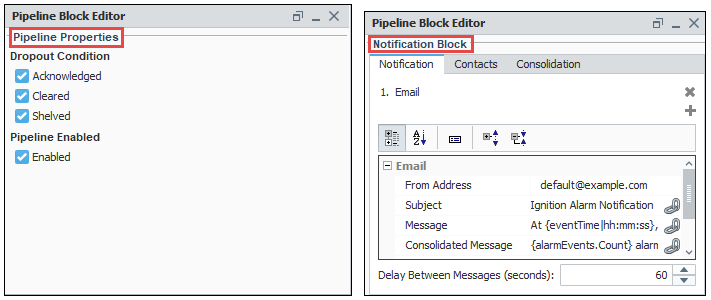
The Pipeline Block Editor displays the pipeline properties and properties of the selected pipeline block. To see pipeline properties, click anywhere in the workspace. Since each pipeline block performs a specific function, it also has its own properties. Select the pipeline block to see its properties. The image below shows both the Pipeline's properties and a Notification block's properties.
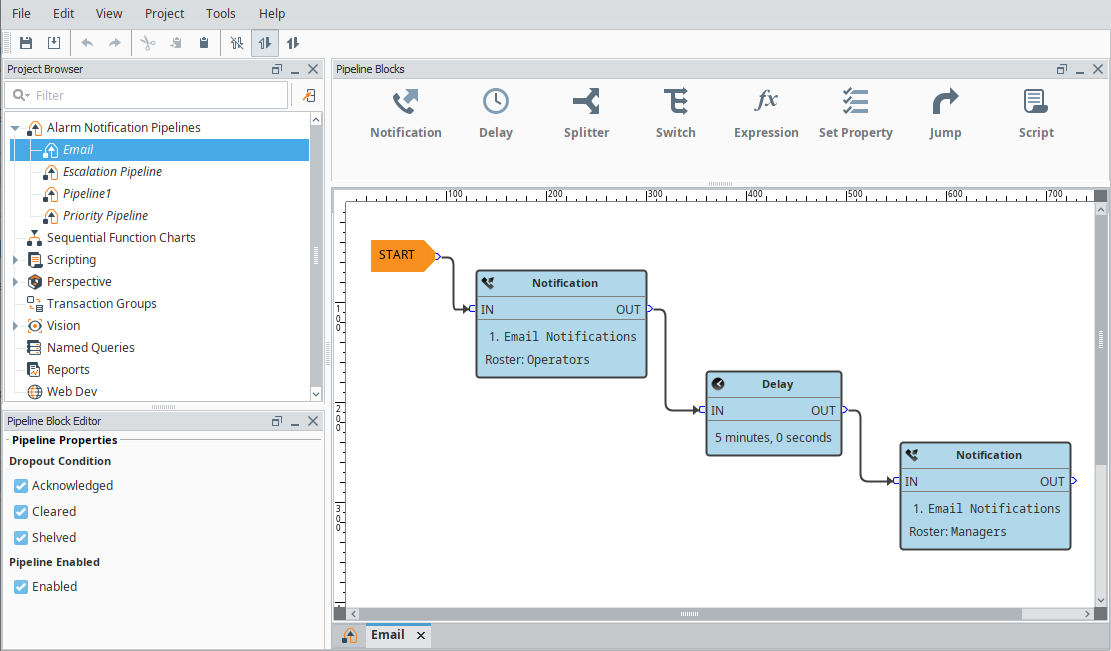
Alarm Pipeline Design Area Example
In this example, we will use a Blank pipeline to create an Email pipeline. It will be set up so that when an alarm occurs, a notification will be sent to Operators via email. If an operator doesn't respond to the notification within 5 minutes, a second email will be sent Managers. This assumes an Operator and Managers on-call rosters have been configured.
- On the Blank pipeline design area (with the START block prepopulated), drag the appropriate pipeline blocks to your canvas to begin building the logic for your notification pipeline. The blocks for this example include two Notification blocks and a Delay block.
- Set the properties for each pipeline block. The first Notification block needs to send email notifications to the Operators roster. The Delay block time needs to be 5 minutes. The second Notification block needs to send email notifications to the Managers roster.
- Connect the blocks from the START block, to the first Notification block, to the Delay block, and end at the second Notification block to create your pipeline.