Project Templates
When you launch the Designer, you will be presented with the Open/Create Project window. This window let's you hit the ground running almost immediately by populating a few fields, the most important ones being your project Name and Title. You can use the defaults in the remaining fields and change them in the Config > Project page later, but don't overlook the Project Template field. Ignition provides several project templates for you to choose from to help you quickly get started developing your project in either Perspective or Vision. The templates get you started with a basic navigation structure and let you add more items as your project matures. Additional project templates can be found on the Ignition Exchange website.
You must be connected to the Internet in order to see the templates available in the Project Template list.

Perspective Project Templates
Here are two Perspective Project Templates you can choose from to get you off to a quick start: Menu Nav and Web Nav.
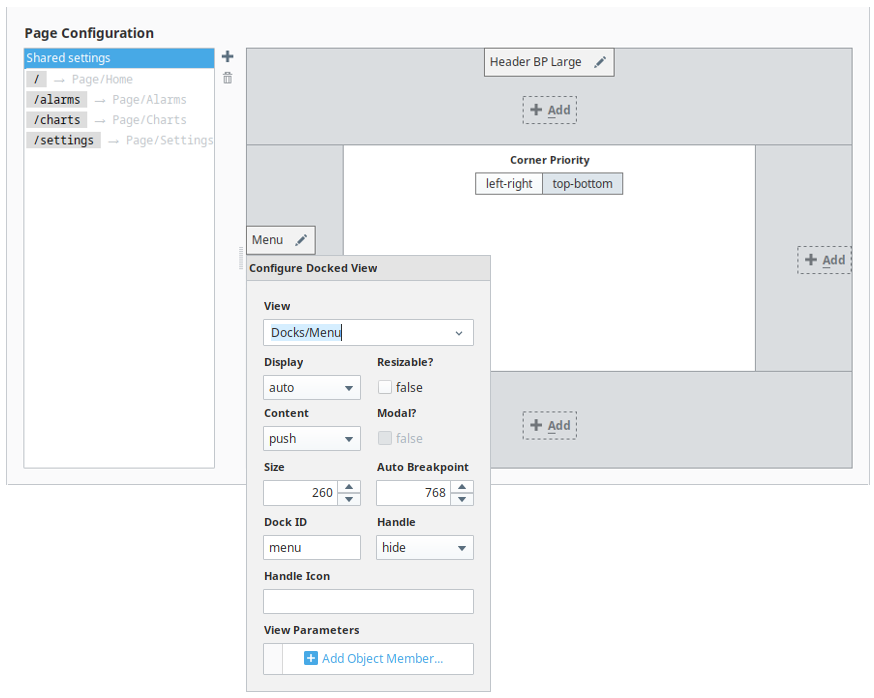
The Perspective Menu Nav and Web Nav templates contain several pre-defined views: Home, Charts, Alarms, and Settings. These views can easily be edited by selecting the view in the Project Browser and editing its Props to anything you want them to be. You can also go to the Page Configuration and edit the page configuration settings and docked view properties.
The images below show what the Menu Nav and Web Nav look like in a Perspective Session.
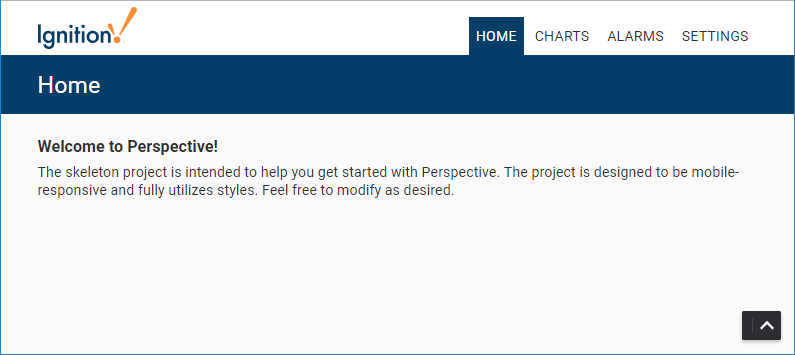
Web Nav
The Web Nav is good for small size project structures where you only have a few main Views. It allows you to navigate the areas of your project using the tabs at the top of the screen. It has a docked view that contains tabs that are always open to do navigation, and the main view which fills the rest of the space. It is a flat structure similar to the what you see on many webpages.
Perspective Menu Nav
The Menu Nav template is a hierarchical view of groups of information that can be configured to expand submenu branches and menu items and is docked on the left side of the screen. The Menu Nav is good for medium and large project structures because you can expose important information at a glance and allow users to navigate and expand submenus if any exist. The menu automatically hides itself on smaller screens devices.

Editing Properties and Page Configuration Settings
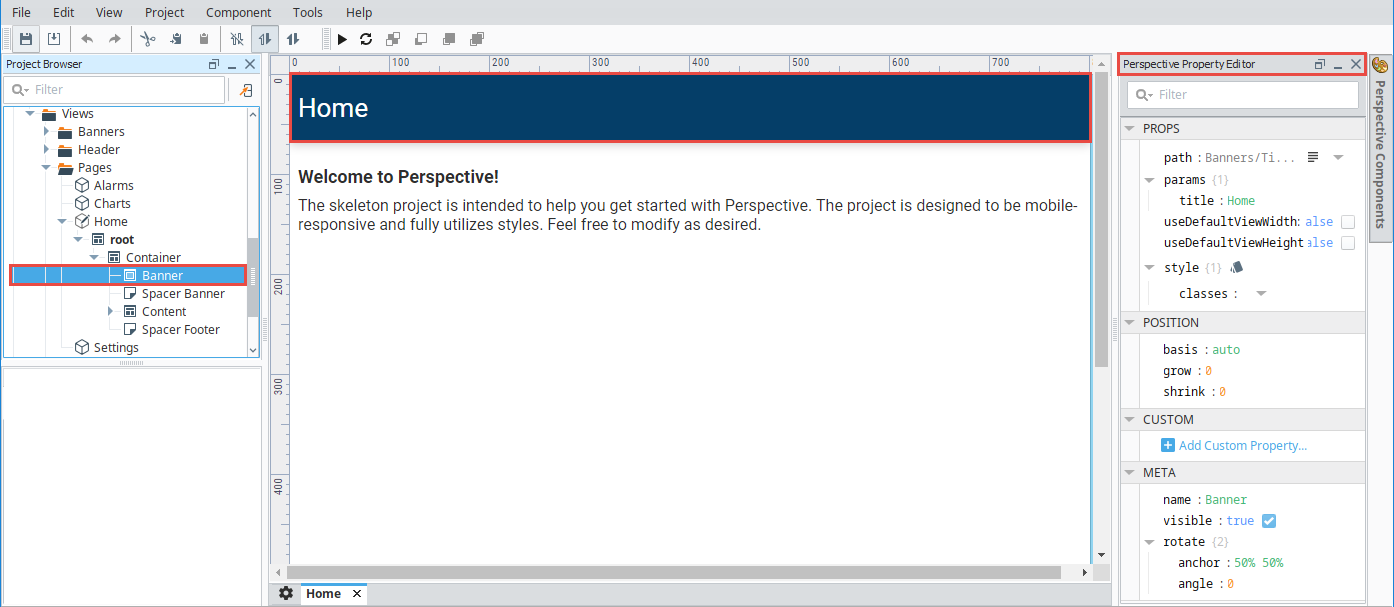
To edit the Menu Nav and Web Nav menus, first you have to have pages configured in your project. Once you have pages configured, you can go to the Navigation view in the Project Browser, select the component and change the corresponding component props in the Perspective Property Editor to add, remove, or update the menu items.
Page Configuration Settings
Project Browser and Project Editor
Vision Project Templates
There are three Vision Project Templates to choose from to help kick start your project: 2-Tier Tab Nav, Tab Nav, and Tree Nav. The Vision templates, just like the Perspective templates, contain several pre-defined menu objects. These objects can easily be edited by selecting the object in the Project Browser by editing its properties and changing them to anything you want them to be.
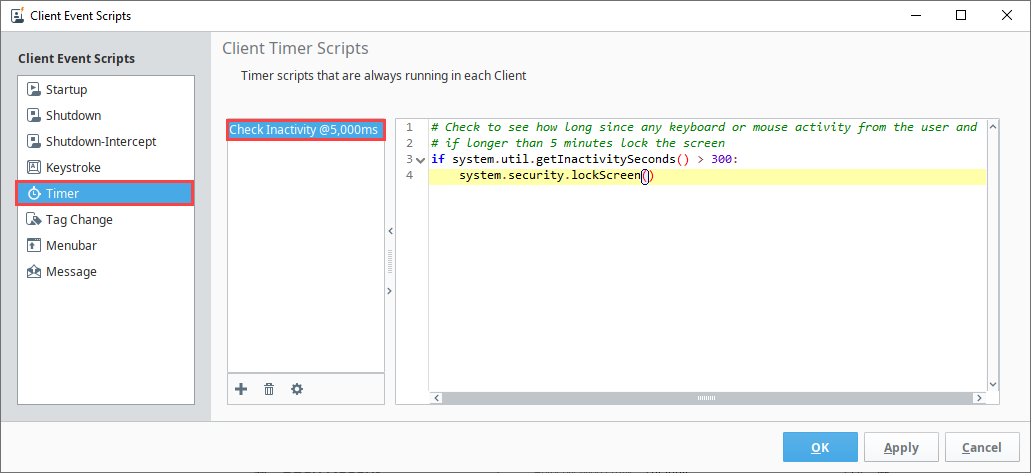
The templates also include an automatic screen lock Client Event Timer script that checks for inactivity of the client every 5 seconds and locks the screen after 5 minutes of inactivity. This script is enabled by default. Refer to the following steps to disable or delete this script:
-
Launch the project where you would like to disable the lock functionality.
-
Click Project on the Designer menu bar and select Client Events.
-
Select Timer. You'll now see the Check Inactivity @5,000ms script listed.
-
If you only want to disable the script, double-click the script name and uncheck the Enabled field. If you no longer want the script, you can select it and then click the Trash
 icon to remove it.
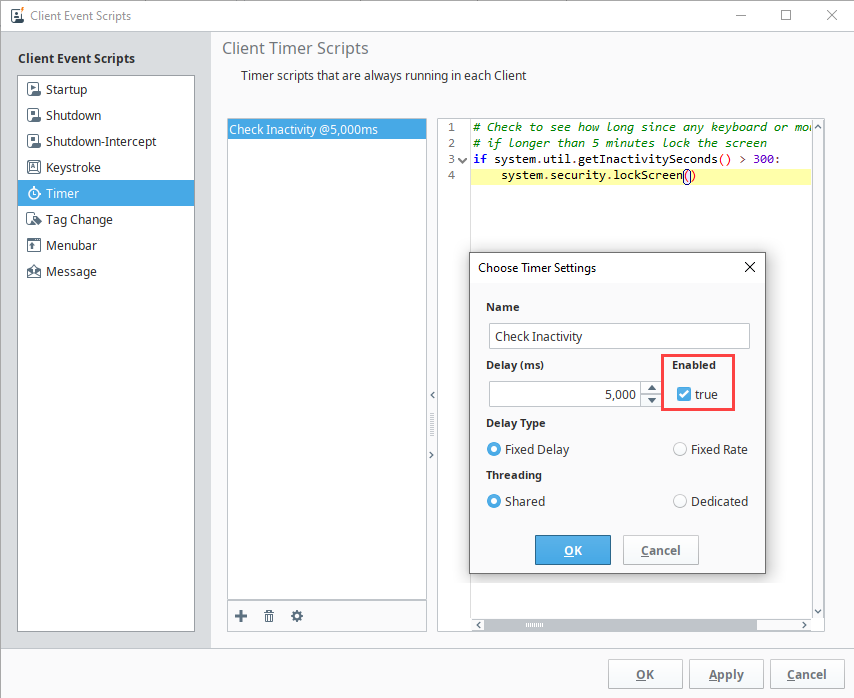
-
Save your project to apply changes.
Tab Nav
The Tab Nav is good for small size project structures where you only have a few main windows. It allows you to navigate the areas of your project using the tabs. The Tab Nav project template has a docked window that contains tabs that are always open to do navigation, and the main window which fills the rest of the space.
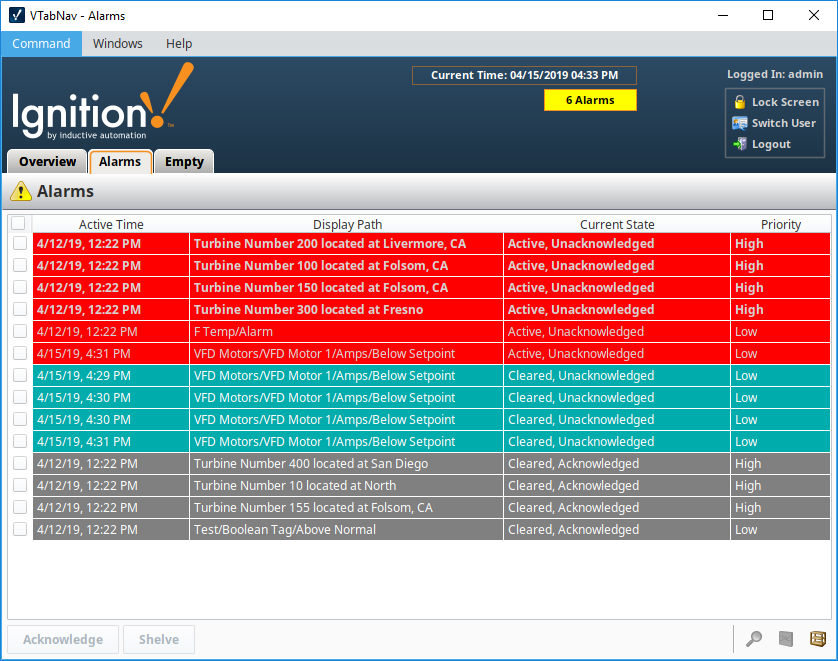
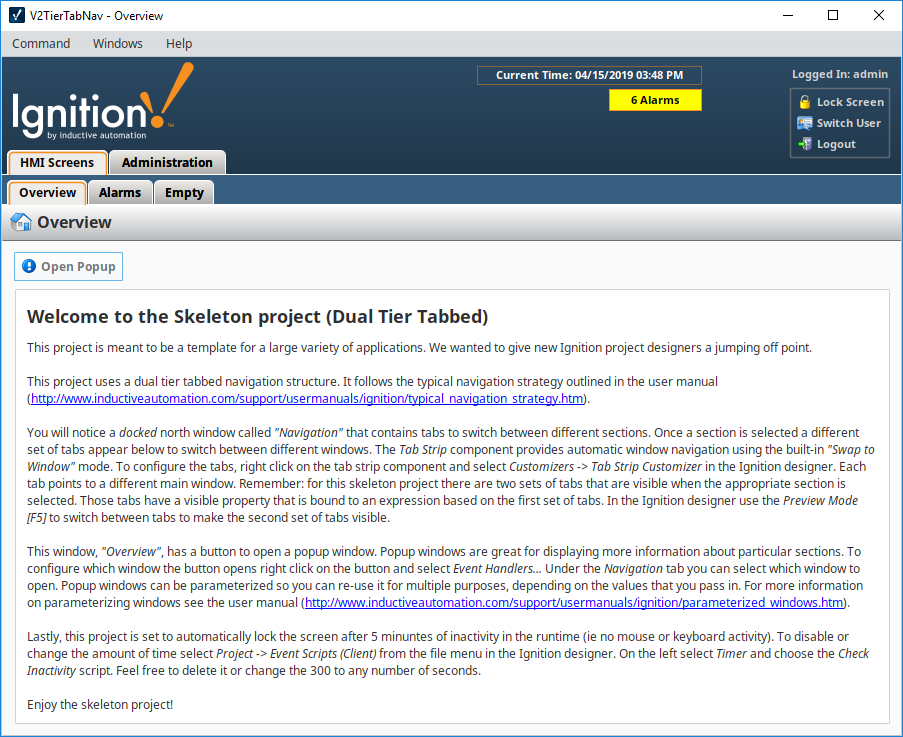
2-Tier Tab Nav
2-Tier Tab is good for small and regular size project structures where windows are grouped. The Tab Nav project template is similar to the Tab Nav template only it has a second tier of tabs added. It contains a second level of tabs allowing you to navigate around various areas of your project. The 2-Tier Tab Nav project template has a docked window that contains tabs that show and hide based on selection that are always open to do navigation, and the main window which fills the rest of the space.
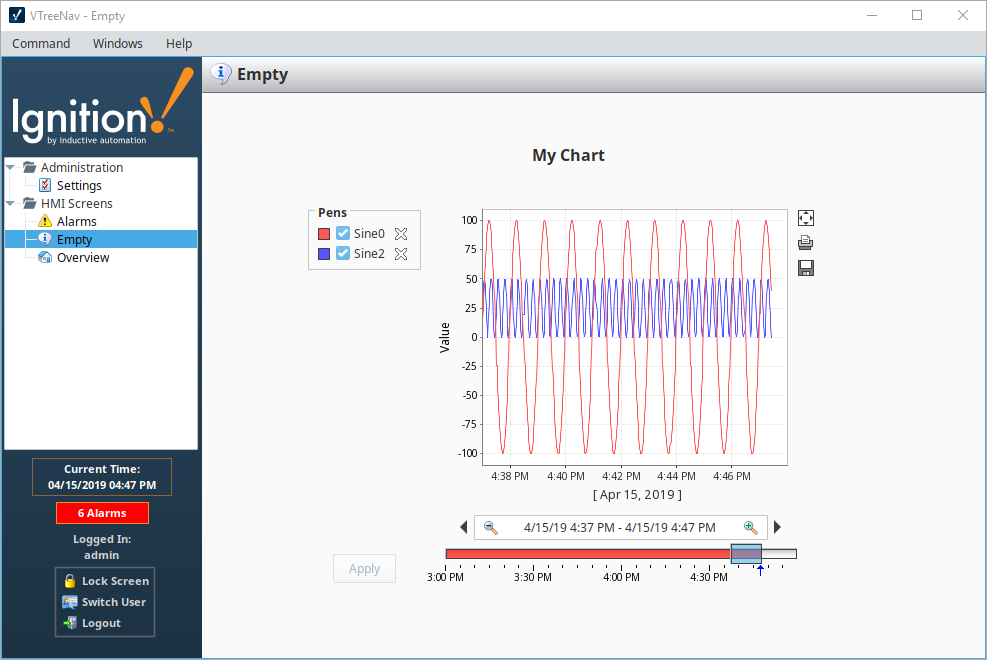
Tree Nav
The Tree Nav project template is a hierarchical view of groups of information that can be configured to expand submenu branches and menu items and is docked on the left side of the screen. It is great for medium and large project structures because you can view the entire project structure at a glance allowing you to navigate to any structure within the tree view. The tree structure uses folders to group main windows, and can be as many levels deep as you need.
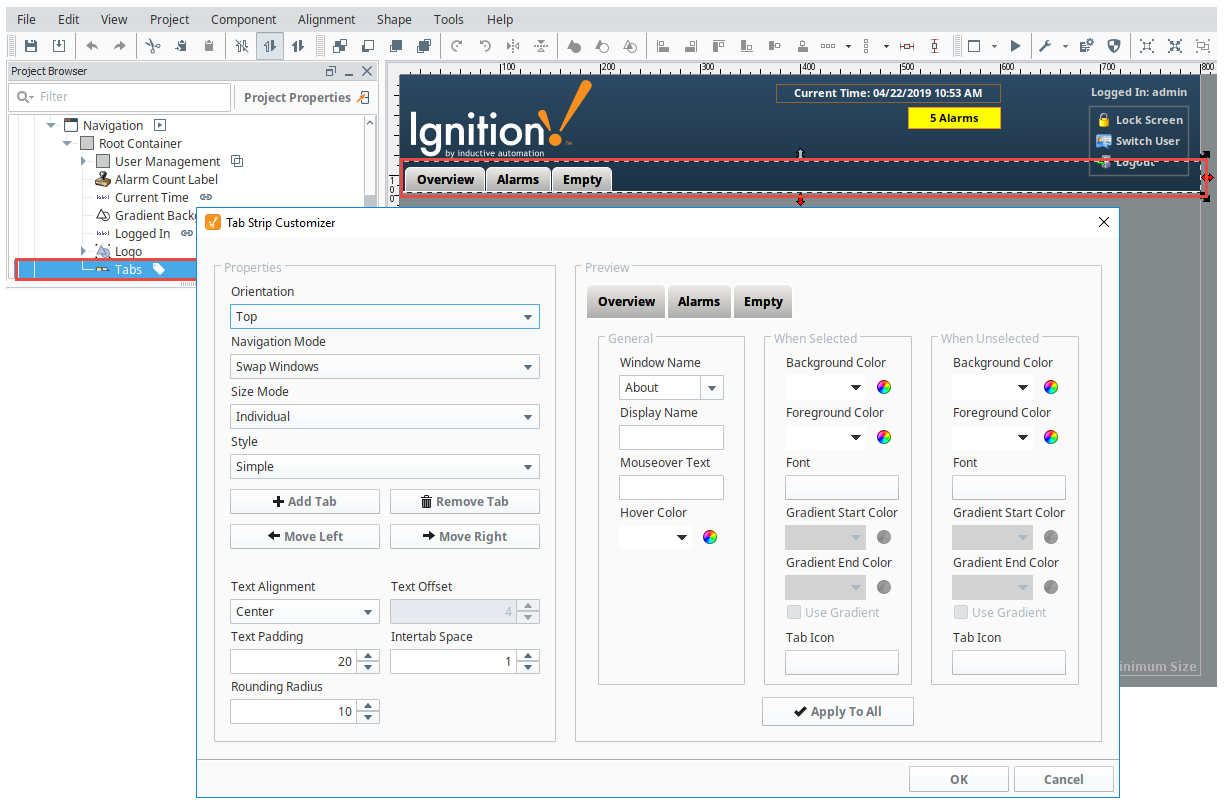
Adding Windows to the Navigation
To edit the Tab Nav and Tree Nav menus, you need to edit the properties of the navigation components. You can go to the Navigation window in the Project Browser, select the Tab Strip, and open the Tab Strip Customizer to change the corresponding component props to add, remove, or update the menu items.