Localization Keys
Ignition's localization features allow you to present your project in multiple languages without duplicating views or windows. This page outlines best practices for working with project terms, component overrides, naming keys, and managing long text.
Project Terms vs Component Terms
Project terms are shared across all components in the project. Use them for any text that appears in multiple places to avoid duplication and ensure consistency.
Component terms apply only to a single component. Use them when a component needs wording that differs from the project-wide translation. If both a project term and a component term exist with the same key, the component term takes precedence.
Review component definitions if translations do not appear as expected.
Using Naming Conventions with Keys
Always define a key for each translation term instead of using literal text. Keys act as stable identifiers that map to the correct translation, even if the visible text changes. Use unique keys that are unlikely to conflict with regular words, such as by prefixing with # or using dot notation like dialog.save_changes. Once a key is in use, keep it stable. Renaming a key breaks its mapping to translations. Keys are especially helpful for long text strings such as introductions or paragraphs, since they prevent accidental matches across multiple components.
Preventing Unwanted Translations
Using common words as keys (such as “Auto” or “Off”) can sometimes trigger unintended translations if a project term with the same text exists. To avoid this, you can define the values as unique keys by prefixing them with #. This convention applies in both Perspective and Vision, although the configuration steps differ between the two modules.
Perspective
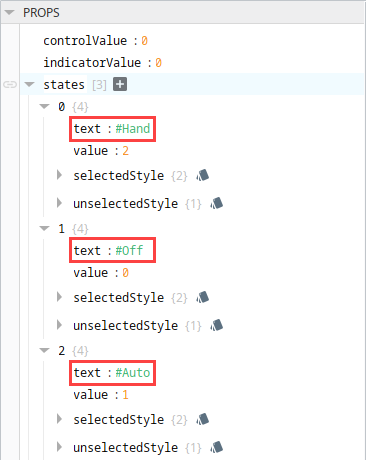
In Perspective, the Multi-State Button component's states, Hand, Off, and Auto are defined in the states[#].text property as #Hand, #Off, and #Auto. Using the prefix ensures these words are treated as keys rather than matching existing project terms.
The keys appear in the Translation Manager, where translations are defined in English and Spanish. When session.props.locale is set to en-US, the button displays the English values.
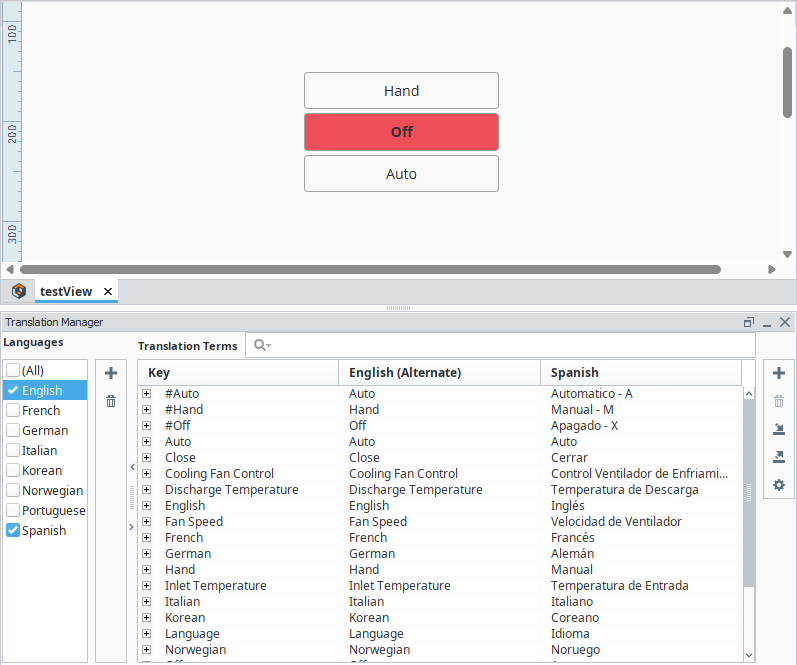
When session.props.locale is switched to es-US, the button displays the Spanish translations.

Vision
In Vision, the Multi-State Button component's states, Hand, Off, and Auto are defined in the Multi-State Button Customizer as #Hand, #Off, and #Auto. Using the prefix ensures these words are treated as keys rather than matching existing project terms.
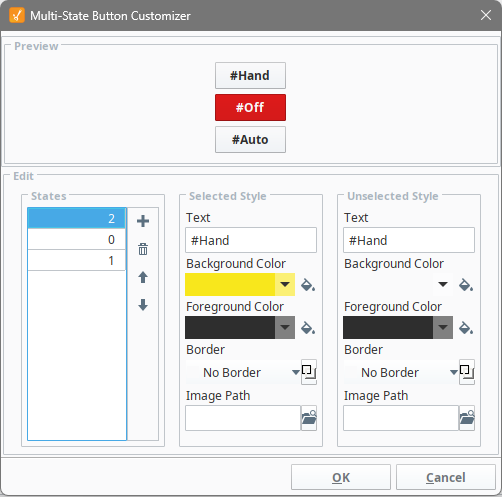
The keys appear in the Translatable Terms panel, where translations are defined in both the component and global columns.
![]()
In Design Mode, the button displays the untranslated keys.
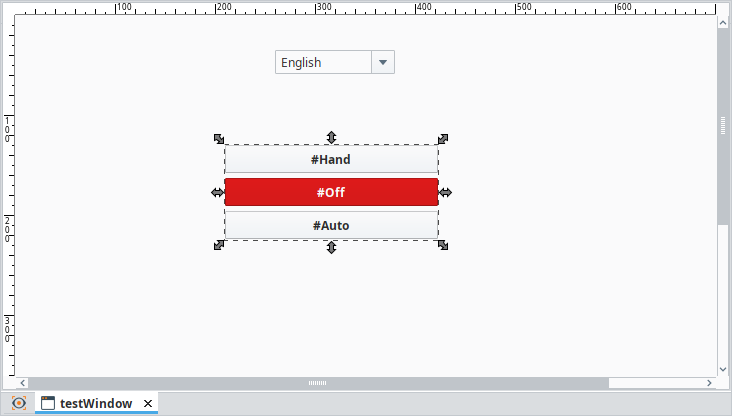
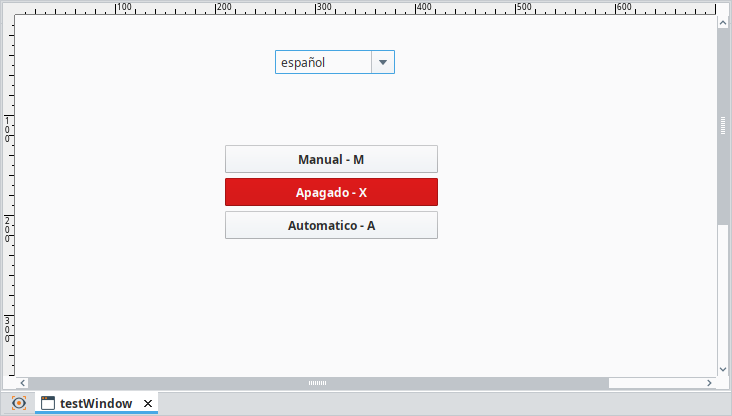
In Preview Mode, the button displays the translated states in English and Spanish.

Overriding Vision Components
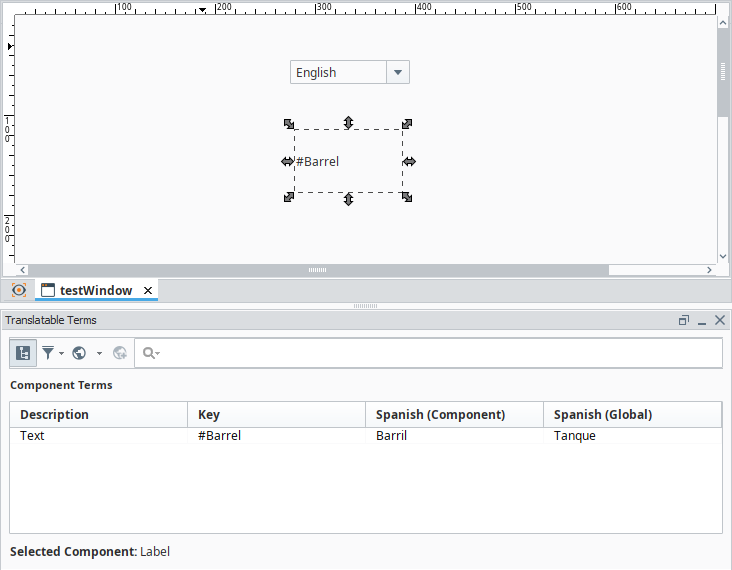
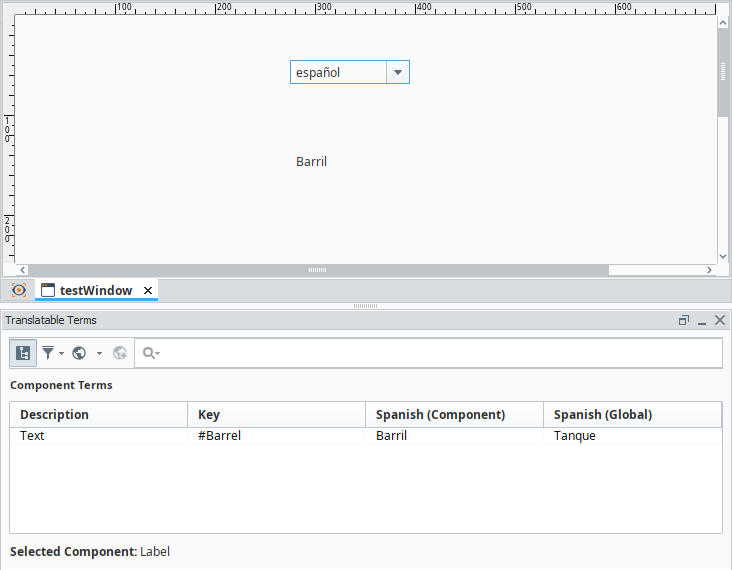
In this example, a Label component was added to the window and its text was set to #Barrel. This created a key in the Translatable Terms panel. The global term translates #Barrel to Tanque, while a component term with the same key translates it to Barril. Because component terms take precedence, the Label displays Barril instead of the project-wide value.
In Design Mode, the Label shows the raw key.
In Preview Mode, the Label displays the component translation, overriding the global term.
Overriding Built-in Vision Messages
In addition to project and component terms, some system dialogs in Vision also use fixed text that can be overridden. These messages are not exposed as component properties, but you can still localize them by adding their text as keys in the Translation Manager. The most common examples are the Access Denied and Screen Locked dialogs.
Access Denied Message
When a Vision window is restricted with Do Not Open, an Access Denied popup appears. The text in this popup is fixed, but you can override it by adding a key in the Translation Manager.
-
In the Designer, go to Tools > Translation Manager.
-
Click the plus
 icon, paste the following value into the Add Item field, and click OK.Access Violation - Key
<HTML><P><font color='red'>ACCESS VIOLATION.</font><P>You do not have the privileges to open window '%s'.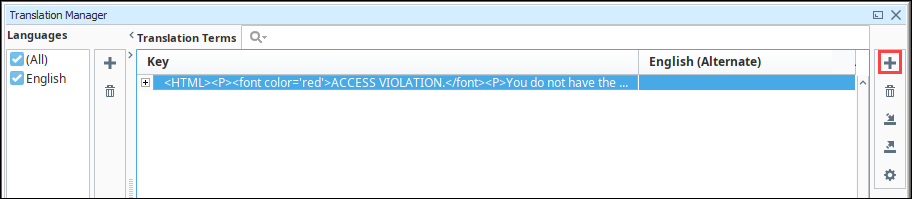 note
noteThe
%splaceholder is replaced with the window name at runtime.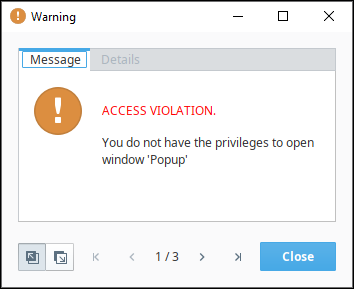
-
Add a translation for the key. For example:
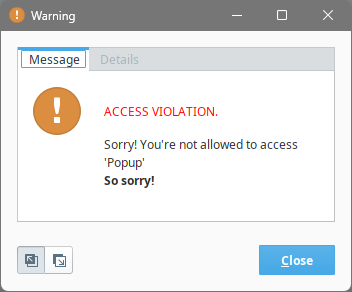
Access Violation - Translated Term<HTML><P><font color='red'>ACCESS VIOLATION.</font><P>Sorry! You are not allowed to access '%s'<br><b>So sorry!</b>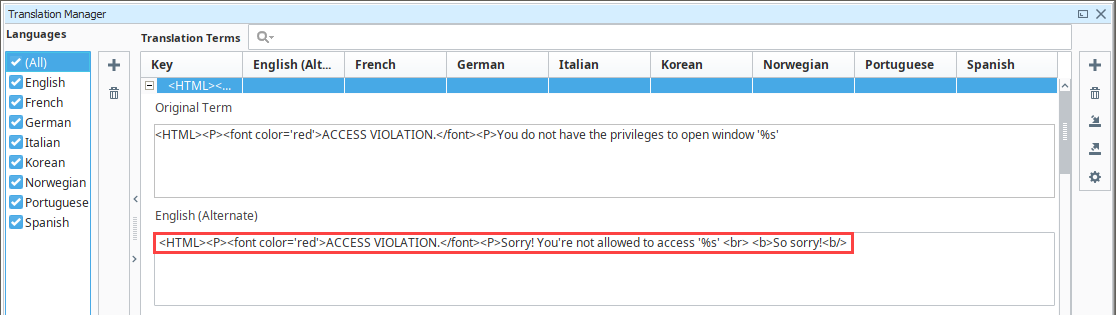
Now, when a user without the required permission attempts to open the window, the popup displays the translated text.
Screen Locked Message
The system.security.lockScreen function in a Client Timer Script displays a popup when the client is locked. The message text is not configurable, but you can override it with a key in the Translation Manager.
-
In the Designer, go to Tools > Translation Manager.
-
Click the plus
icon, paste the following value into the Add Item field, and click OK.Screen Locked - Key<HTML><CENTER>This screen has been locked by<BR><font size=+1><b><u>%s</u></b>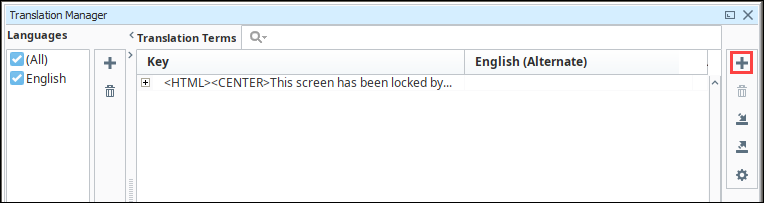 note
noteThe
%splaceholder is replaced with the current username at runtime.
-
Add a translation for the key. For example:
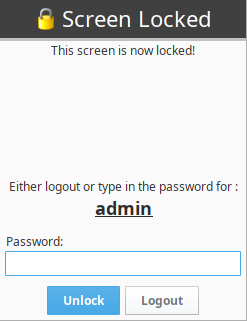
Screen Locked - Translated Term<HTML><CENTER>This screen is now locked!<br><br>Either log out or type in the password for :<BR><font size=+1><b><u>%s</u></b>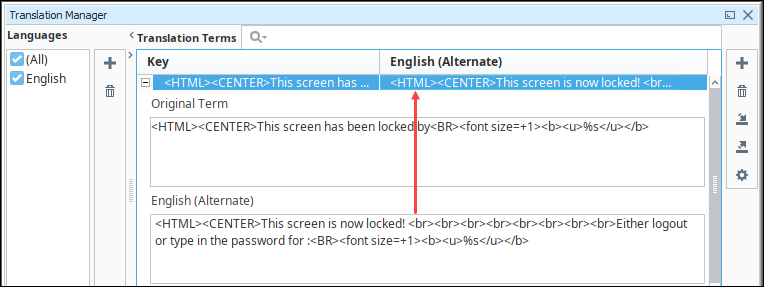
Now, when the screen is locked in the client, the popup displays your translated text.
Wrapping Long Text in Vision
In Vision you can use basic HTML tags to wrap long text values inside components that display text. This allows translations with long sentences or paragraphs to break across multiple lines.
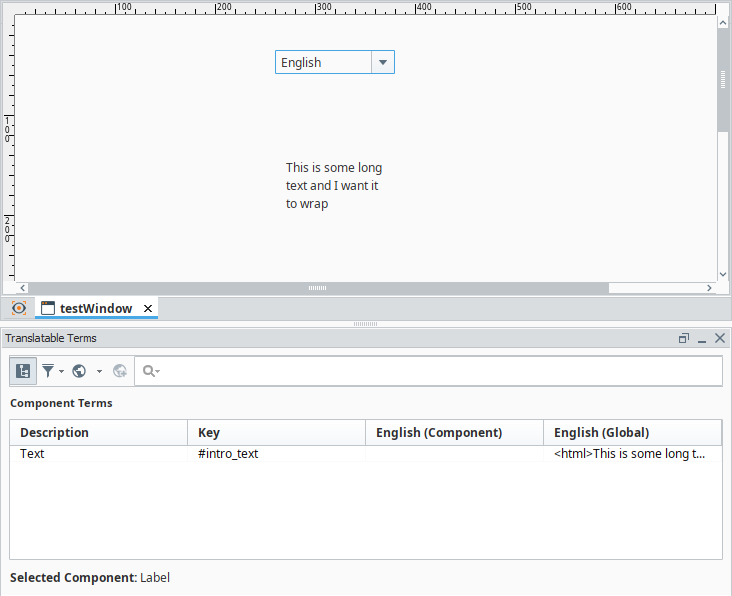
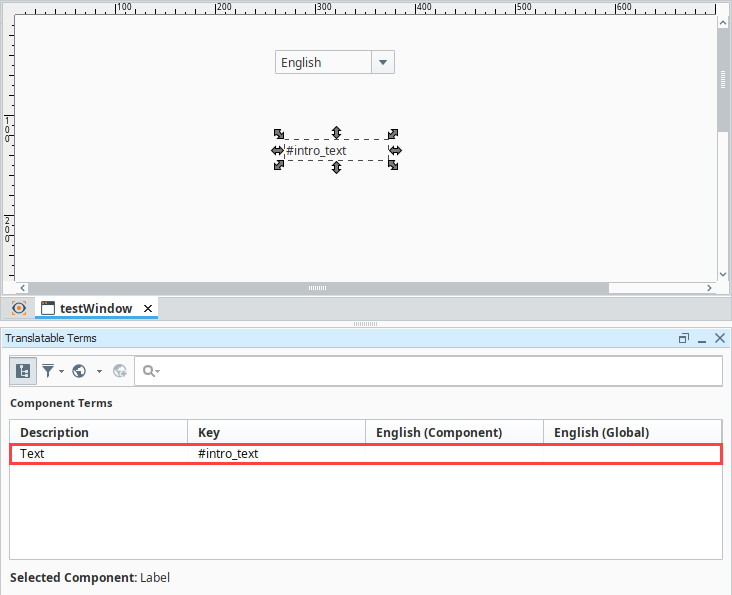
In this example, a Label component is configured with the key #intro_text, and HTML wrapping is used so its text displays neatly in both English and Spanish.
-
In the Property Editor of a Label component, set the
textproperty to a unique key. In the example below, we use#intro_text.
-
Open the Translatable Terms panel and double-click the term row to add translation values for each language.
noteYou can open the Translatable Terms panel by right-clicking the component and selecting Translations.
-
Begin the value with
<html>to enable wrapping.Translation Values# English
<html>This is some long text and I want it to wrap
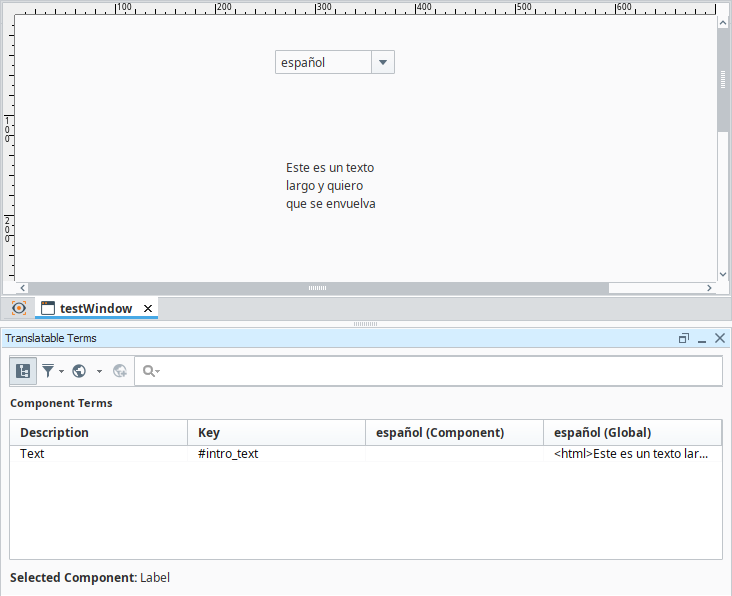
# Spanish
<html>Este es un texto largo y quiero que se envuelva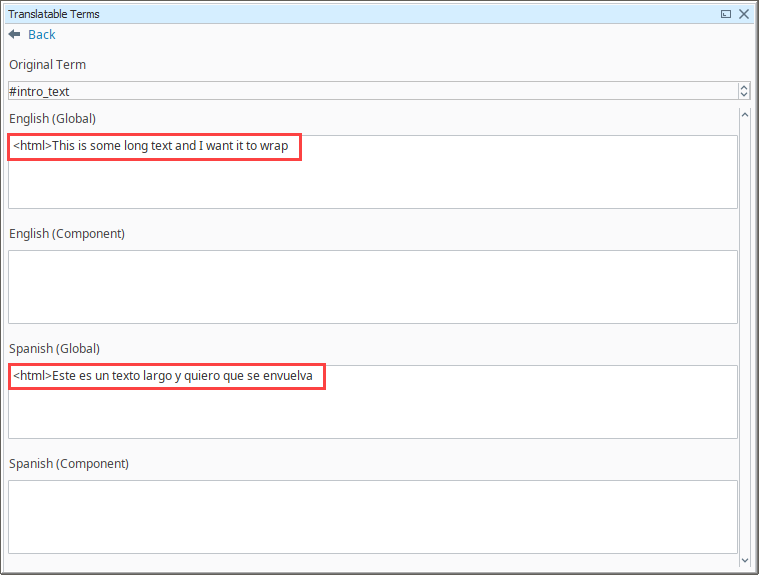
-
In Preview Mode, the Label displays the text across multiple lines in English and Spanish. If the component is not large enough to fit the text, only part of the wrapped content will be visible.