Installing MySQL
Install the MySQL Server and Workbench
The goal of this page is to demonstrate how to install MySQL Server, and a helpful tool called MySQL workbench. This guide is not an exhaustive listing of all of the various installation steps or scenarios for MySQL. For more information, take a look at MySQL's documentation: MySQL Documentation.
-
Go to the MySQL website at https://dev.mysql.com/downloads/mysql/.
-
Click the Download option for Windows (x86, 64-bit), MSI Installer.
-
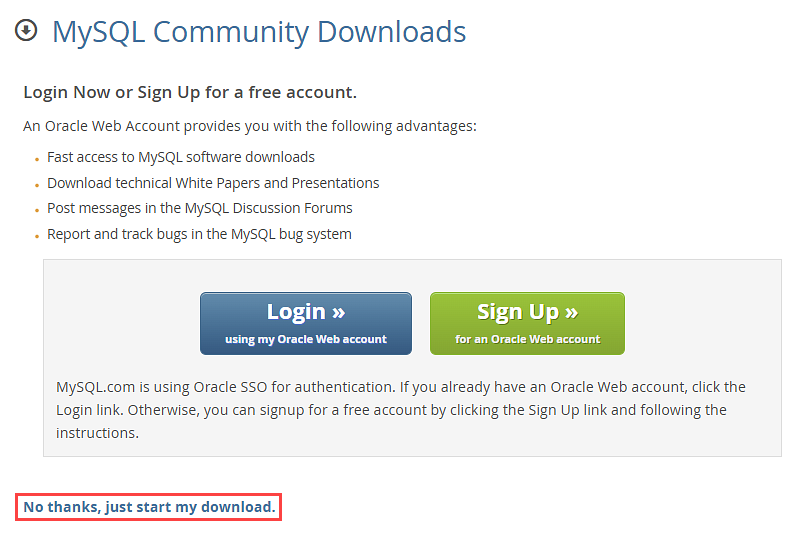
You can login or create an account before downloading if you'd like. Otherwise, click No thanks, just start my download.
-
Once the .msi file is downloaded, run the file to begin the installation process.
-
Complete the MySQL Installer steps until installation is complete. At minimum you'll want to install both the server (the actual database) and MySQL Workbench (an application that allows you to quickly and easily interact with the database, without using a command-line client). Any other items beyond these two are generally unnecessary in most environments.
If you want to learn more, MySQL does have some additional information in their documentation. -
Once the configuration is applied and the database is initialized, you'll see a confirmation message. Click Finish to complete the install process.
-
The MySQL Workbench window is now displayed. MySQL Workbench lets you to administrate the MySQL server.
-
Click on Local instance MySQL to connect to the newly installed MySQL server. You'll have to enter the password you chose during the installation.
-
You are now connected and can see, in the Navigator, the default sys schema. Click on the Schemas tab to see a listing of schemas
-
A "schema" is a collection of tables and other database objects. Ignition needs a schema to connect to. Instead of using the sys schema, we can create a scheme dedicated to Ignition. To create the schema, click the Create New Schema
 icon.
icon. -
You'll see the Schema creation tab. This allows you to make a new Schema. Type in test as the name, and click Apply. Technically you can call the schema anything the database allows, but the default MySQL connection in Ignition assumes a schema named "test". If you name the schema something else here, you'll need to remember the name when creating the database connection in Ignition later.
-
You'll see the Apply SQL Script to Database window. Click Apply, and then click Finish. You should now see the test schema in the Navigator.
Now that the database is installed, you can connect Ignition to it. Learn more here: Connecting to MySQL.