Agent Task - Send Project
Agent Tasks have the ability to send projects and project resources from a Controller to an Agent. It is also possible to send project resources from Agent to Agent if needed.
Send Project Task
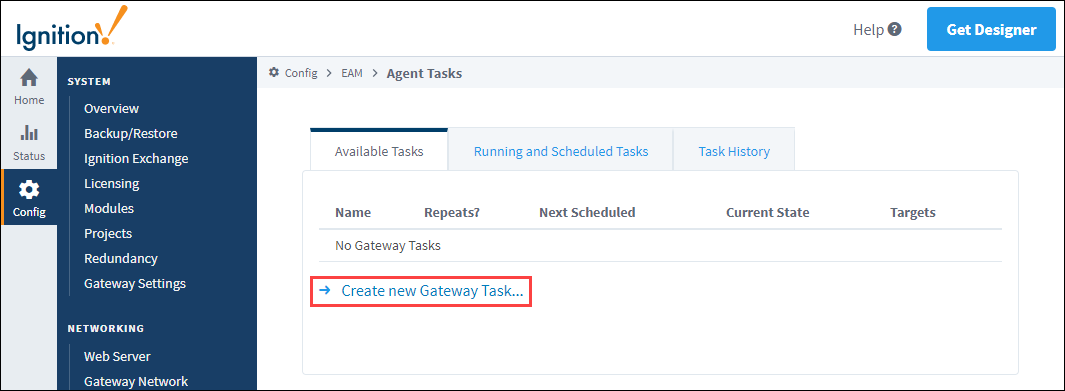
On the Controller, under the Config section of the Gateway webpage, go to Enterprise Administration > Agent Tasks. Here you can create a Gateway Task to send a project from the Controller to an Agent.
-
Click the ‘Create new Gateway Task’ link. The EAM wizard will guide you through each step of the Send Project task.
-
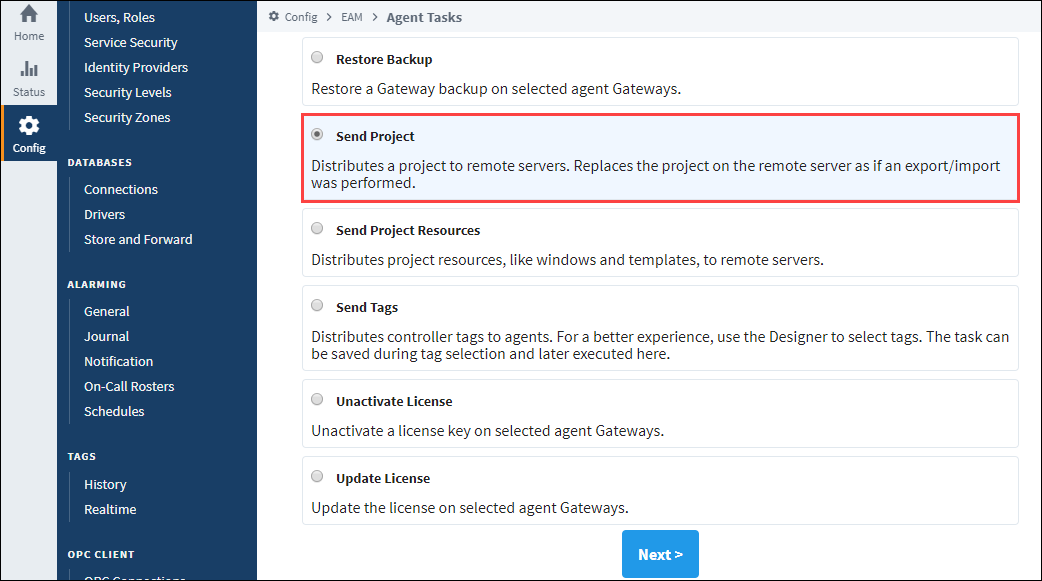
Not only will the Send Project send a project from the Controller to the Agent, but if the project already exists on the Agent, it will replace it. Scroll down the list of Gateway Tasks, and select Send Project. Click Next.
-
Just like with any Gateway Task, the Send Project task needs to be scheduled. There are several scheduling options available, but for this example, schedule the task to Execute Immediately and click Next.
-
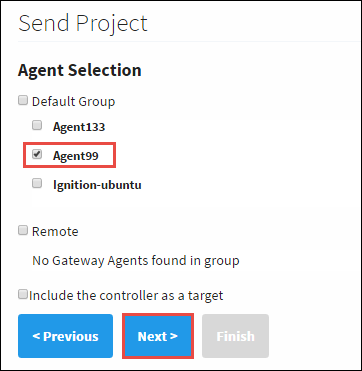
Select the Agent where you want to send your project and click Next.
-
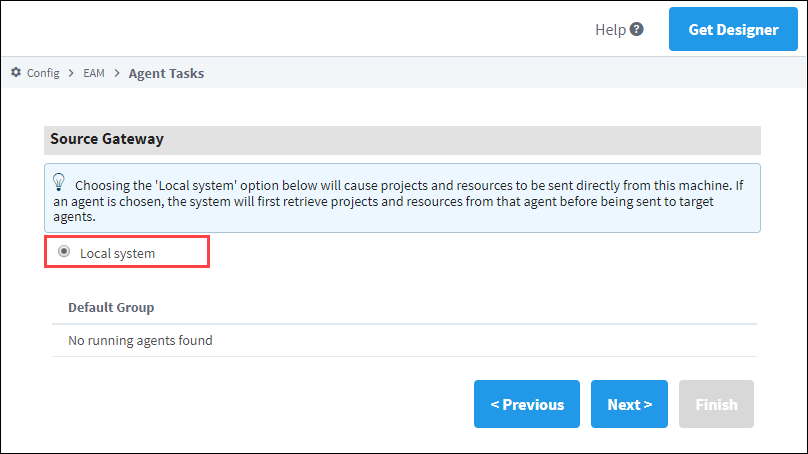
The EAM wizard knows your controller and agent configuration. It’s going to prompt you to choose the machine where your project is located. In this example, the project that you want to send is located on the Controller or Gateway Source so select Local System and click Next.
-
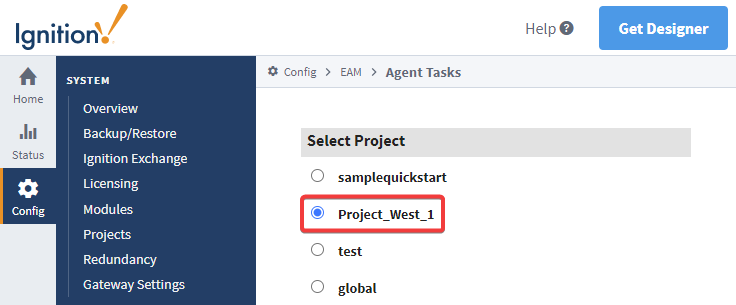
The EAM wizard will display all your projects from your local system. Select the project you want to send to your Agent, and press Next (If you select your Agent on the previous screen, the EAM wizard will display all your projects running on your Agent that were sent over previously from the Controller).
The following step is applicable only if you are running Ignition 8.1.28 or later. If you are running Ignition 8.1.27 or earlier, skip to step 8.
-
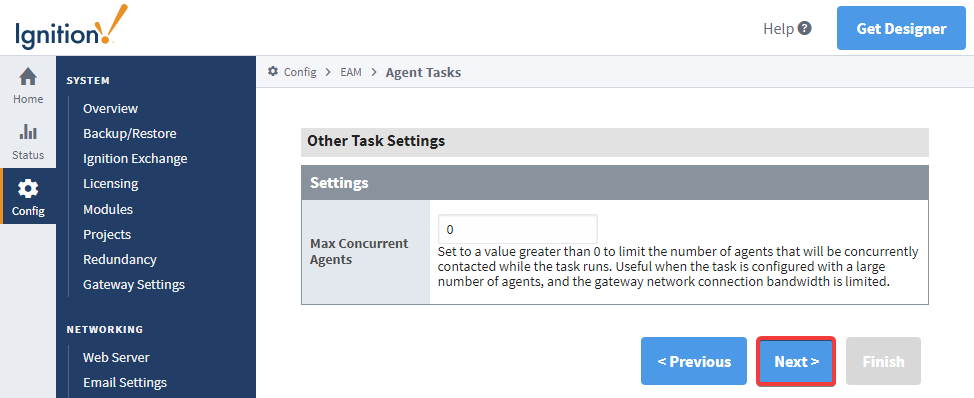
New in 8.1.28The EAM wizard will ask if you want to limit the number of agents that will be concurrently contacted as the task executes, which helps in situations where network connections are weak or bandwidth is limited. For this example, we will leave the value at the default of 0, which disables the setting.
-
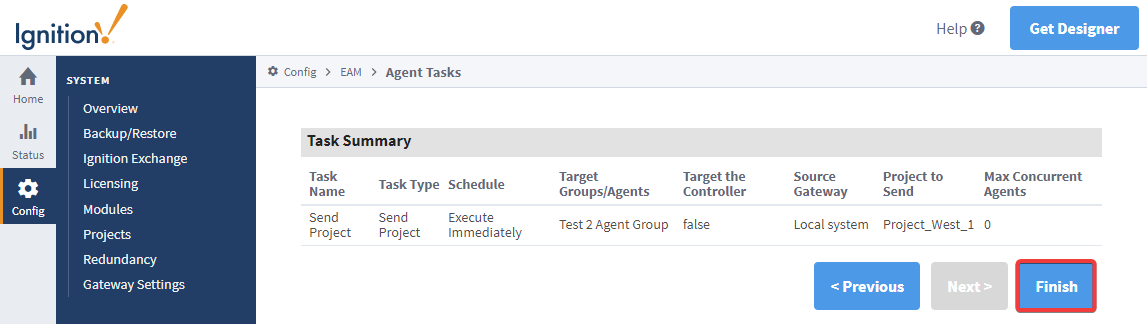
The EAM wizard summarizes all the information for you to review. Click Finish, and your project will be sent from the Controller to the Agent.
-
The EAM wizard will execute the task, the screen will refresh, and a message will pop up stating that your Send Project task was successful.
-
To verify that your project was sent, go to your Agent, click on the Config tab on the Gateway Webpage, and select Projects.
Inherited Resources
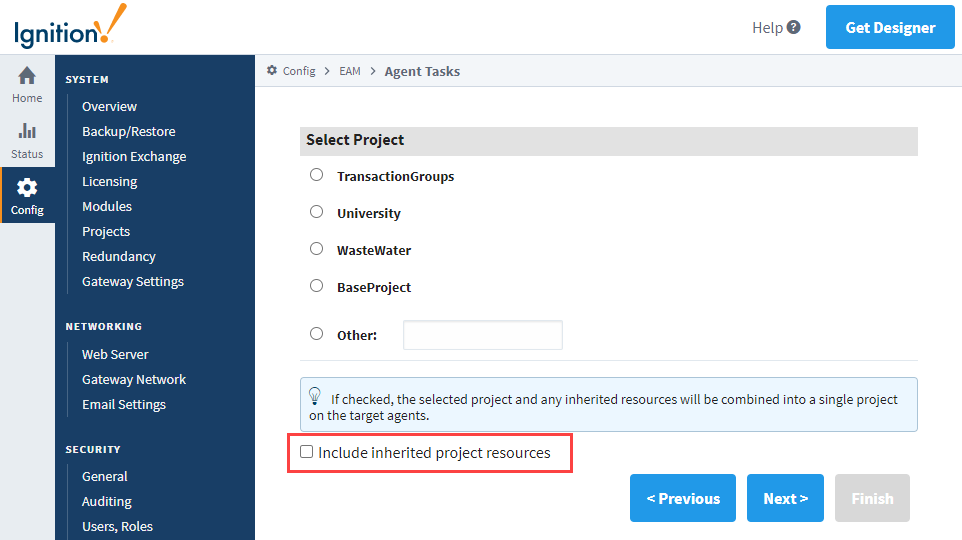
A checkbox was added to the Agent Tasks, as shown in the image below, to include inherited project resources. The default is false.
Send Project Resources Task
You can also send project resources, such as project templates, windows, transaction groups, pipelines and even script modules from the Controller to an Agent.
Sending Global Resources
Global Resources may now be sent with the Send Project Resources Task. Resources such as Shared Scripts and Alarm Pipelines may be sent to any Agent. When selecting a destination project, Global resources may only be sent to the "Global project" on the Agent.
Sending Project Resources Example
-
On the Controller, under the Config section of the Gateway Webpage, go to Enterprise Administration > Agent Tasks. Let’s create another Gateway Task to send project resources from the Controller to the Agent.
-
Click Create new Gateway Task. The EAM wizard will guide you through each step of the Send Project Resources task.
-
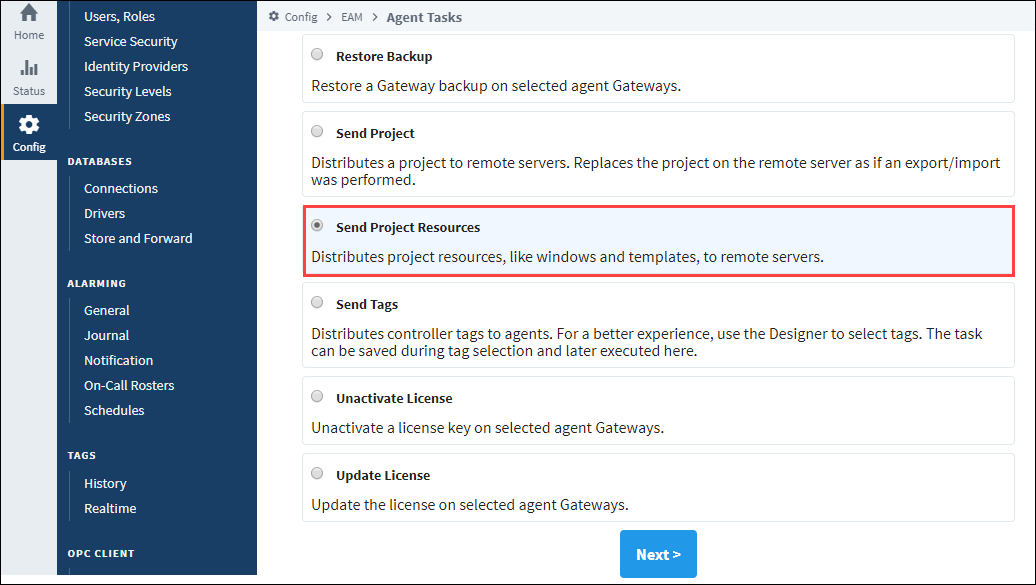
Click on the Send Project Resources radio button, and click Next.
-
Schedule the Send Project Resources task to Execute Immediately and click Next.
-
Select the Agent on the Agent Selection window and click Next.
-
Select the Source Gateway/Local System where your project resources reside and click Next.
-
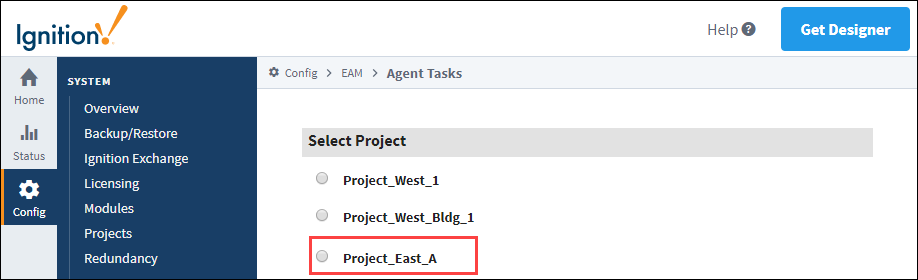
This example sends selected resources from the Training project on the Controller to the Agent. We selected Project East. Click Next.
-
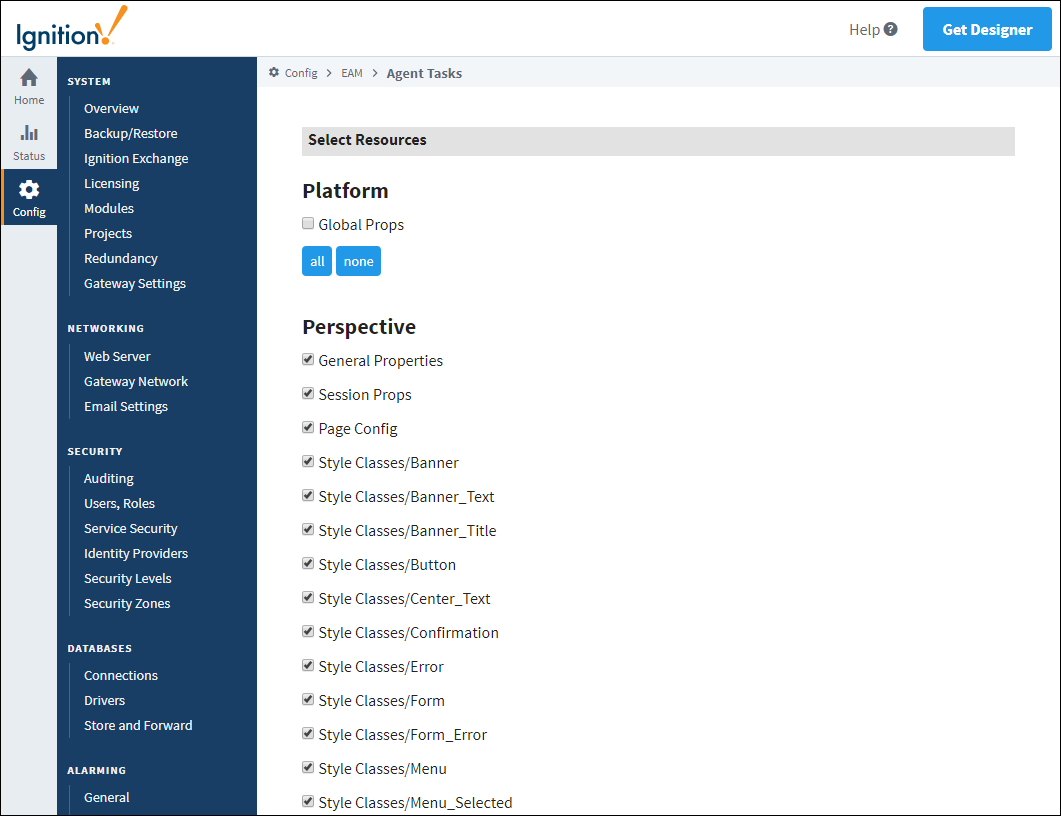
You can see all the resources inside of the Training Project. It can include templates, windows, transaction groups, pipelines and script modules. Choose whatever resources you want to send to the agent and click Next.
-
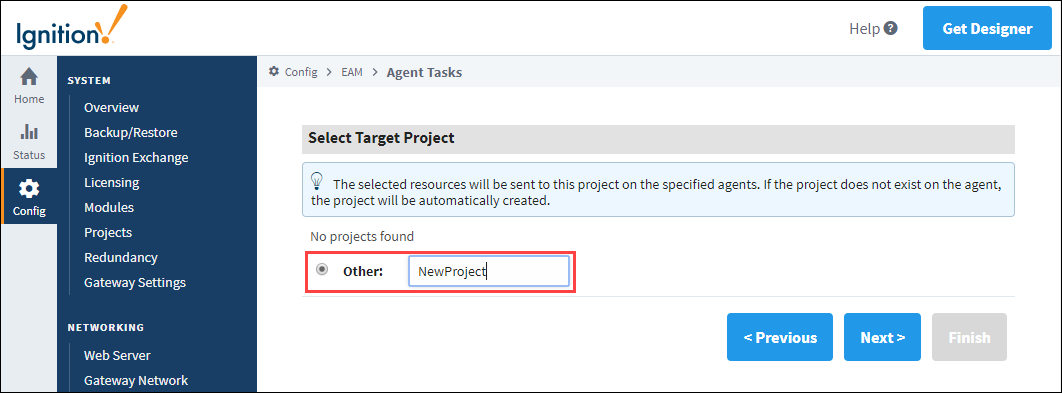
You have the option of either merging the project resources into an existing project or creating a new project on the Agent. In this example, let's create a new project. Select Other and enter a new project name. Click Next.
The following step is applicable only if you are running Ignition 8.1.28 or later. If you are running Ignition 8.1.27 or earlier, skip to step 11.
-
New in 8.1.28The EAM Wizard will ask if you want to limit the number of agents that will be concurrently contacted as the task executes, which helps in situations where network connections are weak or bandwidth is limited. For this example, we will leave the value at the default of 0, which disables the setting, then click Next.
-
The EAM wizard summarizes all the information for you to review. Click Finish.
-
The Gateway Task for Send Project Resources will execute, the screen will refresh, and a message will appear stating that the task was successful.
-
To verify that the Training project resources were sent, go to your Agent, click on the Config tab on the Gateway webpage, and select Projects. You can see in this example that NewProject was created by the EAM controller. If you don't see your new project, refresh the screen by clicking Projects.
Once your project and project resources are sent to the Agent, you need to complete the installation of your project. You need to set up your authentication profile, database, and Tag providers. Once this is completed, you are ready to use the project and project resources on your Agent.