Remote Upgrade
Agents can be upgraded remotely from the Controller. This involves uploading the required binary files for the desired architecture as a task. Once the files have been saved, the remote upgrade procedure may be initiated. Both the Agent to be upgraded, as well as the Controller, must be on 7.9.2+ to execute a Remote Upgrade.
If attempting to update an Agent from Ignition 7.9 to Ignition 8, the Controller should itself be upgraded to Ignition 8 first.
Upgrading Redundant Agents
When upgrading a redundant pair of agents, it is recommended that the backup be upgraded before the master.
Remote Agent Upgrade Task
This task will upgrade the agent(s) upon execution.
This task takes zipped binary files for a version of Ignition, and saves them for upgrades later. Multiple files may be saved for different versions and architectures. Additional modules may be included, allowing for upgrades of non-standard modules to occur simultaneously.
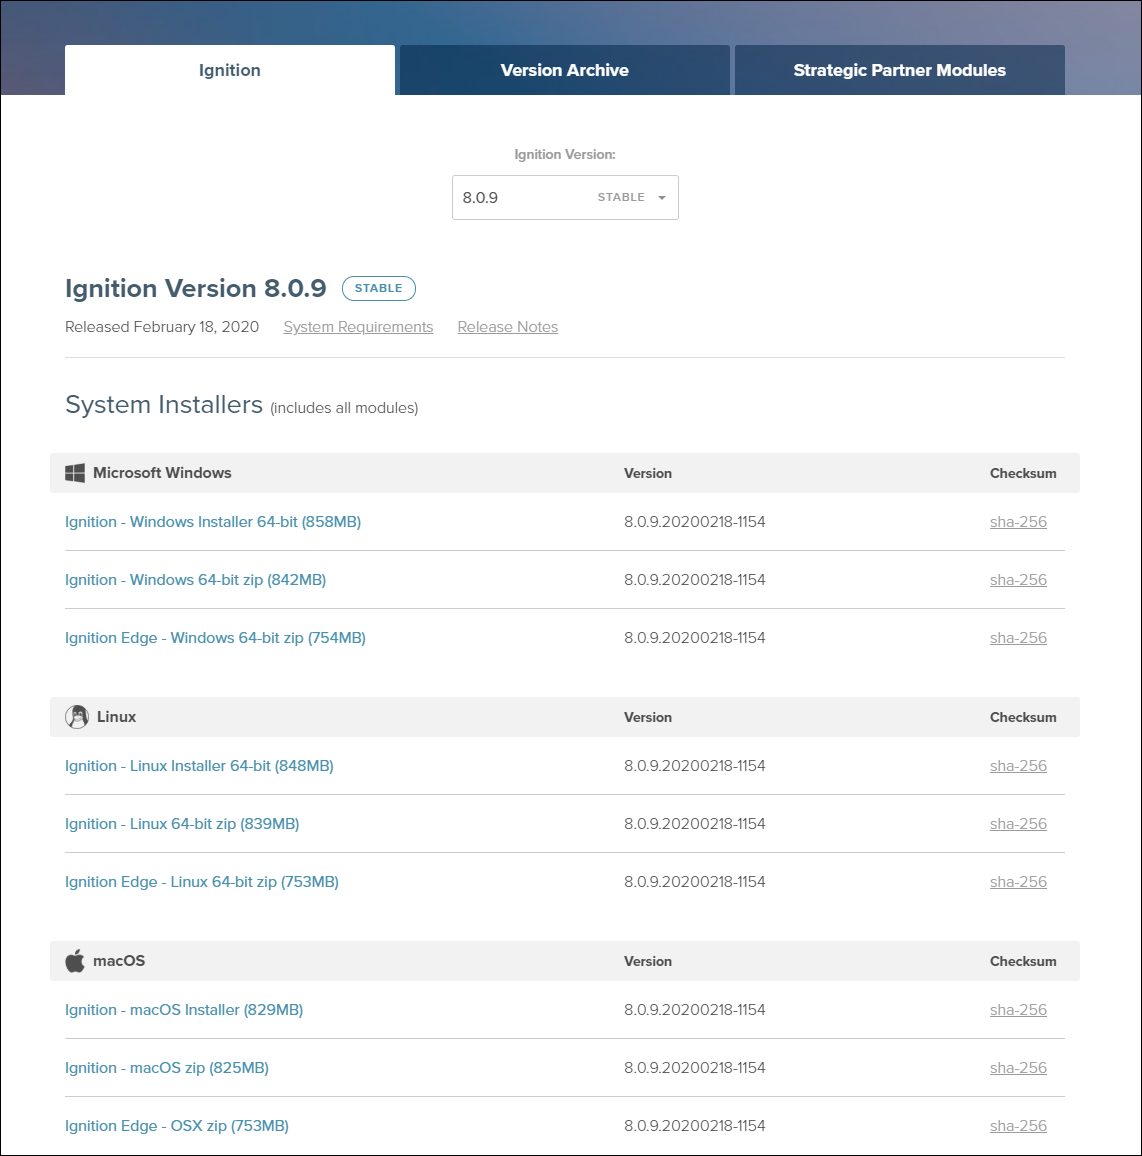
The zipped binary files differ from the installers. The binary files may be found on the Ignition downloads page, listed below the installers.
This task only needs to be executed once per version/architecture: multiple upgrades may be performed from the same files.
Creating the Remote Agent Upgrade Task
-
From the Controller, navigate to Config > Enterprise Administration > Agent Tasks.
-
Click Create new Gateway Task.
-
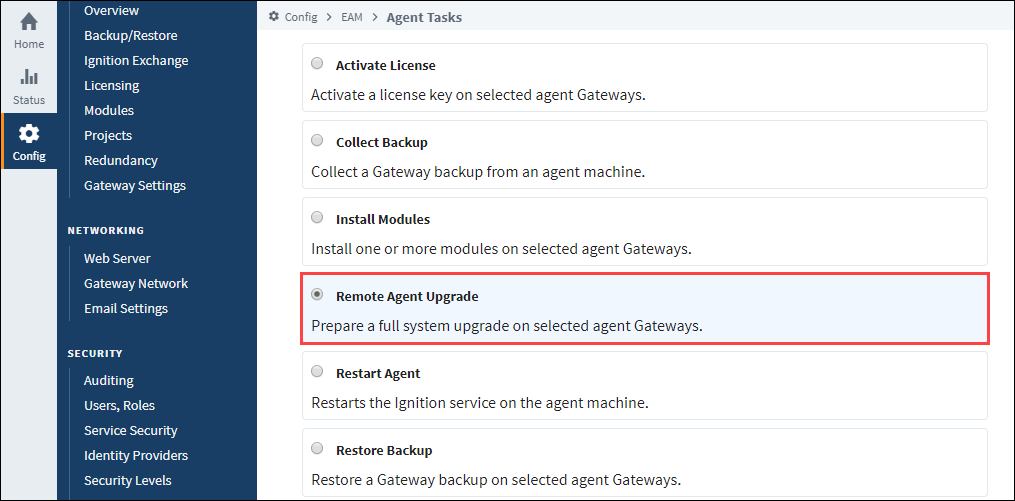
Select the Remote Agent Upgrade task from the list of tasks, and then click Next.
-
On the Task Scheduling page, give the task a name. Like all tasks, you will specify either a group, or several agents, so providing a useful name will make the task easier to identify later. As for the execution, select Execute Immediately to have the task run immediately.
-
Next, select the Agent you want to upgrade. Click Next.
-
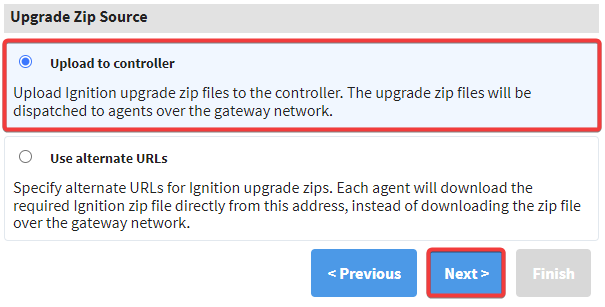
Select how you want to upgrade your controller. You can either choose to upload the Ignition upgrade zip files to dispatch to connected agents, or specify an alternate URL that the agent will use to download the required upgrade zip files. In this example, we will choose Upload to controller. Once you have made your choice, click Next.
 note
noteThe Use alternate URLs option is only available on Ignition version 8.1.33 or newer.
-
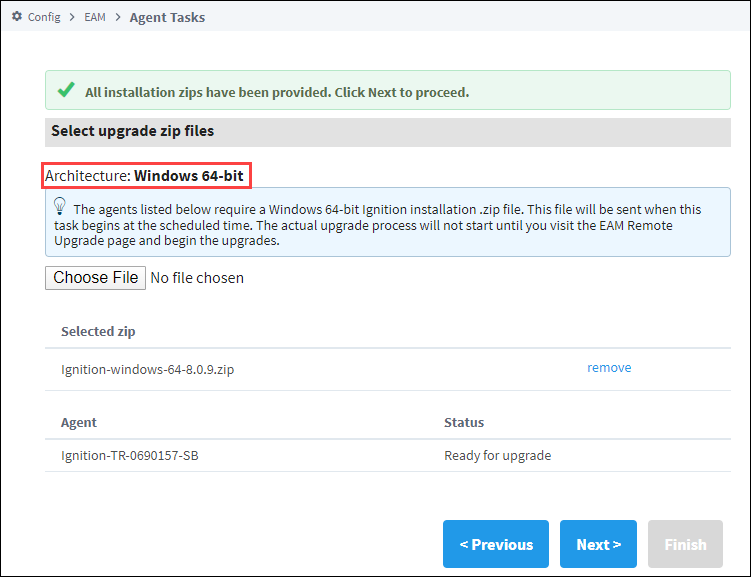
On the Remote Agent Upgrade page, click the Choose File button. Navigate to the file you wish to upload, and click OK. Note that this page will state the architecture of the Agents that were selected in the previous step. Once finished, click Next.
-
Next, select any additional modules that should be included with this Task. Modules that are not included in the typical installation, including third party modules, may be added. Click the Choose File button, navigate to the module, and click OK. This step is optional, so regardless of whether you add custom modules, click Next when you're ready to move on.
-
The Task Summary page will appear. Review the information, and click Finish. Because we selected Execute Immediately during the schedule portion, the new task will run and pass the files to the agent, and begin upgrading.
Upgrading the Agent
Once the files have been passed to the Agent, a remote upgrade may be initiated from the Controller's web interface.
As with all upgrades, it is highly recommended to take a backup of the Agent before starting the upgrade process. Information on taking a backup from an Agent can be found on the Agent Task - Backup and Restore page.
You will not be able to use the EAM Remote Upgrade Task for agents in a Docker container. In lieu of the Remote Upgrade Task, upgrade the image the container is using.
Remotely Upgrading an Agent
-
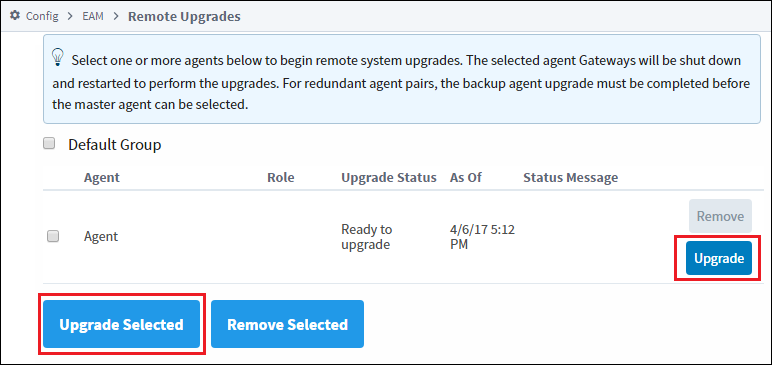
To begin a remote system upgrade, on the Controller, navigate to the Gateway Webpage. Select Config > Enterprise Administration > Remote Upgrades.

-
Once the Remote Upgrades page appears, you may either click the Upgrade button next to the agent you wish to upgrade, or select multiple agents/groups and click the Upgrade Selected button.
-
A confirmation page will appear. Click the Confirm button when ready to proceed.
-
The Remote Upgrades page will appear again. This will report the status of the upgrade. Once complete, the Upgrade Status of the agent will show that the upgrade was successful.