Remote Gateway Notification
The Remote Alarm Provider offers several ways to utilize the alarm notification capabilities of a remote Ignition Gateway. Alarms can be sent through a central Gateway, with full support for remote acknowledgement delivery. This means that you can manage your Email, SMS, and Voice equipment in a central location, and provide those services to a multitude of Gateways.
After configuring a remote provider, the Ignition Gateway will automatically expose the alarm pipelines configured on the remote system. Tags can then target those pipelines directly, with no further configuration required. Alternatively, custom pipelines can be created, and can utilize the remote notification profile through the Notification block, thus expanding the already significant power of alarm pipelines to include the notification capabilities of other Gateways.
The Remote Alarm Provider is provided by the Alarm Notification Module, which must be present and licensed on all Gateways involved. However, notification modules, such as SMS and Voice, only need to be present on the Gateways that are ultimately executing the notification.
In order to use the alarm notification capabilities of a remote Ignition Gateway, your Gateway and the Gateway you want to connect to must be connected to the same Gateway network.
Enabling remote alarm notifications is easy. There are just a few steps to follow to establish your connection to the designated Gateway, expose the pipelines that are part of that Gateway, and to configure your Tag(s), thus, enabling the alarm notification.
Connect to a Remote Gateway and Select a Profile
-
Go to the Config section of the Gateway Webpage.
-
Scroll down and select Alarming > Notification.

-
Click Create new Alarm Notification Profile.
-
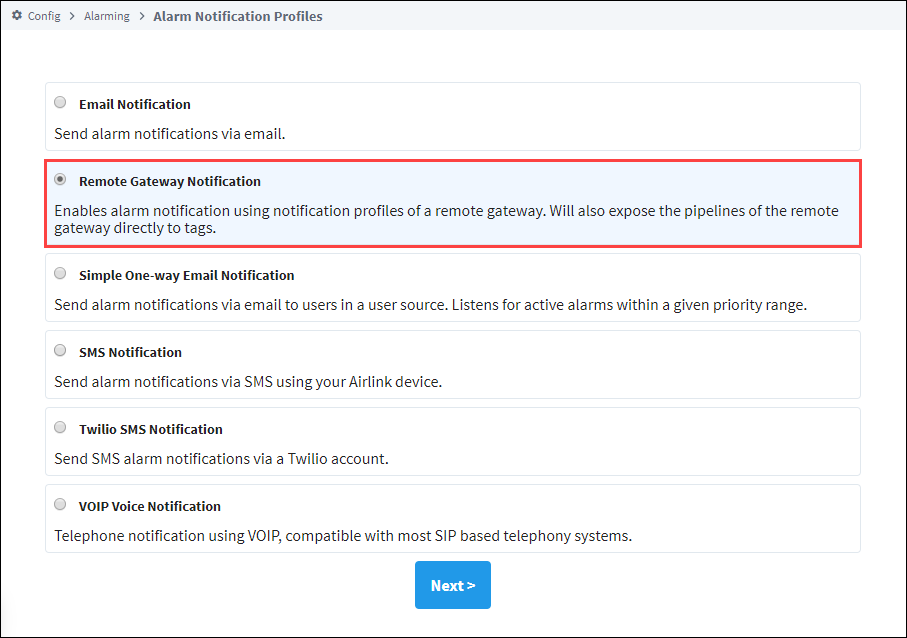
Select Remote Gateway Notification, and click Next.
-
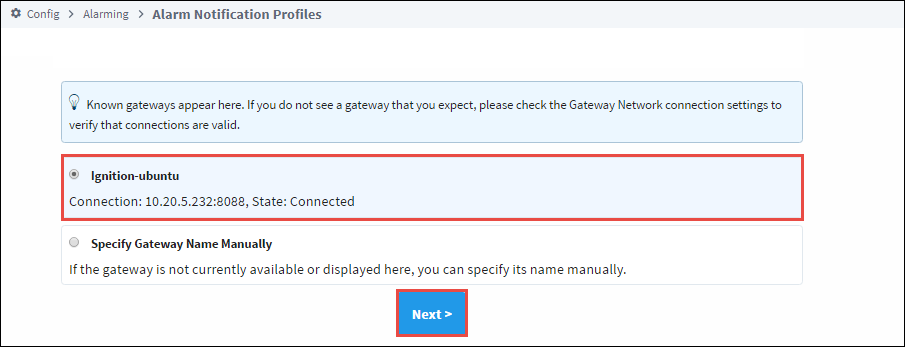
All the known Gateways will be displayed. Choose from the list of available Gateways or you can set up a Gateway manually, then click Next.
-
Once your Gateway is connected, Ignition exposes all the pipelines on that Gateway. Choose from the list of available Remote Notification Profiles, and click Next.

-
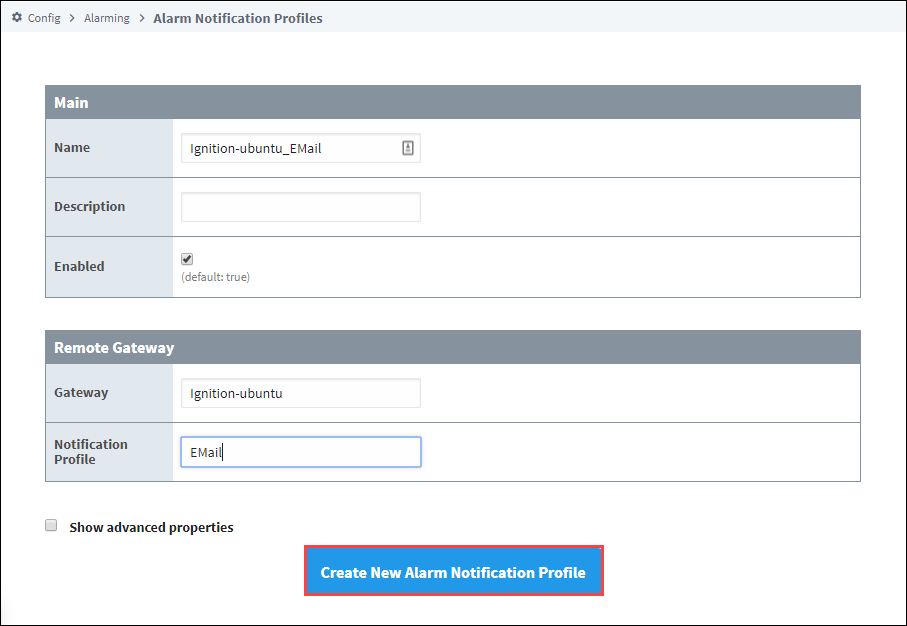
The new Remote Notification Profile window will appear. It will automatically show the name of your Gateway followed by the name of the remote Profile unless you are manually specifying a remote profile. There is a naming convention that is used when identifying the 'Name' of the New Remote Notification Profile. It is the Gateway Name followed by an underscore and the name of the Profile (i.e., Ignition-ubuntu_Email). Click Create New Alarm Notification Profile.
-
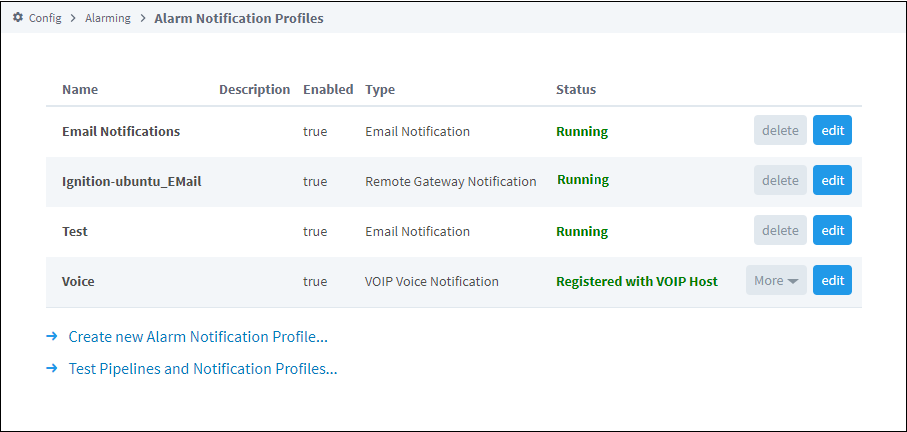
The Alarm Notification Profiles window will open showing all your alarm profiles including the one you just created.
Remote Gateway Notification Settings
Remote Gateway
| Property Name | Description |
|---|---|
| Gateway | The name of the remote gateway that contains the desired Alarm Notification Profile. The name in this field should match the name of the gateway as is reported in the Gateway Network incoming/outcoming connections. |
| Notification Profile | The name of the Alarm Notification Profile on the remote Gateway. |
Advanced
| Property Name | Description |
|---|---|
| Retry Delay | Delay, in milliseconds, between retries of a failed attempt to synchronize with the remote profile. Default value is 10,000. Changed in 8.1.18 In cases where multiple Remote Notification Profiles are targeting the same remote Gateway, the highest Retry Delay value amongst the Remote Notification Profiles will be used. |
| Max Queued Alarm Transitions | Maximum size of the transition evaluation queue before the oldest entries are start getting discarded. This queue is only expected to fill while the connection to the remote is not available. Default value is 10,000. Changed in 8.1.18 In cases where multiple Remote Notification Profiles are targeting the same remote Gateway, the highest Max Queued Alarm Transition value amongst the Remote Notification Profiles will be used. |
Enable the Remote Alarm Notification
The last steps are to select your Tag, add an alarm, and configure your alarm settings. If you already have an existing alarm, then all you need to do is go to your alarm configuration, and select the remote pipeline that you want to use for your alarm.
-
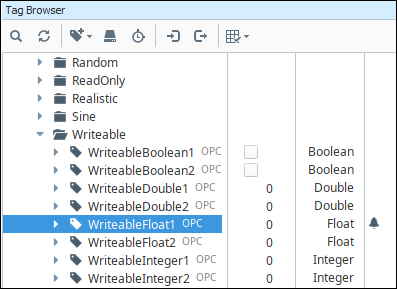
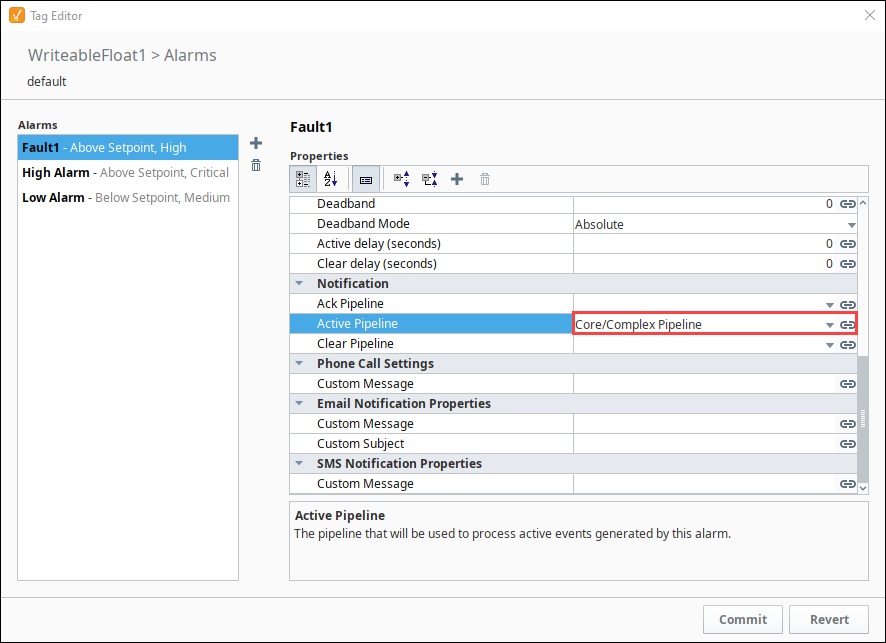
In the Designer, under the Tag Browser, double click on your Tag (i.e., WriteableFloat1) to open the Tag Editor.
-
In the Tag Editor, scroll down to Alarms and click the Edit
 icon .
 -
Select your alarm (i.e., Fault1). If you don't have an alarm, then you'll need to add an alarm. (Refer to the section on Configuring Alarms.)
-
Scroll down to the Notification area and under Active Pipeline, select the remote pipeline (i.e., Core/Complex Pipeline) that you want to use from the dropdown list.
-
Click Commit.
Now, you can even create new custom pipelines and use the remote notification profile through the Notification block, while expanding the significant power of alarm pipelines to include the notification capabilities of other Gateways sharing the same Gateway network.
The appropriate Notification Modules such as SMS and/or Voice must be installed on the Gateways that are executing the alarm notification.
Once your Notification profile is created, you can use it in an Alarm Pipeline.