4. Connect to a Database
After you install your database, you can connect it to Ignition. Alternatively, you can have Ignition create an internal SQLite database, which is ideal for testing, demonstrations, and just getting started. This next section will show how to create and connect Ignition to a SQLite database.
Connect to SQLite
Since SQLite is intended for lightweight local storage, you'll want to connect to a server-based database in a production system. For the purpose of getting started as demonstrated on this page, the SQLite database is an easy option to use.
-
If you are already logged into Ignition, then go to the Config section of the Gateway Webpage, otherwise login as the user with full/administrative privileges.
-
From the Config section, navigate to the Databases > Connections page.
-
Click the Create new Database Connection... link.
-
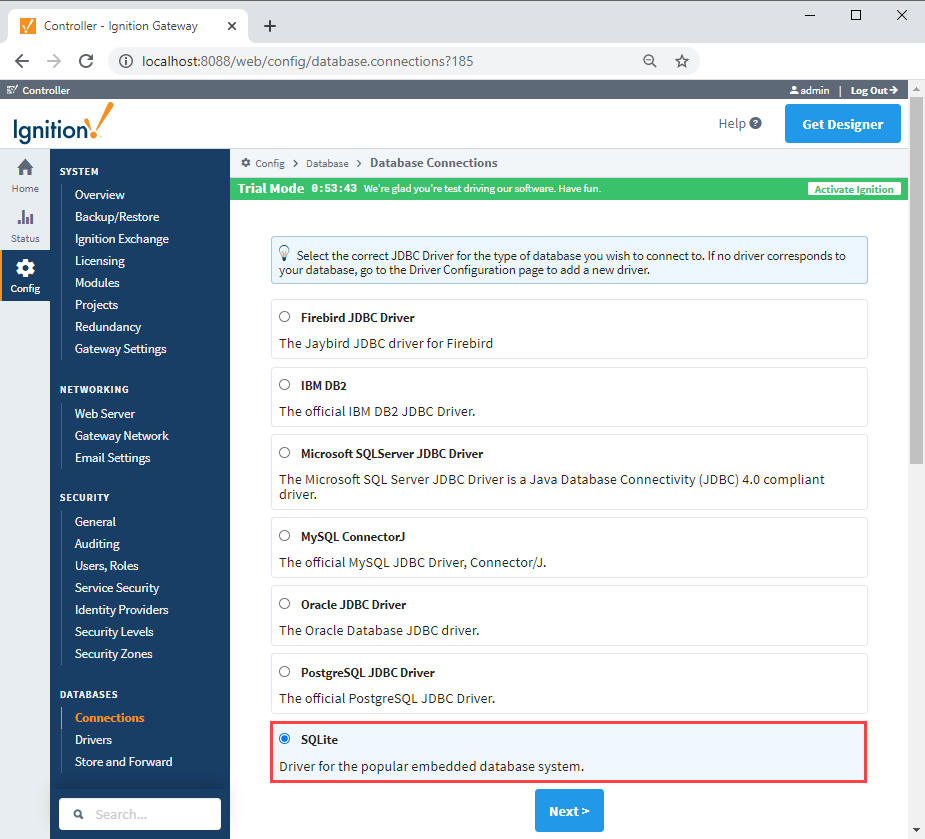
Select the SQLite option and click the Next > button.
-
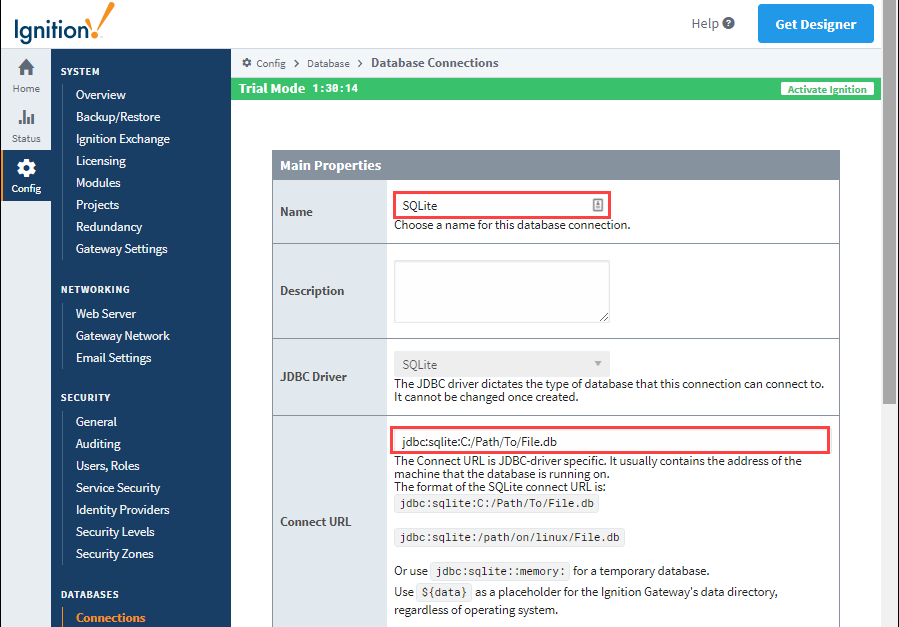
On the Database Connections page, enter a Name and Connect URL. You can leave the other fields blank.
- On Windows systems, the Connect URL will default to: jdbc:sqlite:C:/Path/To/File.db. Part of the Connect URL is a file path. The Gateway will attempt to create a SQLite database at the specified path (assuming there isn't already one there, in which case it simply connects to that database).
- The SQLite Database Connection does not require a username or password to connect. Scroll to the bottom and click the Create New Database Connection button.
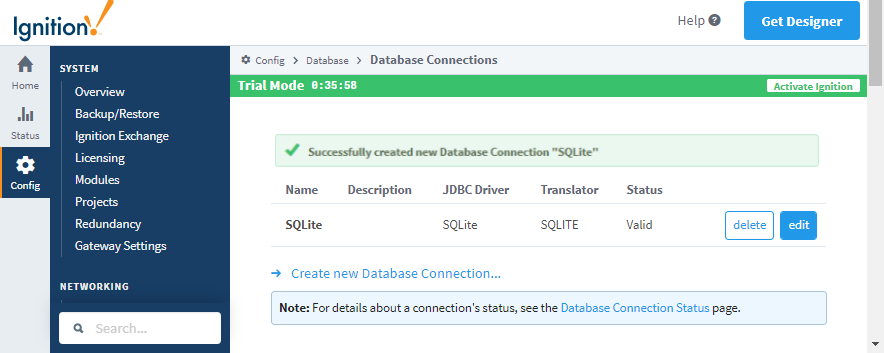
A success message will appear when the database connection is created.
To get detailed descriptions for a number of different database connections, see Connecting to Databases. You can also go to Database Connections.