Getting Started with Scripting in Ignition
Overview
The best way to get started with scripting in Ignition is to write some very simple scripts and print them within Ignition. Let's take the phrase, "Hello World," and print it within Ignition. To show how flexibile Ignition is, there are actually a few ways to easily do this. One way is to use the Scripting Console, and another way is to use a Button component. Both examples are shown below.
Example - "Hello World" Using the Script Console
When testing or writing a new script, the Scripting Console is very useful since you can immediately get some feedback on the results of the script. When learning Python, it is a great place to start since you don't have to create a window or component before you begin writing your code.
-
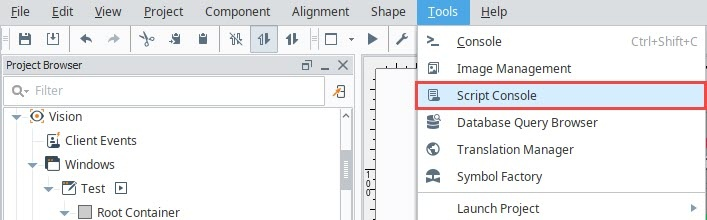
In the Designer, open the Script Console from the Menu Bar: Tools > Script Console.
-
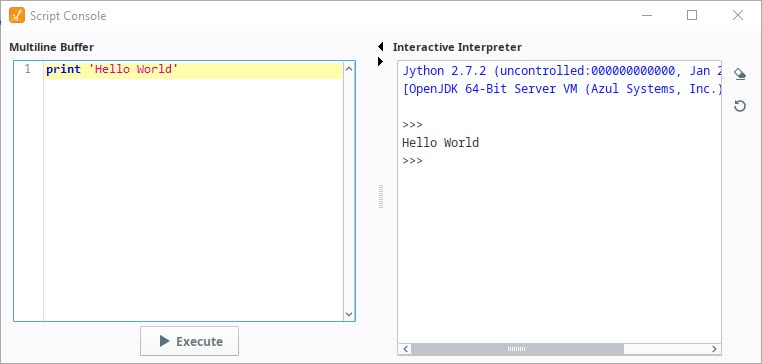
The Script Console will appear. Type the following code, or simply copy and paste it into the text area in the Multiline Buffer on the left side of the Script Console:
Python - Simple Printprint 'Hello World' -
Click the Execute button at the bottom of the Script Console. You should see the message "Hello World" appear in the Interactive Interpreter on the right side of the Script Console.
Example - "Hello World" on a Button Component
Scripts are commonly located on components in a window. In this example, let's add a script on a Button component, and print out "Hello World" when the Button is pressed.
-
In the Designer, create a new Main Window. Give it a meaningful name if you like. (We won't need to reference the name of the window in any of these examples).
-
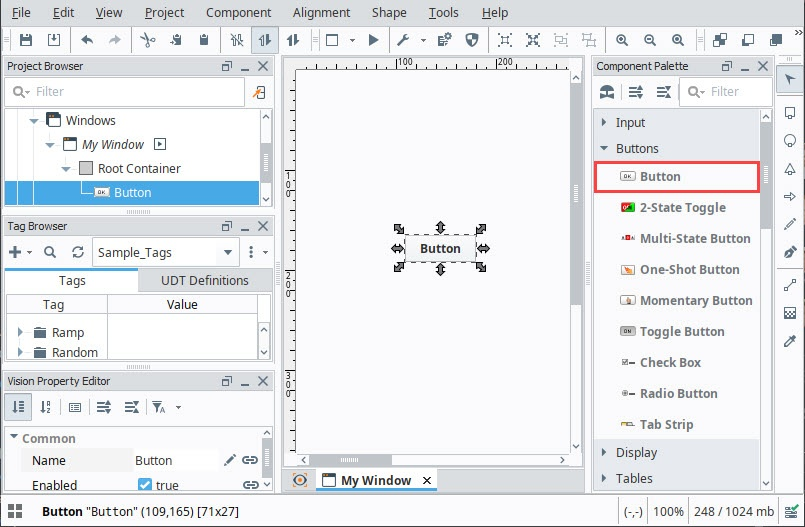
Drag a standard Button component to your window.
-
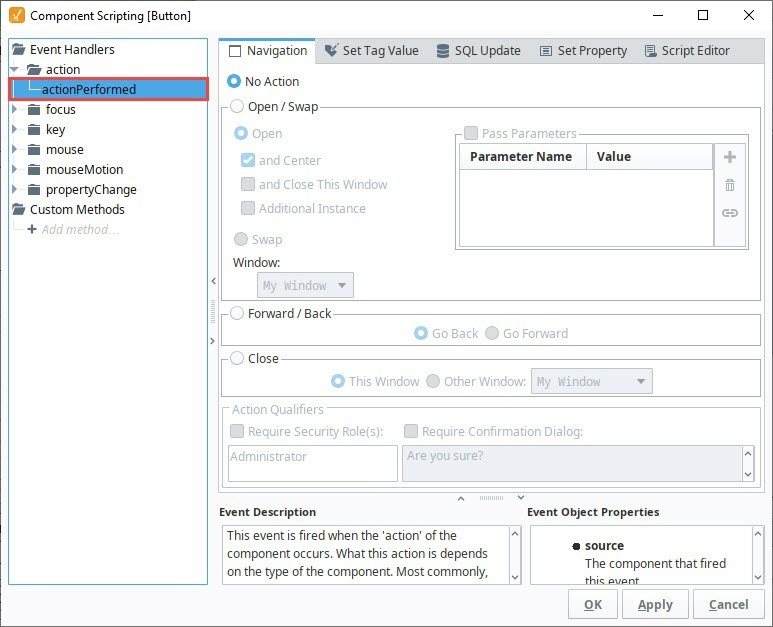
Let's add a script that triggers when the Button is pressed. With the Button component selected, right click on Scripting to open the Component Scripting window.
-
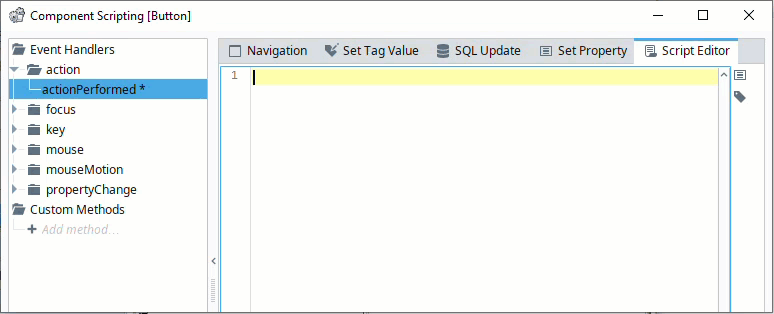
Under Event Handlers, select the action > actionPerformed option, and click the Script Editor tab. Make sure the actionPerformed event is highlighted. If an event is not selected, all of the remaining features in this window will be disabled, so we will not be able to write a script. Additionally, if the wrong event is selected, then our script will not trigger when we expect it to.
-
In the Script Editor, you will see a large editable Text Area. This is where we will type our script.
-
Let's generate a message that shows "Hello World!" Use the following code to get started. Make sure the word "print" lines up exactly to the left edge. Indention in Python means something, so we need to avoid starting our lines with a space or tab unless we're denoting a block of code under something like an if-statement or function definition. Click OK to close the Component Scripting window.
Python - Simple Printprint "Hello World!"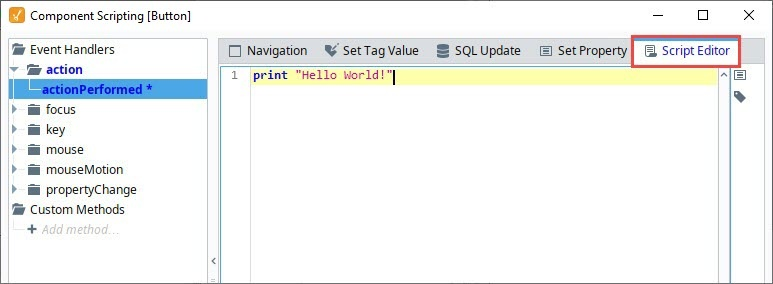
Notice the actionPerformed event is blue and bold. This means there is a script on this event. This is useful to know in situations where a component has scripts on multiple events.
Additionally, an asterisk character ( * ) is next to the event. This means you have not applied/saved the changes to the script. The asterisk will disappear when you press either OK or Apply, and reappear whenever you make a change to the script. If you see this, then it means you may want to save any changes you made.
The Script Editor tab also has a blue color, denoting where the script is. An event will only ever have a script located on a single tab at any time. If a new tab is selected and configured, it will wipe out the work on the prior tab, for example, writing a script on Script Editor and then configuring the Navigation tab will erase the script on the Script Editor tab.
-
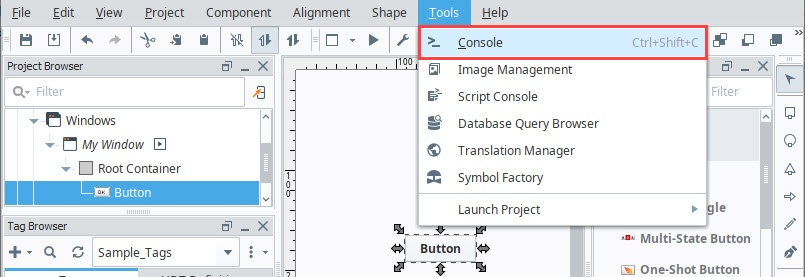
Now we can test the script. Place the Designer into Preview Mode, and press the Button. If everything is working as intended, then it should appear as if nothing happened. This is because we used print in our script, which always outputs to a console, as opposed to popping up at the user. This means we need to open the Designer's Console to see the results of our script. At the Designer's menu bar, select Tools > Console. This will make the console appear.
-
There may be a large amount of text in the Output Console. The Designer logs many different types of activities and events here, including polling events from components on other windows that are currently open in the Designer. However, the most recent events should be towards the bottom. As a quick tip, you can also click the eraser icon
 to clear out the console, and then press your Button again to generate a new entry like we did in this example.
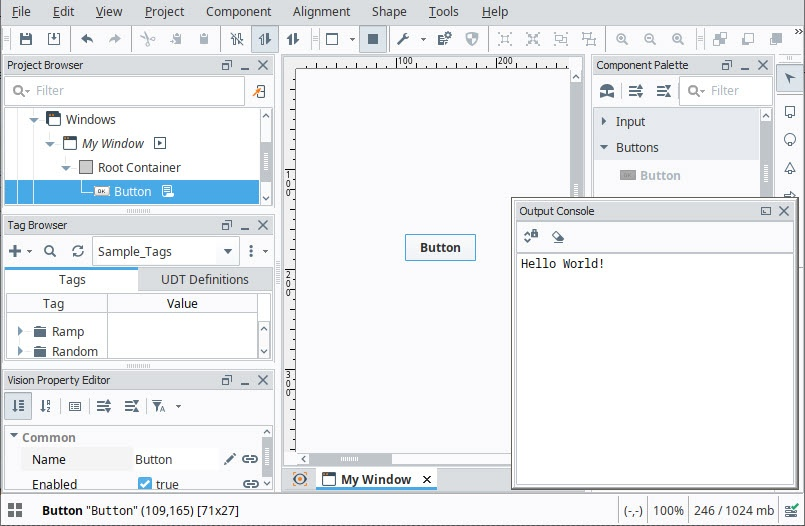
We can now see where print statements go when called from a component, but this isn't too useful, as we don't want our users to open the console to see messages. Print statements are very useful when troubleshooting a problematic script, or even when testing a new script. Keep this in mind as you start to delve into scripting more.
Example - Using a Message Box
Now that we've seen how to print to the Output Console, lets make our message appear when we call it. This time, we will modify the script on the Button component to bring up a window that the user will see.
-
Open the Component Scripting window again, and find the script on the Button.
-
We will use one of Ignition's built-in functions, called system.gui.messageBox, to display the message. This will make a message box appear, which is a modal window that we can pass a string to. Remove your old code on the Button, as we will be replacing it. Start by typing the following:
Pseudocode - Built-in Functions Begin with system.system. -
With the Text Cursor just to the right of the ".", hold The Ctrl/Cmd key and press the Spacebar. This will make the Autocompletion popup appear. This lists all of the available system functions. Start by clicking on gui, and then messageBox. Note, that you can still type while the popup is open to filter the results in the list.
 New in 8.1.18Starting in 8.1.18, the Autocompletion popup appears by default after typing "."
 -
Once you've selected messageBox, click on it, and it should start some of the code for you automatically.
-
Complete the code by placing some parentheses and a message as a string. Alternatively, you can copy the example below.
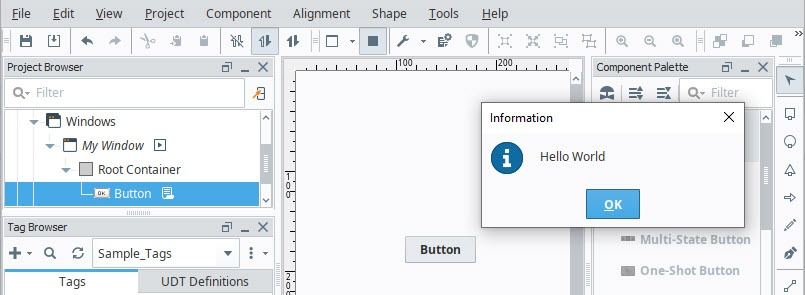
Python - Using a System Function to Write to a Message Boxsystem.gui.messageBox('Hello World') -
Place the Designer into Preview Mode, and click your Button. You will see a Message Box appear displaying the message we passed to the function.