Core Historian
This page demonstrates how to create a Core Historian on the Gateway, and describes the available settings and configuration options for existing historians.
Configuring a Core Historian
-
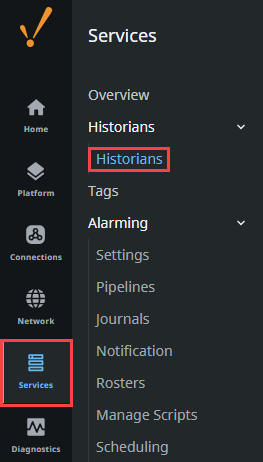
Navigate to the Services > Historians > Historians section of the Gateway.
-
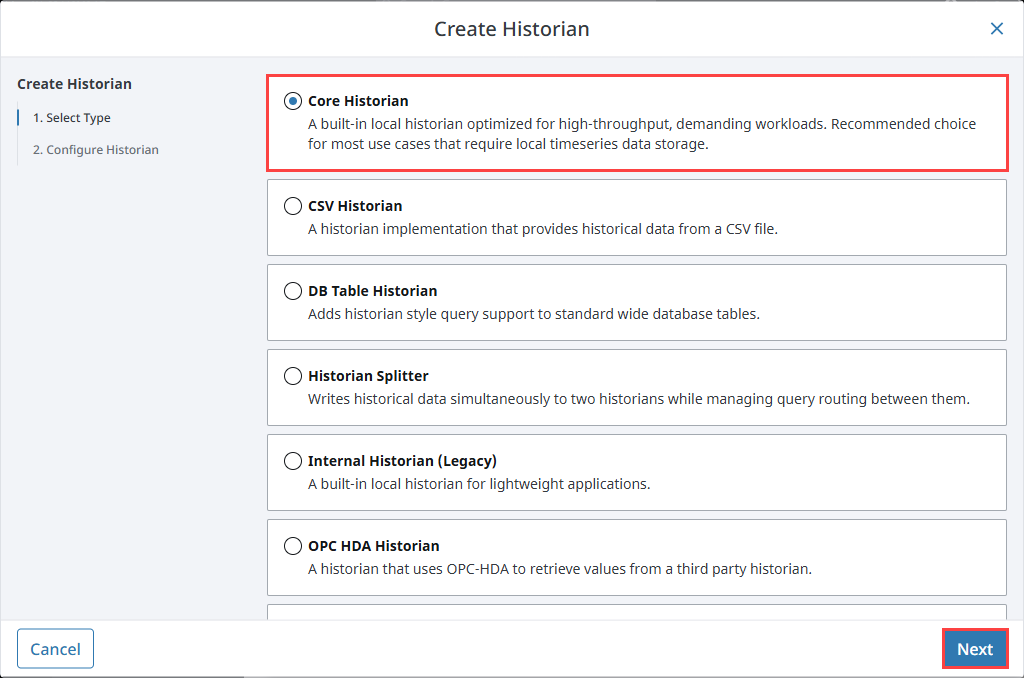
On the Historians page, click Create Historian +.
-
From the Create Historian form, select Core Historian, then click Next.
-
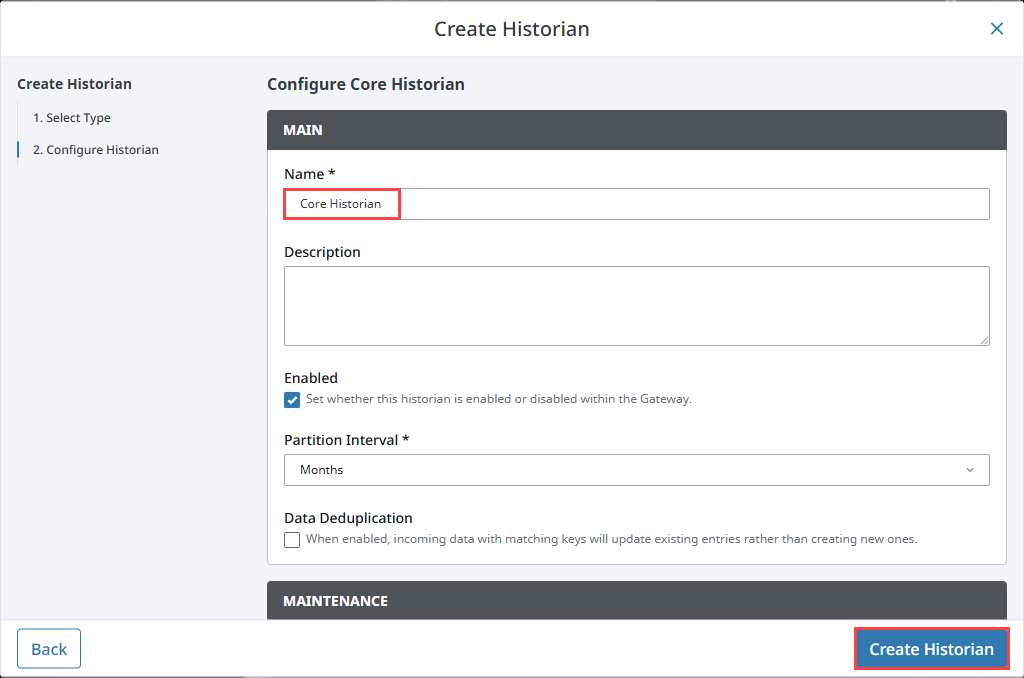
Give your Historian an appropriate name, and configure the settings to align with your needs. In this example, we will name our Historian Core Historian, and leave the settings as the default. Click Create Historian when done.
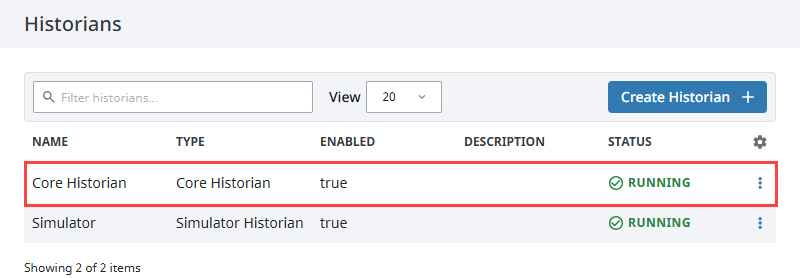
Your Core Historian will now be listed and ready to store data.
Settings
Main
| Property | Description |
|---|---|
| Name | Specifies the unique name used to identify the historian provider. |
| Description | Provides an optional user-defined description for the provider. |
| Enabled | Set whether this historian is enabled or disabled within the Gateway. |
| Partition Interval | Granularity of table partitioning (Week, Month, Year). |
| Data Deduplication | When enabled, incoming data with matching keys will update existing entries rather than creating new ones. |
Maintenance
| Property | Description |
|---|---|
| Mode | Determines how older data is archived or permanently deleted. Options include:
|
| Archive Folder | The path to a folder that will serve as the target location for the archived partitions. This setting is only available when the Mode property is set to Archive. |
| Maintenance Age | Specifies the age threshold for data maintenance. |
| Maintenance Age Units | Specifies the time unit used for the data maintenance age threshold. Must be a whole number multiple of the Partition Interval, e.g., if the Partition Interval is DAY, the Maintenance Age must be a whole number of days (24 HOURS, 2 DAYS, 3 MONTHS, etc.) |
Metadata Storage
When enabled on a tag, metadata is stored automatically in system-managed tables. This includes properties like tag path, data type, units, and scaling. Metadata is preserved even if the tag is removed.
Metadata must be explicitly enabled in the Tag Editor by setting Include Metadata to true. This setting is found in the History section when editing a tag in the Designer.
Metadata is required for features like annotations, aggregates, and Historian scripting functions.
Customizing Server Settings
Starting in 8.3.4, server.conf and log.conf files will be automatically created upon Core Historian creation. These files allow for certain server settings to be customized, such as the Cairo commit mode and log routing. Once a connection has been created, these files can be found in the %IgnitionInstallationDirectory%/data/var/com.inductiveautomation.historian/corehistorian/conf/ directory.
The log.conf file provides file and stdout writer logging properties. The server.conf file contains a filtered set of properties for the following settings:
- RAM
- Cairo
- Materialized View
- WAL
- HTTP
- PG Wire
- Metrics
- Logging
Note that some settings are restricted and set to false by default. The default cairo.commit.mode property is set to sync.
Support for Ignition's legacy system properties that relate to historian configuration, such as historian.questdb.httpServerEnabled and historian.questdb.pgwireServerEnabled have been maintained for backward compatibility. If used, these properties will take precedence over any conflicting values set in the server.conf file.