Driven Scan Class - One Shot
The Driven scan class can be configured as a One-shot scan class. This will not run at a rate, but instead it will be triggered by a change in the driving Tag's value. One-shot polling executes once when the condition becomes true, then waits for that condition to become false then true again. This makes it follow a 'rising edge' or 'falling edge' pattern.
Let's make a Driven One-shot scan class that only updates once when a Memory Tag goes to true. We are using a Memory Tag so a user can change the value when they want to poll the PLC. This is actually a good example of how an operator can poll the PLC for new values whenever they want to, using a refresh button on the screen.
To Create a Memory Tag
-
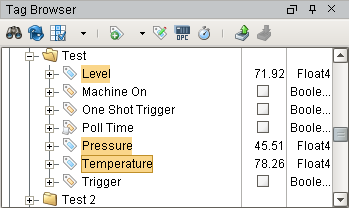
In the Tag Browser, right click on the Tags folder, then go to New Tag > Memory Tag to create a memory Tag.
The Tag Editor will open.
-
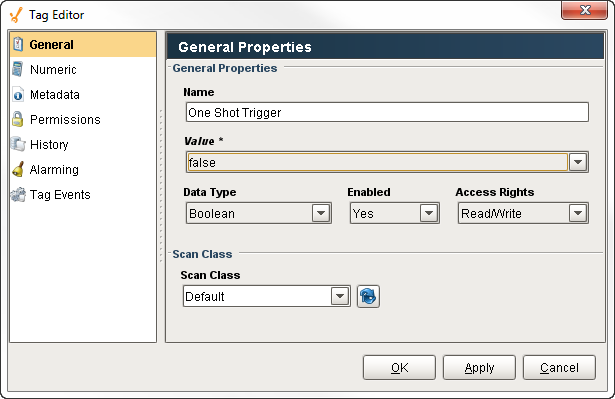
In the Tag Editor, enter the following:
- Tag Name: One Shot Trigger
- Value: false
- Data Type: Boolean
-
Click OK to add the One Shot Trigger Tag to the Tag Browser.
To Make a Driven One-shot Scan Class
Once you have your driving Tag created, add a Driven - One shot scan class that lets a user poll Tags manually.
-
In the Tag Browser, click on the Timer icon (
 ) to open the Scan Class Editor.
 -
Create a new scan class by clicking on the green + icon on the lower-left of the window.
-
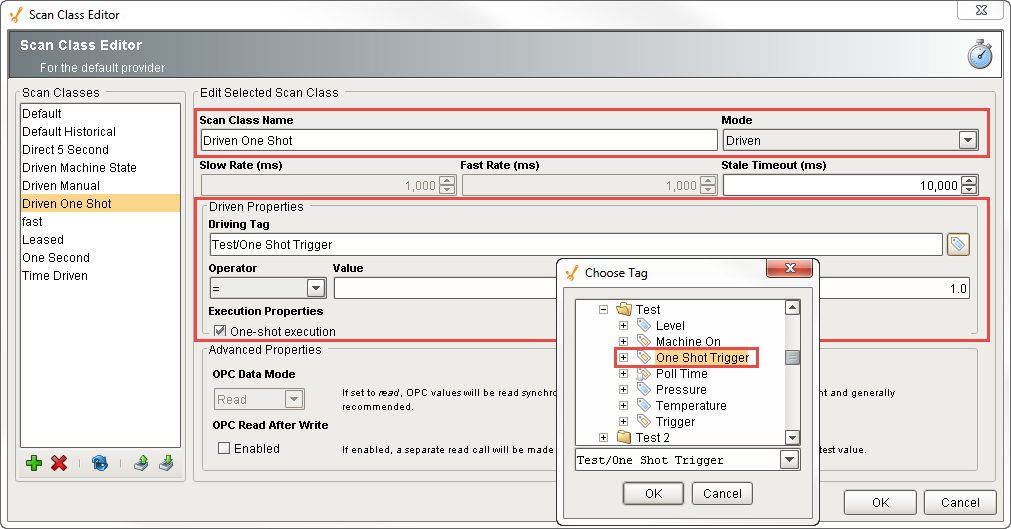
Enter the name of the scan class. For example, you can name it Driven One Shot, and set the Mode to Driven.
This scan class executes based on the condition you set on the Driving Tag.
Ignore the slow and fast rate since they are not used.
-
Click on the Tag icon next to the Driving Tag box, and choose the Tag you want to set the condition on, and click OK. This examples uses the One Shot Trigger Tag that was just created.
-
Set the Operator property to = and the Value property to 1.
-
Check the One-shot Execution property.
Click OK.
-
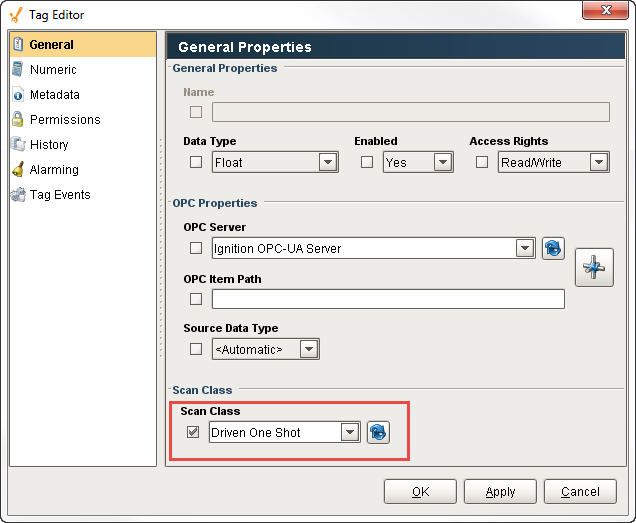
Next, select all the other Tags that you want to run in this scan class (i.e., Level, Pressure, and Temperature).
Right click on the selected Tags, and the Tag Editor will open. To change the scan class, choose Driven One Shot from the dropdown, and click OK.
-
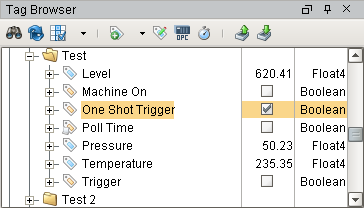
In the Tag Browser, check the One Shot Trigger Tag to set the value to true, and you will see the values update once, and then stop.
Uncheck the One Shot Trigger Tag, to set the value to false, and check it again to set it to true, and you will see the values update again.
-
Drag a Momentary Button component onto a window, then drag your One Shot Trigger Tag onto the button. Now your operators can request new values and the button automatically resets the Tag.