Installing or Upgrading a Module
Module Configuration
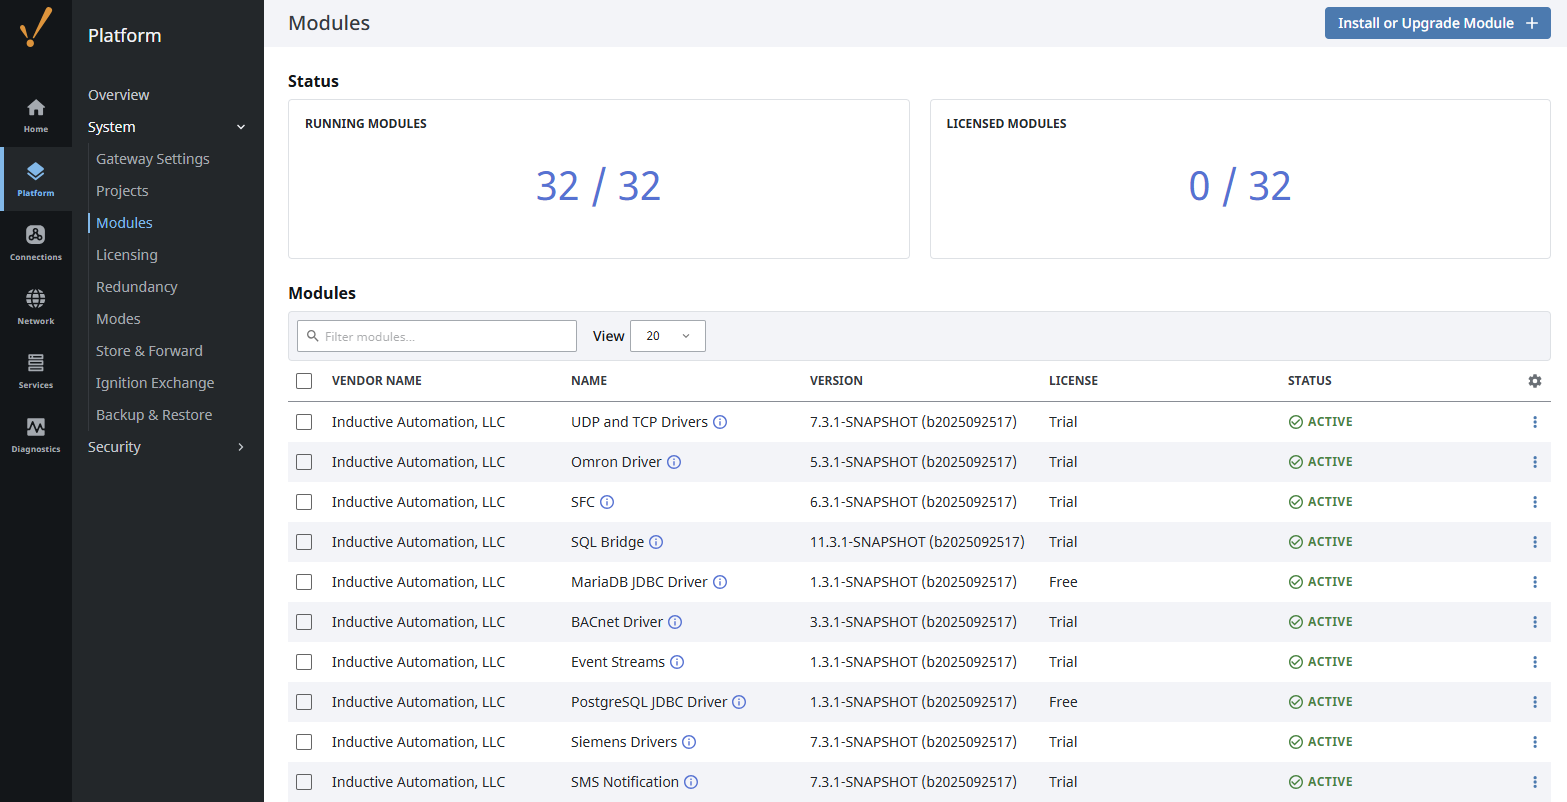
All module configuration is done from Gateway Webpage in the Platform > System > Modules section. The Modules page shows a list of the currently installed modules, their current version, and if they are running properly with a license. The top of the page shows a quick count of the running and licensed modules, so you can easily tell if anything is not working. It is then easy to scroll down through the list to see which modules are having issues.
From here you can also add, remove, enable, and disable modules. Modules integrate their settings into the Gateway configuration tree, and therefore do not offer settings in this section.
Downloading a Module
Ignition comes with some default modules when installing the software. There may be a few modules you require that are not included when performing the initial installation, however. To find the module(s) you require, follow the instructions below.
-
Go to the downloads page on the Inductive Automation website.

-
Click on "Other Versions", located under the Ignition tablet and mobile device graphic. By default, this will take you to different installers and modules for the latest version of Ignition.
-
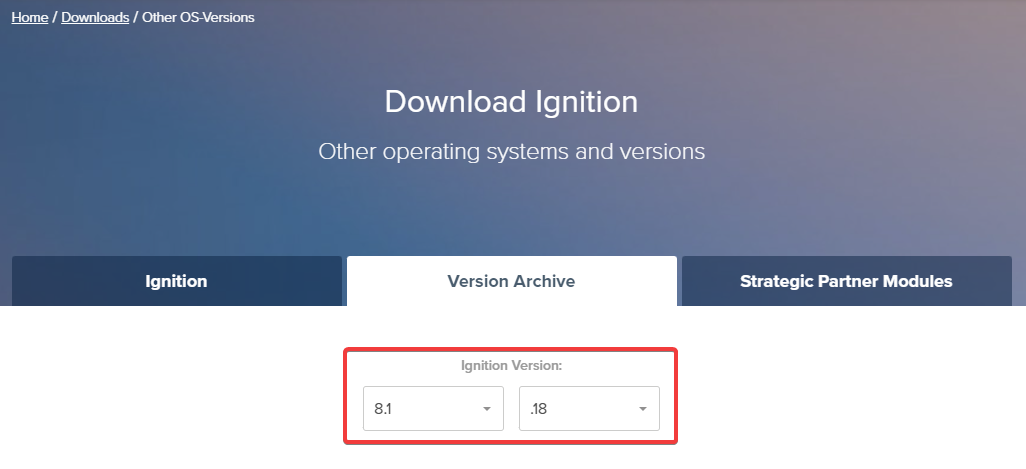
Select which version of Ignition you are currently running.
-
Scroll down the page until you see which module you are looking for. Once you click on the target module, it will start downloading the .modl file.
Install or Update a Module
The following procedure assumes you have a .modl already downloaded in preparation for installing or upgrading a module, including for third party modules.
Installing a module will require connected Vision Clients and Designers to restart. Perspective Sessions will not require a restart. Production systems using either Clients or Designers should wait for downtime before installing a module.
-
On the Gateway Webpage, select Platform > System > Modules to open the Modules page.
-
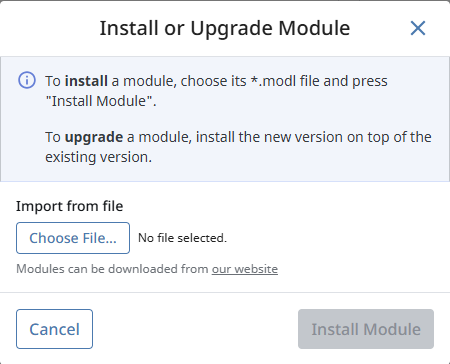
Click the Install or Upgrade Module +.
-
Click Choose File, select a .modl file that you have previously downloaded.
-
Click Install. When the page reloads you can now see the module you installed in the list of modules.
Manual Module Installation
Alternatively, you can add module files directly to your Gateway File System by following the steps below. This example will add the MongoDB Connector module.
-
Navigate to the
%IgnitionInstallationDirectory%/user-lib/modulesfolder. -
Add your .modl file to your modules folder.
-
After adding your new module, we will need to create an entry in our modules.json file to bring the MongoDB module into our Gateway. Go to
%IgnitionInstallationDirectory%/dataand open the modules.json file. -
We will use the same format as the existing entries, and the onStartup and certFingerprint properties will use the same values. However, we will change the module name and filename (file path) properties to reflect using the MongoDB Connector module:
- Module Name:
com.inductiveautomation.connectors.mongodb - Filename:
C:\\Program Files\\Inductive Automation\\Ignition\\user-lib\\modules\\MongoDB Connector-module.modl

- Module Name:
-
Once you have added your entry, save the modules.json file.
-
Restart your Gateway service.
Your new module will now be ready to use.
Uninstall a Module
Uninstalling a module will require connected Vision Clients and Designers to restart. Perspective Sessions will not require a restart. Production systems using either Clients or Designers should wait for downtime before uninstalling a module.
-
On the Gateway Webpage, select Platform > System > Modules to open the Modules page.
-
Locate the module you want to uninstall.
-
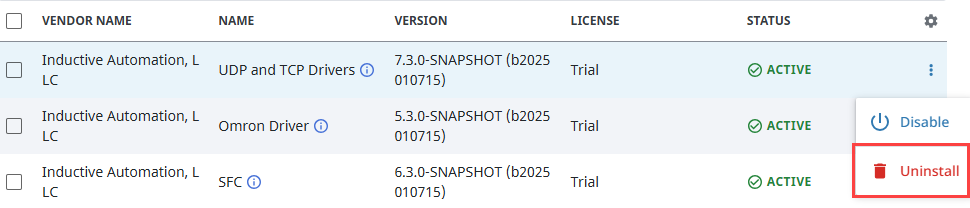
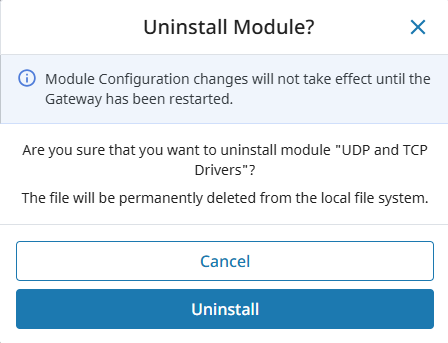
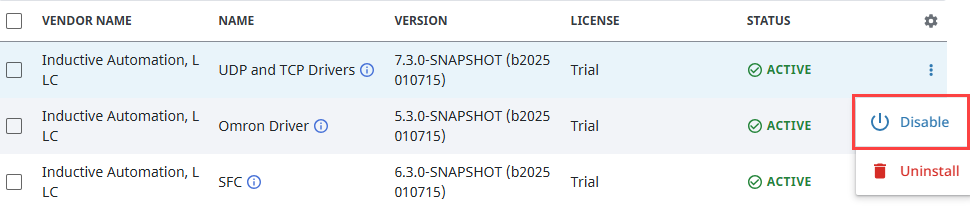
To the right of module name, click the three dot menu and select Uninstall.
-
Click Uninstall. The module is no longer installed and is removed form the list.
Disable a Module
-
On the Gateway Webpage, select Platform > System > Modules to open the Modules page.
-
Locate the module you want to disable.
-
To the right of module name, click the three dot menu and select Disable. A confirmation message appears.
-
Click Disable.
The module status will change to Active Pending Restart until the Gateway has been restarted, and the Gateway Restart Required banner will appear at the bottom of the page. After the Gateway has been restarted, the module will still be listed but will not be functional.
Enable a Module
This option is only available for a currently disabled module.
-
On the Gateway Webpage, select Platform > System > Modules to open the Modules page.
-
Locate the module you want to enable.
-
To the right of module name, click the three dot menu and select Enable. A confirmation message appears.
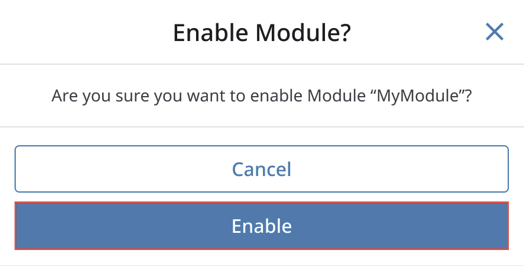
-
Click Enable.
The Gateway Restart Required banner will appear at the bottom of the page for you to easily restart your Gateway. After the Gateway has been restarted, the module will be enabled.
Module Status
The installed module list on the Modules page also provides some basic information about each module. The Version, License, and Status columns are all displayed in the list. Module licensing is performed centrally on the Platform > System > Licensing page, so the values on the Modules page are only for informational purposes.
Module Shows as Faulted After Installation
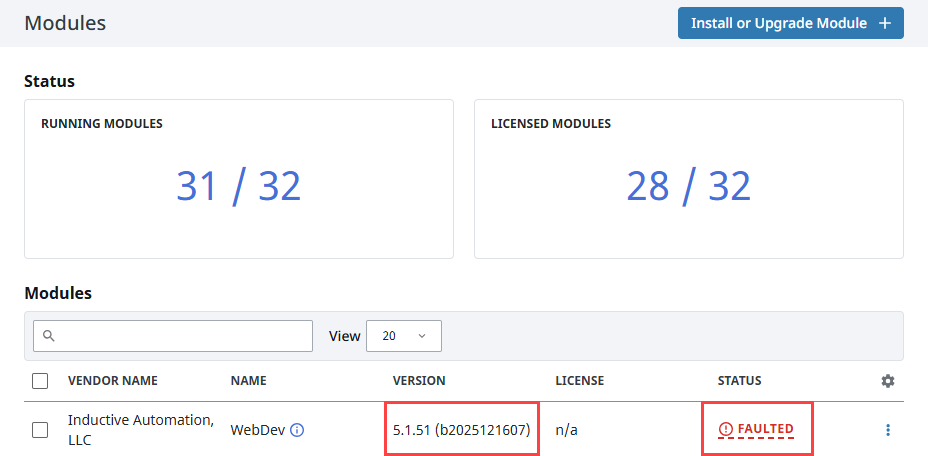
In some cases, a module may appear to install successfully, but its functionality does not become available. A common cause of this behavior is a version mismatch between the installed module and the Ignition platform. For a module to load correctly, the middle digit of the module version must match the middle digit of the Ignition platform version. If a version mismatch is detected, the module will display a Status of Faulted on the Modules page.
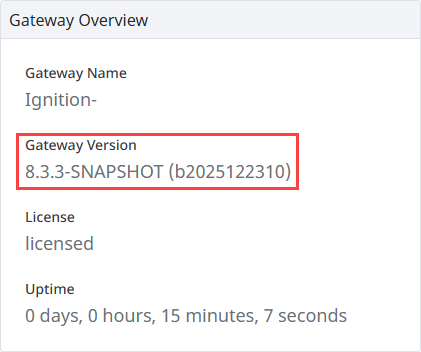
To verify compatibility, navigate to Diagnostics > Overview and note the Ignition version currently running on your Gateway.
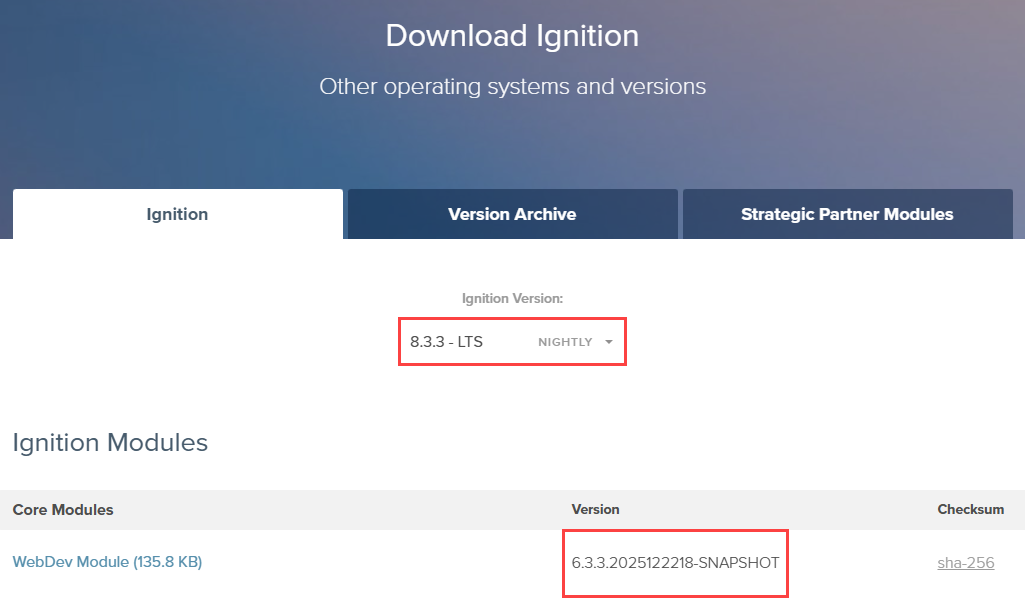
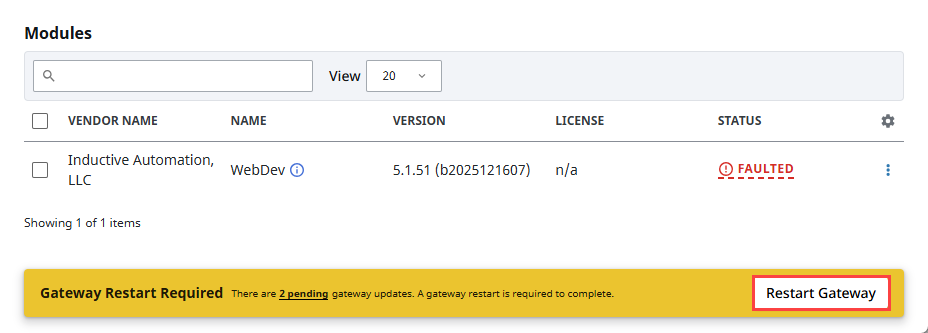
Because the WebDev module shown above has 1 as the middle digit and the Gateway has 3, there is a version mismatch and the module will remain in a faulted state. To resolve this, download the correct version of the module from the Inductive Automation Downloads page. Use the Ignition Version dropdown or Version Archive tab to select the Ignition version that matches your Gateway. From the list of available modules, locate the compatible version and download it.
After installing the compatible version, the Gateway Restart Required banner will appear at the bottom of the Modules page. Click the Restart Gateway button to complete the installation.
Once the Gateway has been restarted, the module will show a Status of Active, and will become available for use.

Verify Trusted Modules
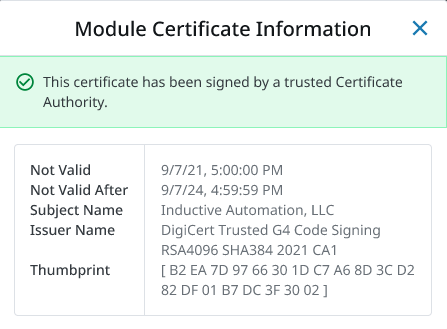
Verify the authenticity of Ignition modules on the Platform > System > Modules page. Expand the three dot menu for your module and select View Certificate to see details about each certificate.
A warning message will appear if the module certificate is expired, however this will not have any impact on security or module behavior.
Quarantined Modules
Near the bottom of the Modules page is the Quarantined Modules section. Modules can be quarantined for various reasons, such as a certificate being unsigned or needing review, or licensing issues. The Gateway will list the specific reason a module is quarantined, along with the module name and version.

Third Party Modules
Third Party modules are not produced by Inductive Automation. Ensure that you know who produced the code and perform due diligence as you would with any other software vendor in accordance with organizational policy.
Strategic Partners, such as Cirrus Link, and Premier Technology Providers, such as 4IR and Sepasoft, are trusted parties by Inductive Automation. However, their modules or services are created by separate groups and may need to be vetted separately from the Ignition platform.
The Module Showcase hosts Ignition modules written by the community. Authors are required to request certificates from Inductive Automation (IA). IA will remove modules with known problems or risk, but hosting does not require a high level of vetting. Your account representative may be able to provide more information on known authors or organizations.
The bundled version of Java in Ignition uses Java 17.0.13, which may impact third party module compatibility. Refer to third party module documentation for further communication about any end-user modifications that may be required.