Array and Dataset Tags
Array and Dataset data types are now available on Tags. Both data types allow for multiple data points to be stored in a single Tag. Configuring a Tag as an array or dataset is as easy as changing the data type in the Tag Editor.
Array Tags
Many OPC servers and drivers already support array type Tags, and now each element in the array can easily be represented with the array data types in Ignition. Additionally, array data types can be used with devices that do not support array types, and will instead expose each bit in the value.
Array Tag Write-Back
Array Alarm Example
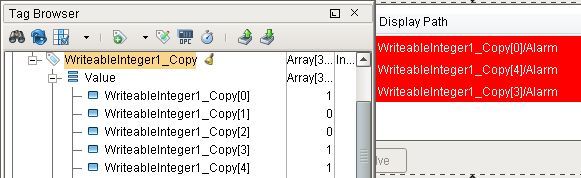
Because the core data type of each element in the array is the same, it is possible to apply Tag History, Alarming, or Scaling configurations onto the array, and these configurations will be inherited by each element.
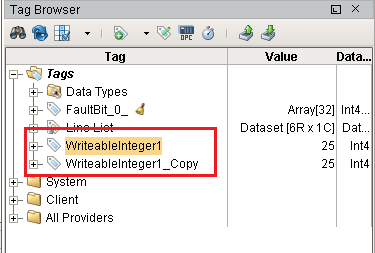
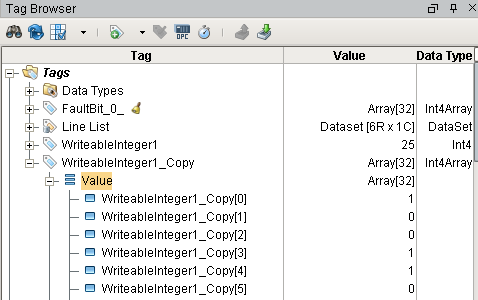
- The WriteableInterger1 and WriteableInteger1_Copy Tags below are using the same OPC Item Path, and both are currently configured as Integer Tags.
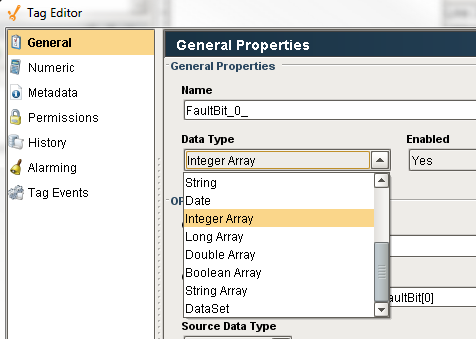
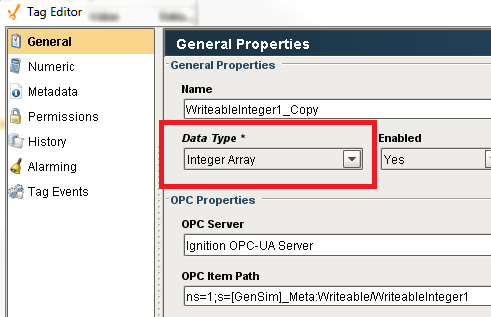
- Edit the WriteableInteger1_Copy Tag, and change its data type to an Integer Array, and click OK.
- Once the Tag finishes re-subscribing, the value for WriteableInteger1_Copy will now show "Array[32]" instead of the previous value. Expanding the Tag reveals a new Value section, and expanding this section will show the value of each bit.
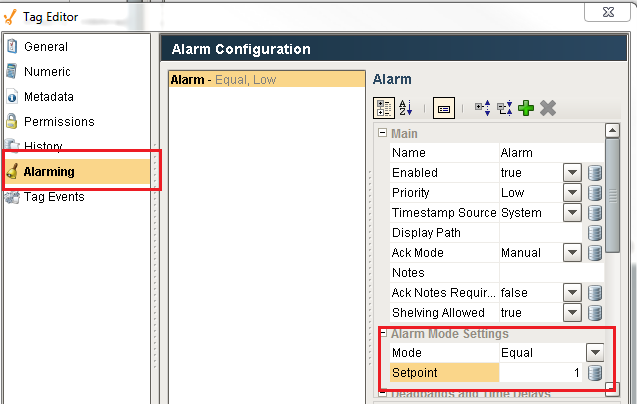
- Next, edit the WriteableInteger1_Copy Tag again, and head to the Alarming section. Create a new alarm with Mode set to Equal, but change the Setpoint to "1," and then click OK. This way an alarm will be active for each element that is set to 1.
- Create a new Alarm Status Table report, and you should see an alarm for each true element.
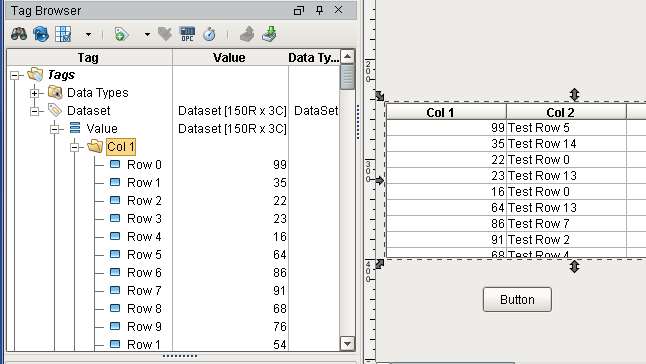
Dataset Tags
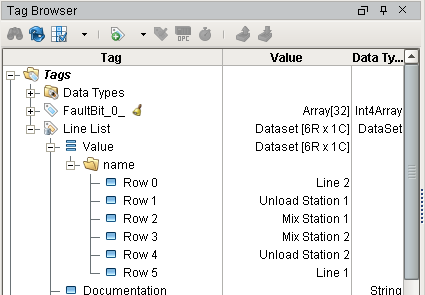
Dataset Tags allow multiple rows and columns worth of data to be stored in a Tag. Each column is exposed as a separate folder in the Tag (i.e., the "name" folder in the image below). Dataset Tags can be driven by a query, so it's possible to query for multiple columns on a row in a single Tag. This is much more efficient than using multiple query Tags (and thus multiple queries) to retrieve the same data.
Memory Tags that use the Dataset type support bi-directional bindings in tables.
Dataset Tag Write Example
The following example will write the contents of a Table component to a Dataset Tag.
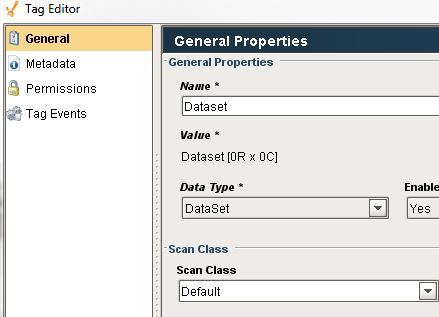
- Create a new Memory Tag. Name it Dataset, and change the data type to Dataset. The Dataset will be empty by default.
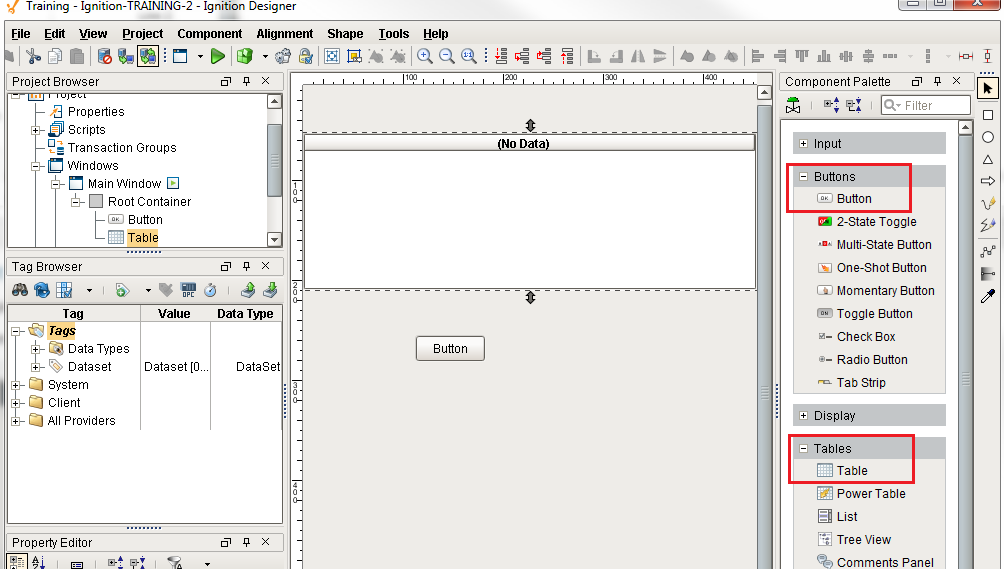
- On a new window, add a Button component and Table component.
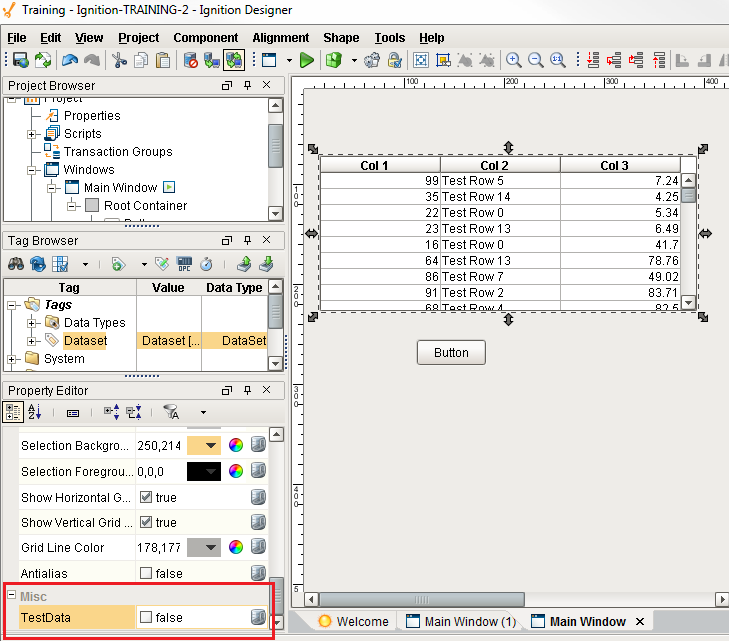
- Generate some test data on the Table by toggling the TestData property.
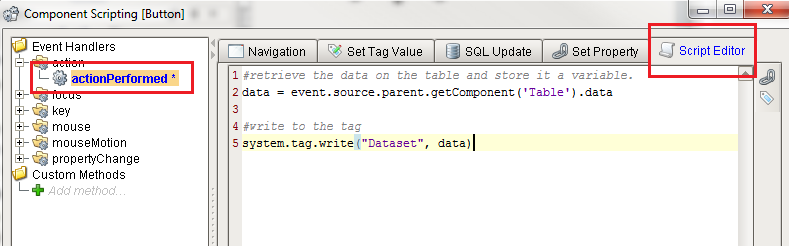
- Next, the Button component will need a script to handle writing to the Tag. Right click on the Button component, and select Scripting. Choose the actionPerformed Event Handler, and click on the Script Editor tab. Use the following code:
#retrieve the data on the table and store it as a variable.
data = event.source.parent.getComponent('Table').data

#write to the tag
system.tag.write("Dataset", data)
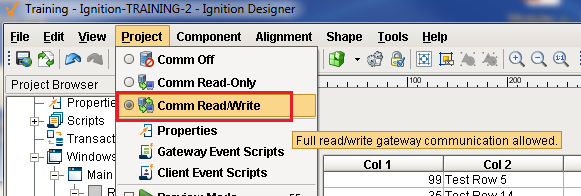
- Make sure the Designer is set to Read/Write Mode: Project menu > Comm Read/Write.
- Put the Designer into Preview Mode, and click on the Button component. The data in the table has been passed to the Tag. Expanding the Tag in the Tag Browser will show the new values on the Tag.