Downloading and Installing Ignition
This document explains how to download and install Ignition.
Downloading and Installing Ignition
This section is a simple guide on how to install Ignition using the installer from the Inductive Automation website. To see more information and other ways of installing Ignition, see the Installing and Upgrading page.
- Dual-Core Processor (32 or 64 bit)
- 4GB RAM
- 10GB free HD space
Also, ensure you have Administrator privileges to run the Ignition installer.
Commissioning the Gateway
-
Go to the Inductive Automation website at www.inductiveautomation.com, then click Download Ignition in the upper right corner of the page. Your web browser automatically detect which operating system you're running. Since this guide uses Windows, we will use the Windows installer.
-
Run the downloaded Ignition install wizard. Click Next on the Welcome page to proceed with the installation.
-
You will be prompted to specify the installation directory and Gateway Service Name. In this example, we will use the default options. Click Next.
-
Select the installation option you want to use. This example will use Typical to get the default modules Ignition comes with. Click Next.
-
The wizard is now ready to install Ignition. Click Install to start the installation process.
-
Once Ignition has successfully been installed, click Finish to launch the Ignition Gateway.
-
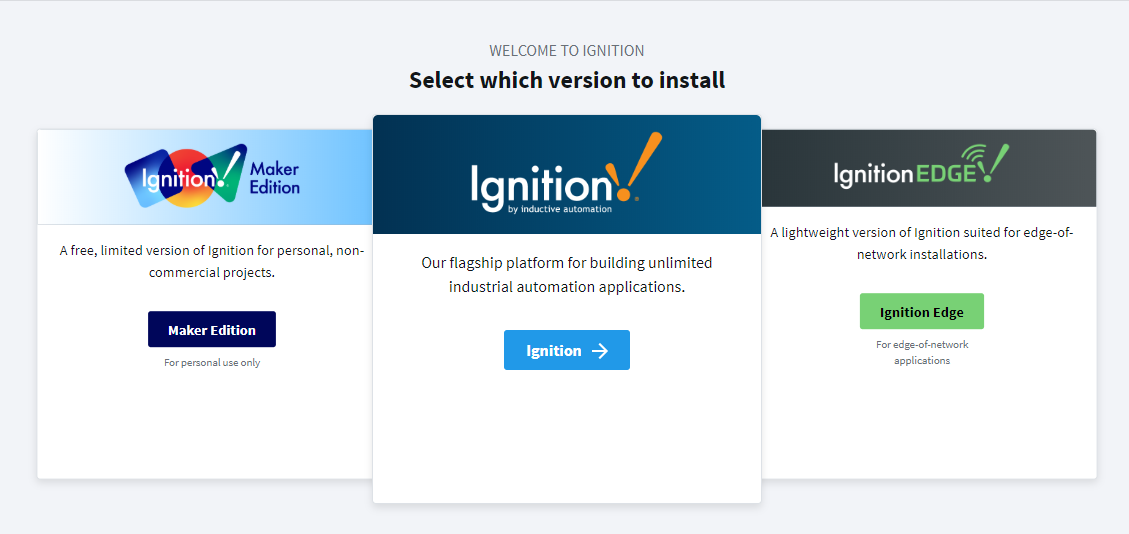
You will be presented with three versions of Ignition to choose from. In this example, we will use the Standard Edition.
 note
noteIgnition Maker Edition is for personal, non-commercial use. See the Ignition Maker Edition page for more details.
Ignition Edge is a light version of Ignition intended for on field and edge-of-network use. See the Ignition Edge page for more details.
-
The End User License Agreement (EULA) window will be displayed. Click the button acknowledging you read and agree with the terms and conditions, then press Next.
-
You will then need to create your first user. Keep in mind that this first user will be the administrator account with full privileges in Ignition. Enter a username and password, confirm the password, and then click Next.
-
You will be prompted to select which ports the Ignition Gateway will use. During the commissioning process, the Gateway will check the specified ports for availability, and increment the port number until the next available port is found. In most cases, leaving the default port values on this page is recommended. Once you have specified which ports to use, click Finish Setup.
noteThe default port values are:
- HTTP: 8088
- HTTPS: 8043
- Gateway Network: 8060
-
Click Start Gateway to begin the commissioning process.
-
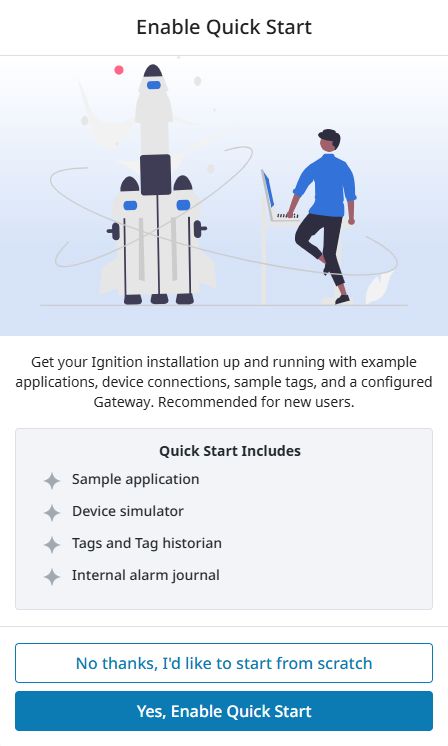
Once the Gateway finishes commissioning, you will be prompted to enable Quick Start. Quick Start contains different preconfigured resources and connections. For this example, we will select Yes, Enable Quick Start.
-
You will be prompted to log in. Use the credentials you set in step nine to log in.
-
After logging in, Quick Start will automatically begin initializing resources, including a Device Simulator, tags, a Historian, and an Internal Alarm Journal. We will be using these resources in the Designing a Project section of this guide.
-
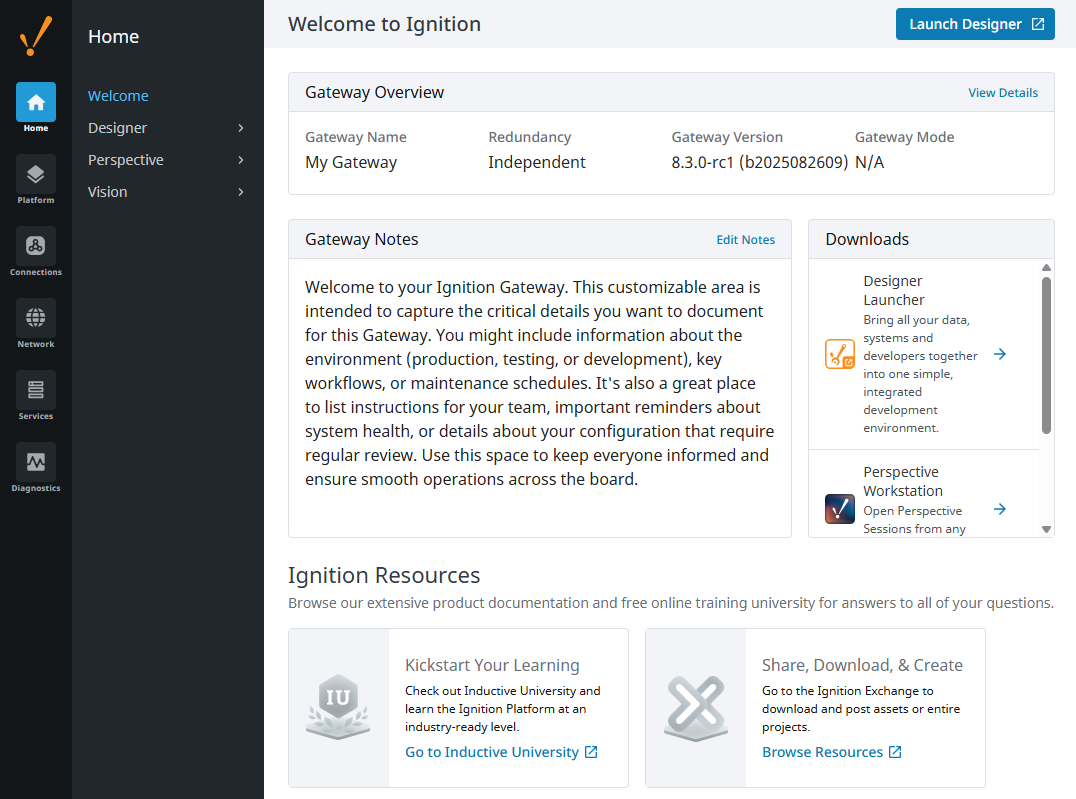
Once the Quick Start process is complete, your Gateway will be ready to use. If you are accessing the Gateway on the machine it is installed on, you can get to the Gateway by going to http://localhost:8088 and signing in with the credentials created in step nine.
 note
noteThe 8088 port may be different if you chose to use different ports than the default in step 10. If it is, you can access the Gateway using the port you configured instead of 8088.
Downloading and Installing the Designer Launcher
To begin designing a project, you will first need the Designer Launcher, which is found on the Gateway Webpage.
The Designer Launcher is simply a location to consolidate the different Gateways you can connect to and create projects for within your network, including remote Gateways. It is convenient to have if you want to connect to multiple Gateways.
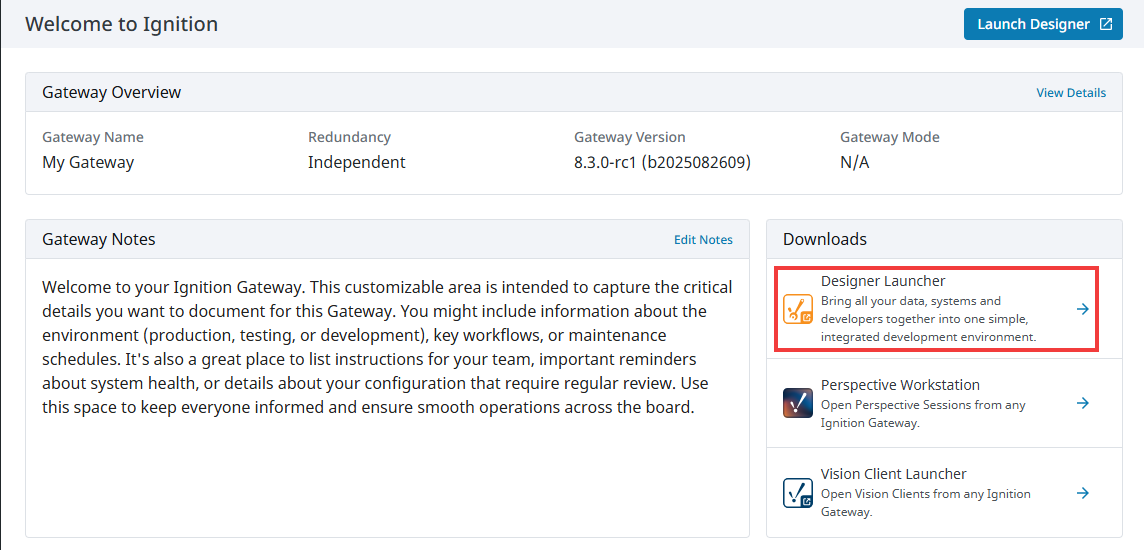
Alternatively, you can use the Launch Designer button on the top right of the Gateway Webpage to launch the Designer directly. Go to step x if you want to skip using the Designer Launcher.
-
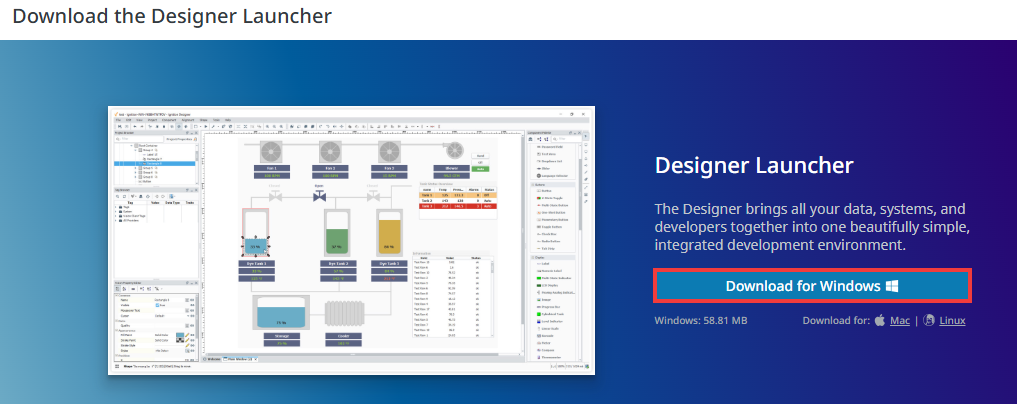
On the Gateway Webpage, click on Designer Launcher in the Downloads category. This will bring you to the Download page for the Designer.
-
Click the Download button to download the launcher. The Gateway will automatically detect which operating system to download the launcher for.
-
Open the downloaded file. You may be prompted to install for either all users or only the current user, depending on your administrative privileges. We will install the Designer Launcher for all users.
-
The Designer Launcher Setup Wizard will open and display the file location to install the launcher in. We will use the default directory. Once you have specified a location, click Next.
-
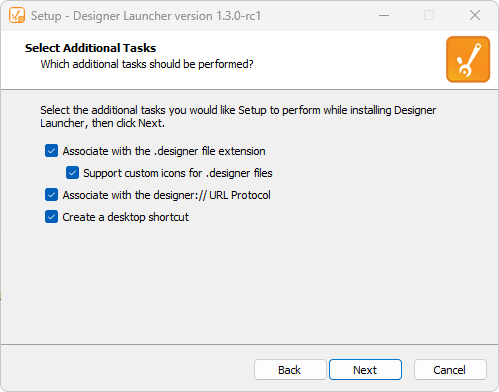
You will be prompted to select any additional tasks to perform, such as associating the .designer file extension or creating a desktop shortcut. We will leave the default settings here and click Next.
-
The Ready to Install page will provide a summary of your choices. If you are satisfied, click Install.
-
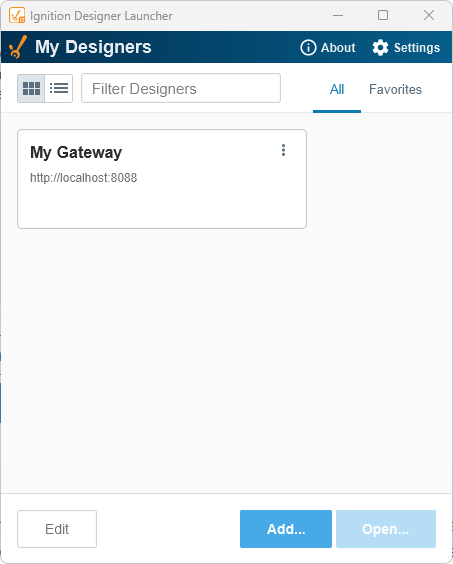
Once the Designer Launcher finishes installing, click Finish. The setup wizard will close and open the newly installed launcher, and your Gateway should be selectable in the Designer Launcher.
Downloading and Installing Perspective Workstation
Since this guide focuses on using Perspective, this section will demonstrate how to download and install Perspective Workstation.
Similar to the Designer Launcher, Perspective Workstation will allow you to quickly launch any Perspective-based project regardless of whether the Perspective project is locally hosted or on a remote system. This will allow us to open and test our Perspective project when it is done as an operator would.
-
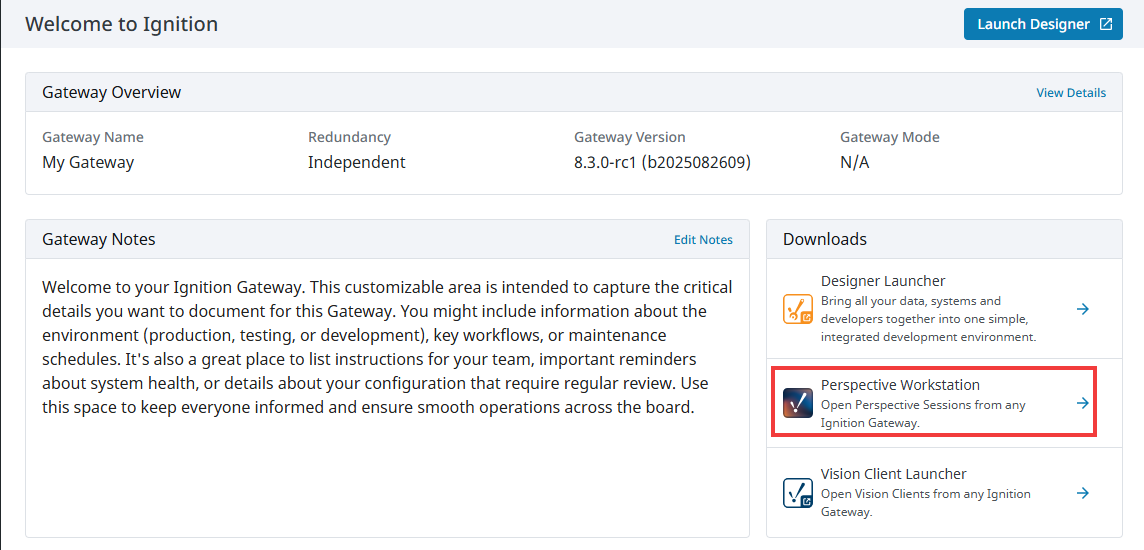
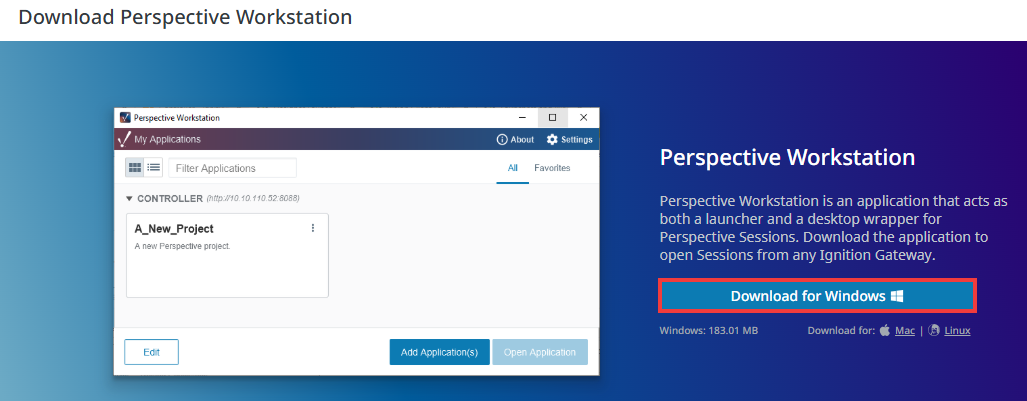
On the Gateway Webpage, click on Perspective Workstation in the Downloads category. This will bring you to the Download page for Perspective Workstation.
-
Click the Download button to download the launcher. The Gateway will automatically detect which operating system to download the launcher for.
-
Open the downloaded file. You may be prompted to install for either all users or only the current user, depending on your administrative privileges. We will install Perspective Workstation for all users.
-
The Perspective Workstation Setup Wizard will open and display the file location to install the launcher in. We will use the default directory. Once you have specified a location, click Next.
-
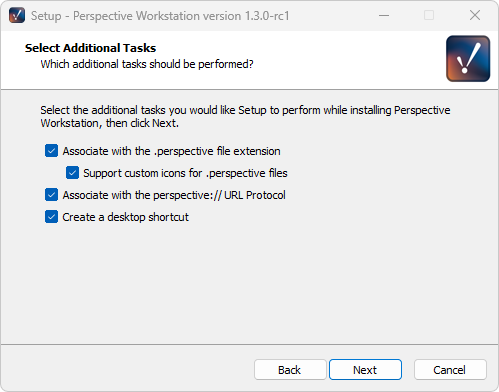
You will be prompted to select any aditional tasks to perform, such as associating the .perspective file extension or creating a desktop shortcut. We will leave the default settings here and click Next.
-
The Ready to Install page will provide a summary of your choices. If you are satisfied, click Install.
-
Once Perspective Workstation finishes installing, click Finish. The setup wizard will close and open the newly installed launcher.
-
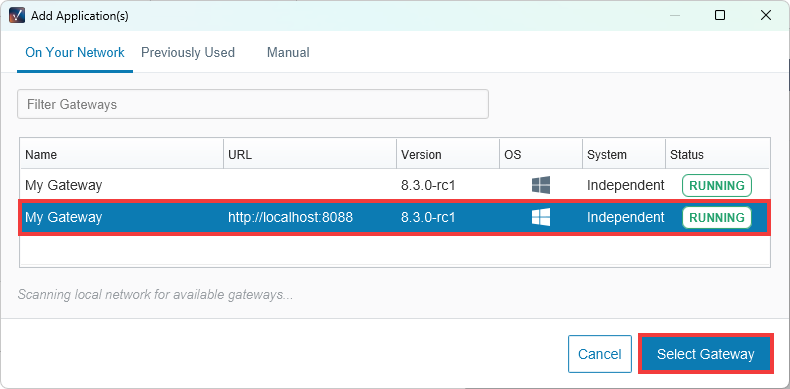
You may need to add your Gateway if you are receiving a No Applications Configured message. To do this, click on Add Aplication in Perspective Workstation.

-
The Add Application(s) window will appear and display all the available Gateways to select. Since our project is going to be on our locally hosted Gateway, we can select the Gateway located at http://localhost:8088, then click Select Gateway.
-
You will be prompted to select which projects to add. Since we enabled Quick Start when first commissioning our Gateway, we already have a project called Sample Quick Start, which we will add by clicking Add Application(s).
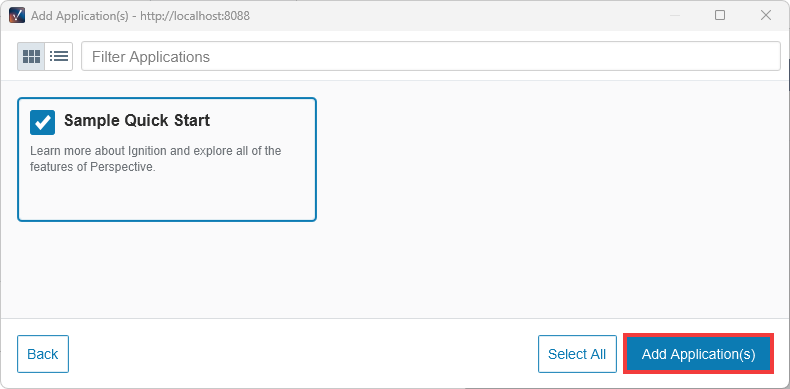
Your Perspective project should now be launchable within Perspective Workstation.