Navigation - Tree View
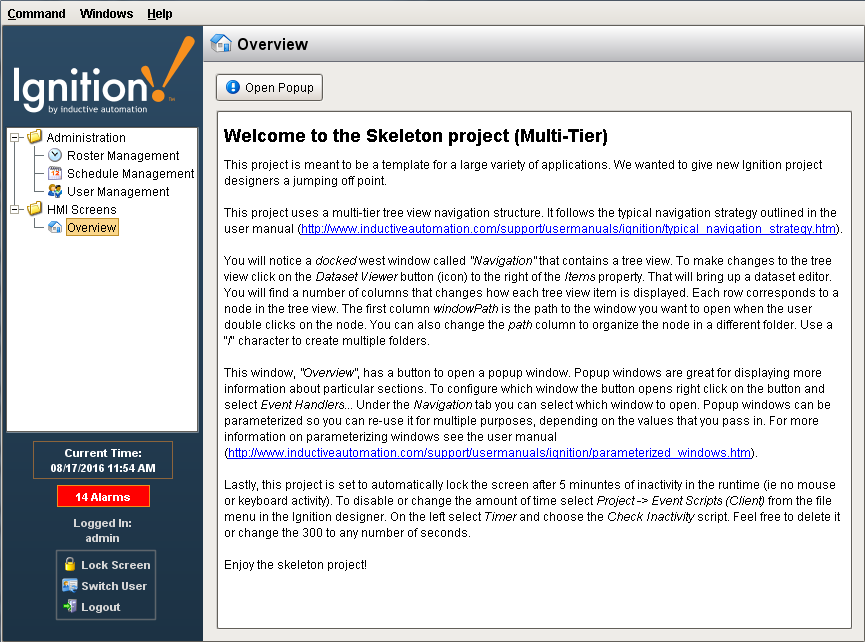
The Tree View navigation strategy is excellent for large project structures. It uses a typical navigation strategy that has a docked west window that contains a Tree View component to navigate around to various areas of your project. The Tree View window is always open and the main screen fills the rest of the space. Users can go to the Tree View, double click on an item and it will swap out one main window for that. The Tree View Project Template contains a built-in skeleton project that you can use to help you get started designing your navigation structure. You can also drag a basic Tree View component to a window for navigation, but that requires a little set up in scripting.
To Configure a Tree View in the Designer
A docked west window called Navigation contains a tree view that allows you to switch between different sections in your project. You can create a Tree View for navigation by either using the skeleton template project or dragging a Tree View component to a docked window.
The following example uses the default Tree View skeleton project.
-
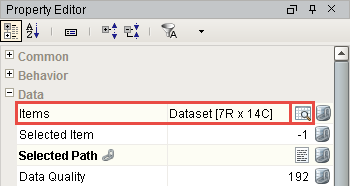
Select the Tree View component from the Navigation window.

-
From Property Editor, find the Items property and click on the Dataset Viewer icon.
This brings up a dataset editor as shown in the screenshot below. You will see a number of columns that identify how each tree view item is displayed. Each row corresponds to a node in the tree view. The windowPath column is the path to the window you want to open when a user double clicks on the node. You can also change the path column to organize the node in a different folder.
Main Windows already createdThis step assumes you already have your main windows created in your Project Browser.
To add an item to the tree view window, click the add row icon
 and enter the appropriate information for your new item in each column of the Dataset Viewer. When you're finished editing, press OK.
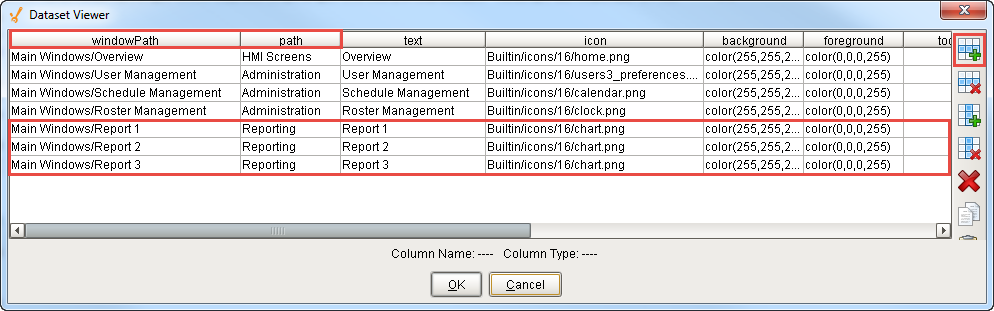
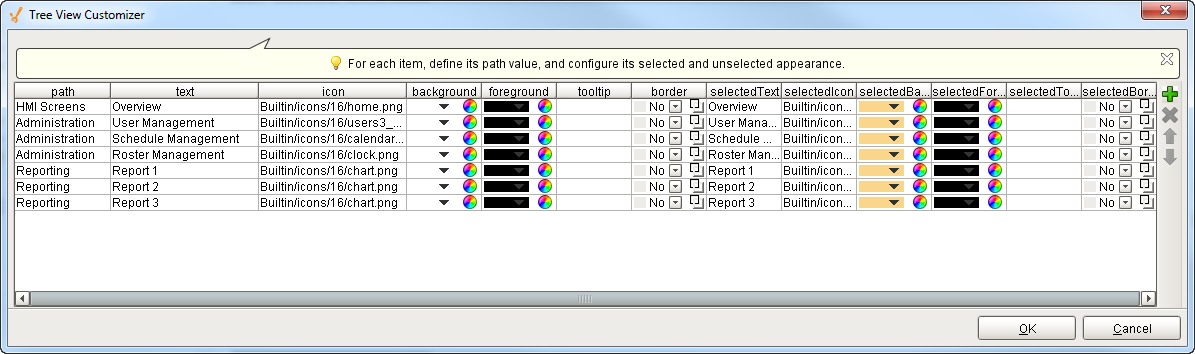
You can also edit the dataset by right-clicking on the Tree View component and choosing Customizers > Tree View Customizer. You'll notice that when you open the Tree View Customizer it doesn't have the windowPath column. If you use the Customizer to add or edit your windows, you will also have to go to the Dataset Viewer to edit the windowPath column. It's quicker to use the Dataset Viewer to manage your windows where all columns are visible.
-
The Tree View component uses a script that executes when the user double-clicks on one of the nodes in the Tree View component to navigate to various windows. Right click on the Tree View component, scroll down to Scripting, and select the Script Editor tab to view the script. The script is executed on the Tree View's mouseClicked event handler.
mouseClicked code# If the user performs a double-click, open the appropriate window
if event.clickCount == 2:
row = event.source.data
if row != -1:
# Grab the window path value out of the tree view's items dataset
windowPath = data.getValueAt(row, "windowPath")
system.nav.swapTo(windowPath)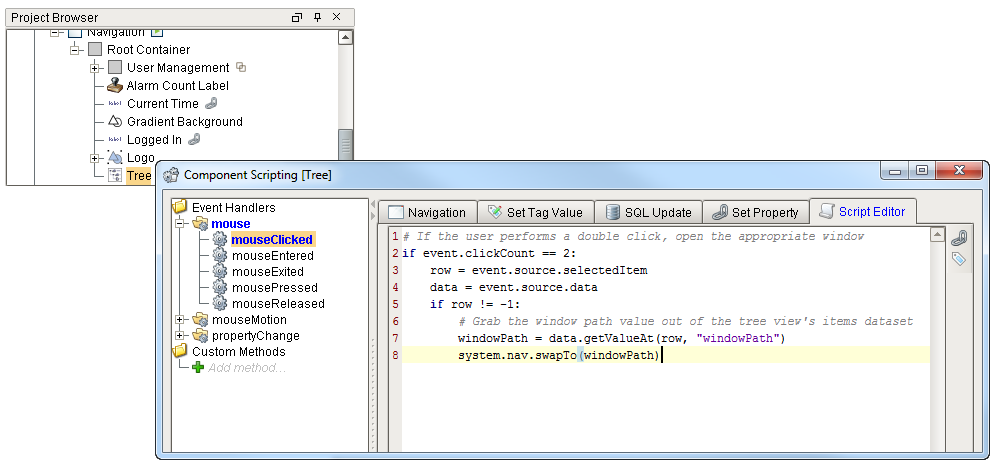
-
To test your window navigation, go to Preview Mode and switch between windows.
-
Save and Publish your project.
-
Give it a try! Open your project in the Client, and double click on the various Tree View items to swap between windows.
| Tree View - Report 1 | Tree View - Report 2 |
|---|---|
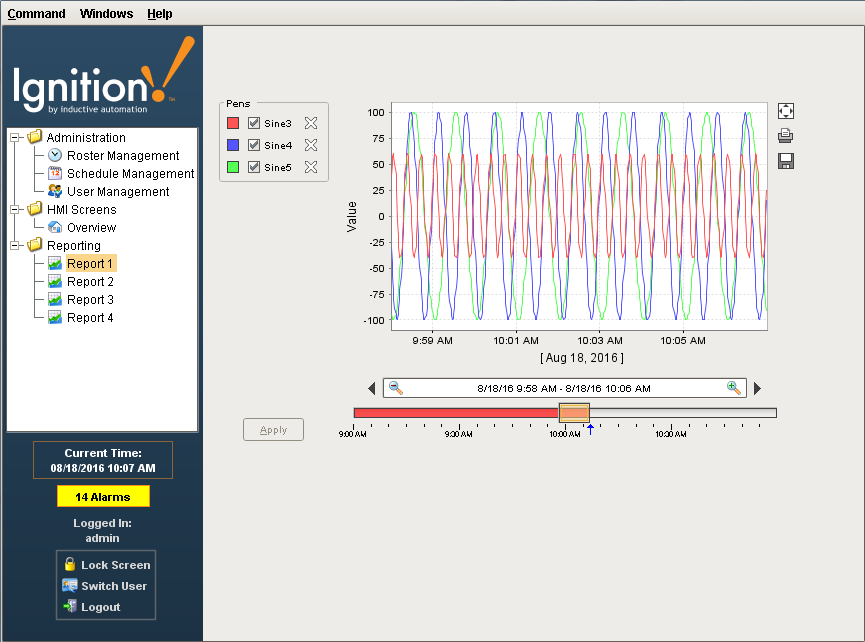 | 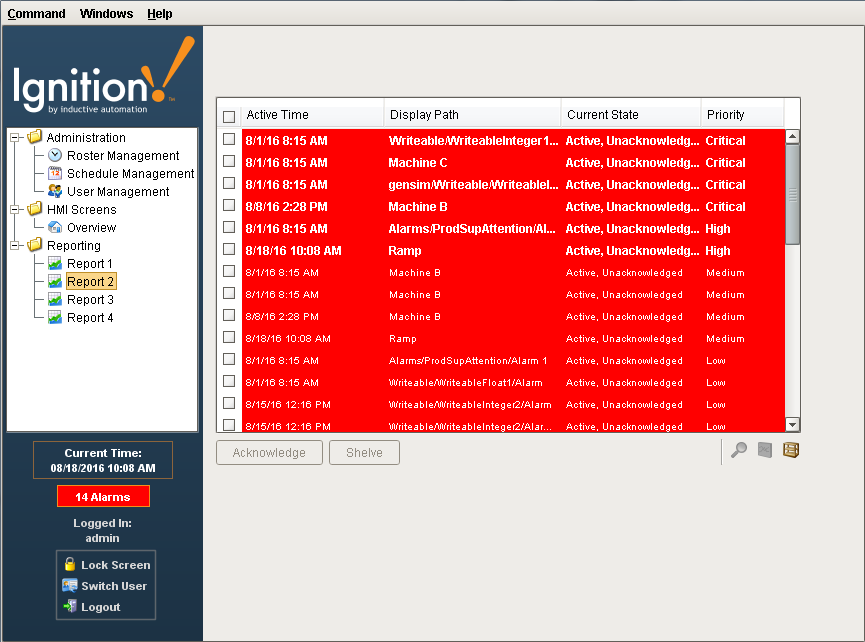 |