Windows - Install
- Dual-Core Processor (64)
- 4GB RAM
- 10GB free HD space
Also, ensure you have Administrator privileges to run the Ignition installer.
Download and Install Ignition on Windows
-
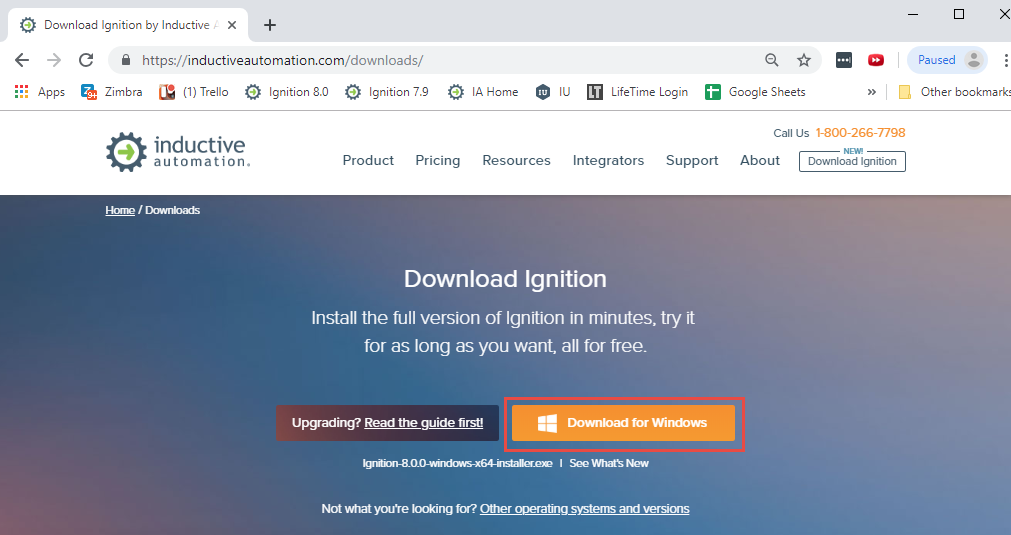
Go to the Inductive Automation website at www.inductiveautomation.com
-
Click the Download Ignition button in the upper right corner of the page. The browser will determine what operating system you're running and will bring up Download for Windows.
-
Click Download for Windows. If you want to see what other operating systems are supported, click on the Other operating systems and versions link and scroll down to System Installers.
-
Run the downloaded file Ignition-X.X.X-windows-x64-installer.exe (found on the lower-left of the window if using Chrome), or go to your downloads folder and double-click the file to start installation.
-
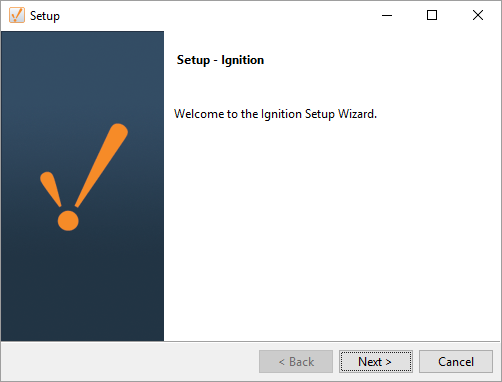
The Setup window welcomes you to the Ignition Setup Wizard. To begin the installation, click Next.
-
The Installation Directory window is displayed. By default, Ignition is installed under your Program Files folder: Program Files\Inductive Automation\Ignition. This is usually a good choice. To accept the default Installation Directory, click Next.

-
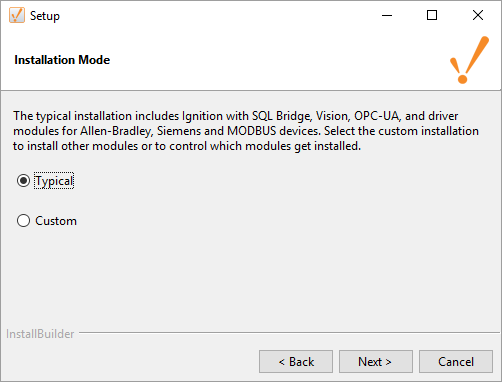
The Installation Mode window is displayed. Select either the Typical or Custom mode. The Typical installation includes Ignition with most of the commonly used modules. The Custom installation lets you control and individually select the modules that you want installed. (Both options are shown in this step). If you choose the Typical installation, click Next.
Typical Installation
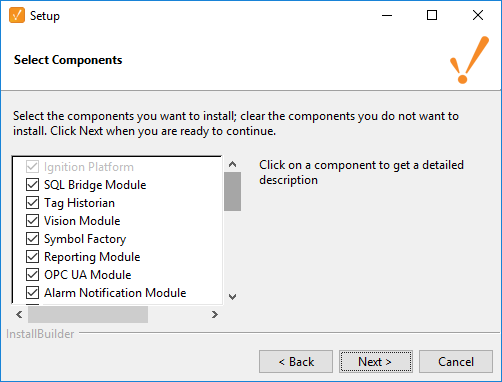
If you select Custom mode, check the box for the modules you want to install and uncheck those modules you don't want installed as part of your Custom Ignition installation. To see a brief description of the module, click on the module name. If you choose the Custom installation, click Next.
Custom Installation
-
Setup Wizard shows Ignition is now Ready to Install. If you decide to change your selections, click Back to go back and make your changes. Click Next to continue.

-
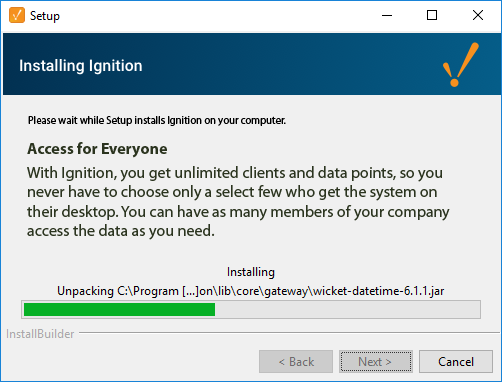
Ignition will install the selected modules. When installation is complete, click Next.
-
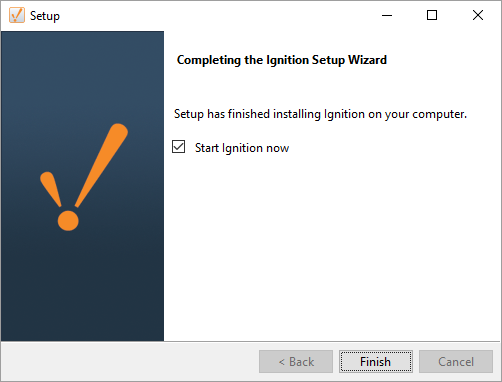
After Setup Wizard shows Ignition installation is finished, make sure that the check box for Start Ignition now is selected, then click Finish.
-
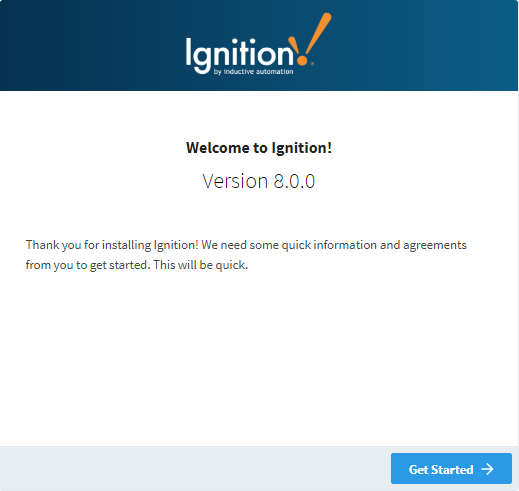
Once Ignition is installed, your default web browser will open and you will be greeted with a Welcome to Ignition message. Click Get Started.
-
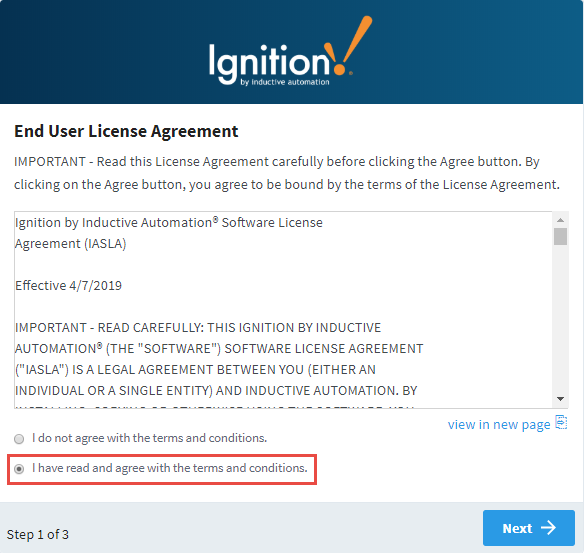
The End User License Agreement (EULA) window will be displayed. Click the button acknowledgng you have read and agree with the terms and conditions, then click Next.
-
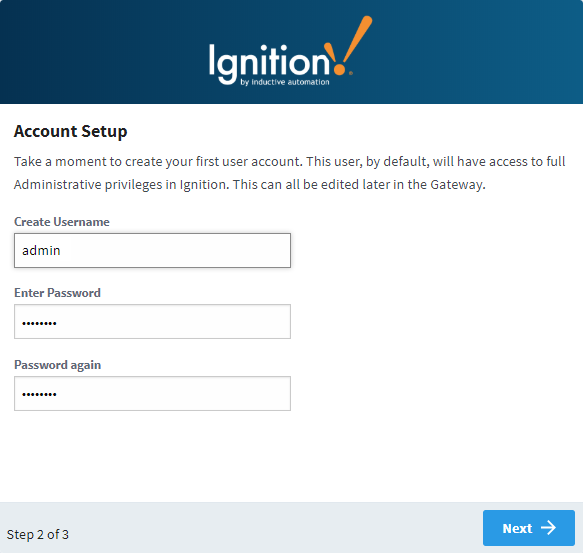
An Account Setup window will open for you to enter your first user. This first user will be the main / administrator account with full privileges in Ignition. Enter a username and password for your administrator, and click Next.
-
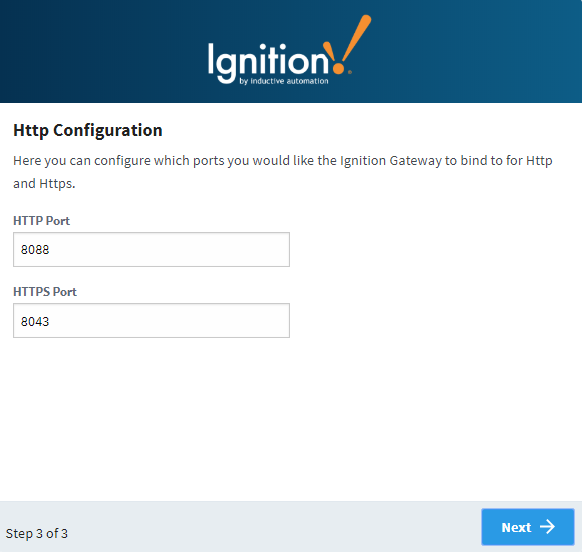
The HTTP Configuration window will open for you to set your Gateway Ports. The default HTTP Port is 8088, and the default HTTPS Port is 8043. Click Next to continue.
-
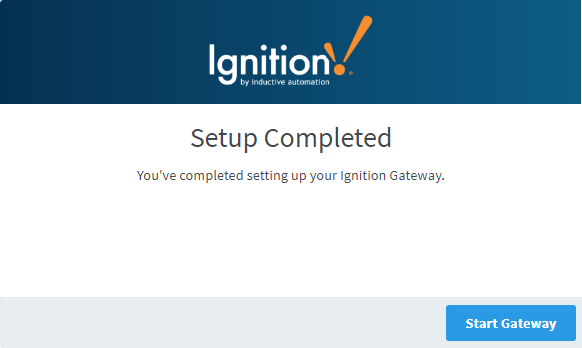
The Setup Completed window will be displayed, and now you can Start the Gateway.
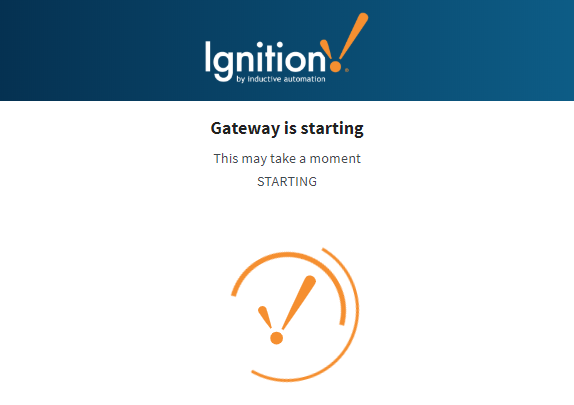
A splash screen informs you that Ignition is starting. This may take a few minutes to finish.
-
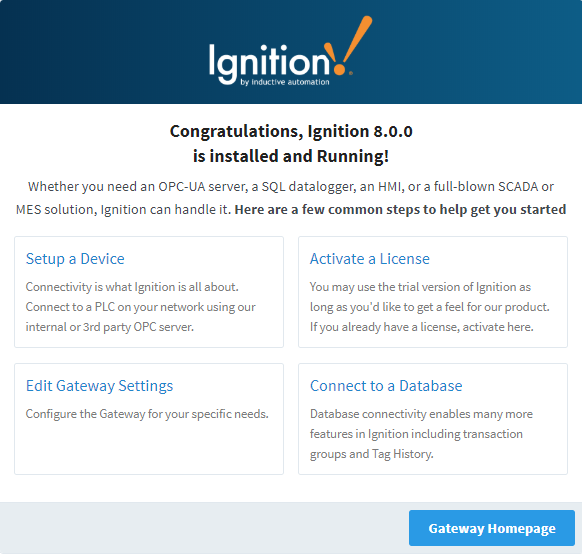
That’s it! Ignition Installation is complete and the Gateway is then launched. You will be presented with the following Congratulations window to complete your configuration setup. You can click a link to Setup a Device, Activate a License, Connect to a Database, Edit Gateway Settings, or go to the Gateway Homepage where you can also complete all these steps, and access some of our resources such as the Ignition User Manual and IU videos.
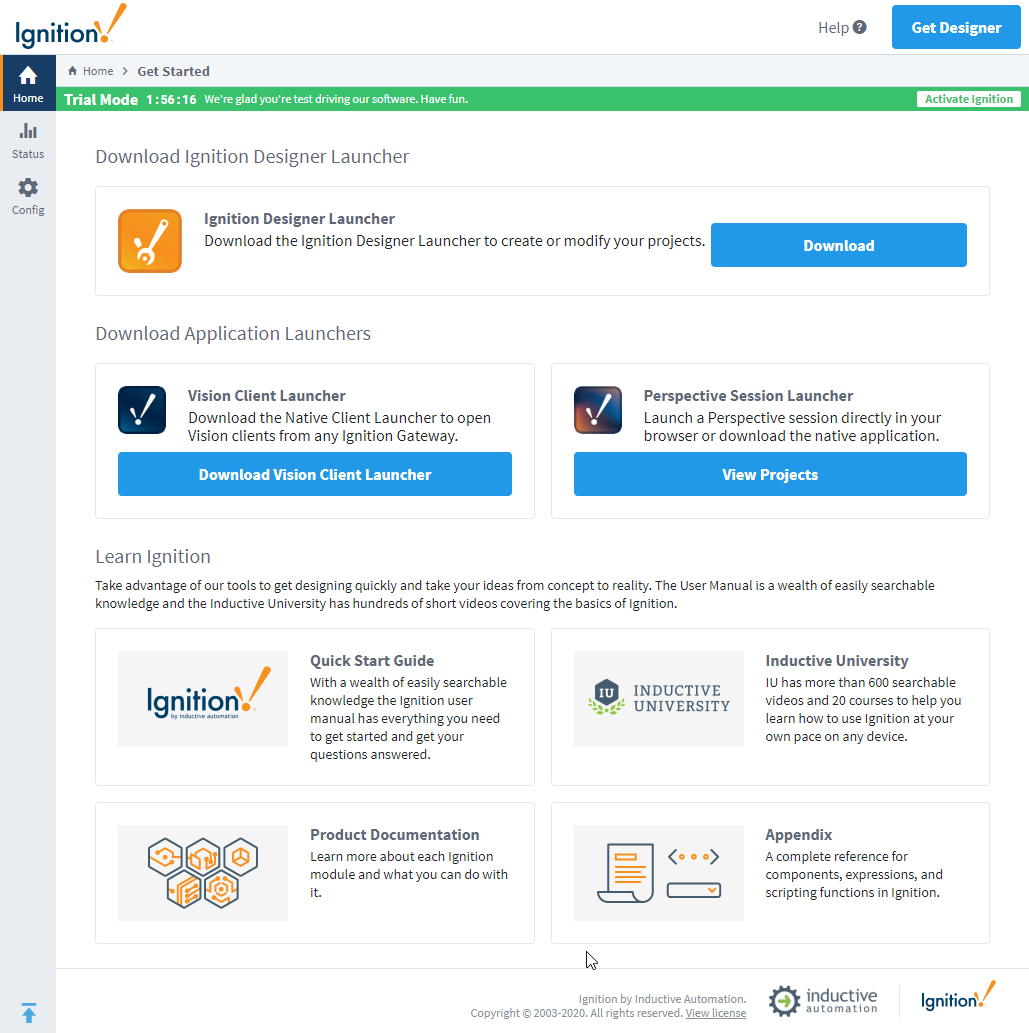
Your web browser opens the Gateway home page at http: //localhost:8088. Sign in using the credentials for the administrator or user with full privileges for the Gateway as shown in Step 13 above.
Ignition installs itself as a Window Service (Start > Control Panel > Administrative Tools > Services > Ignition Gateway), so it starts automatically when your computer starts up.
Automated Installation on Windows
You can automate Ignition installation across different machines using scripts. Ignition is then installed silently from a command shell without showing any user prompts. Keep in mind that the installer cannot automatically start the Gateway after a silent installation.
You can use the following command to start the Gateway:
net start ignition
Command line example:
Ignition-8.x.x-windows-x64-installer.exe --mode unattended --prefix "C:\some folder" --unattendedmodeui none
net start ignition
Flags:
-- mode unattended (ensures that no prompts appear during installation)
-- prefix "C:\some folder" (optional flag; if a value is set, then Ignition is installed in the specified folder, otherwise Ignition is installed in a default location under C:\Program Files)
-- unattendedmodeui none | minimal (the none flag does not display any sort of graphic during installation; the minimal flag displays a small progress bar and nothing else)
Uninstalling Ignition on Windows
Be sure to back up your Gateway and unactivate your Gateway license.
During a new Ignition installation, an uninstaller executable is created.
When Ignition is uninstalled, the settings database and folder in /data is backed up to /data_<current date>, and modules and user-supplied JDBC jars in /user-lib are backed up to /user-lib_<current date>. Also, the Ignition service is removed from Windows installations automatically.
Run the Uninstaller for Windows
- Open the Start menu and navigate to All Programs > Inductive Automation > Ignition.
- Select Uninstall Ignition. The uninstaller wizard guides you through the uninstallation process.
You can also uninstall Ignition from the Windows Control Panel > Programs and Features section.